Files
Guardrails File
Organizations often want to add custom data or metadata to the Configuration Management Database (CMDB) for use in Guardrails policies, as well as referencing arbitrary metadata across a wide range of resource types. To facilitate this, Guardrails introduced a resource type called a Guardrails File.
File Properties
A Guardrails File can be used to reference data across a Guardrails environment.
- A File resource can contain any arbitrary data. Customers will often utilize JSON schema for easy reference.
- A File resource can be a child of the root Turbot resource or a Guardrails Folder.
- The AKA of a File resource is user definable.
- A File has a title and a description, both of which will be stored in the Guardrails File resource metadata.
- Users can update the Guardrails File using standard GraphQL or the Guardrails Terraform Provider. This can be configured a variety of ways depending on the organizations requirements.
- Use a trigger to update the Guardrails File whenever asset data in an inventory management tool changes.
- Write a shell script to pull data from a third party API and update the File with the Guardrails CLI.
- Manually update the File via Terraform.
- Write a Lambda to update the File via the GraphQL API using DynamoDB streams.
Guardrails Files are extremely valuable tools in a Guardrails admin's toolkit, and can aid in the deployment and management of a large number of resources.
Example Files
A typical Guardrails File stores data that can be referenced across a Guardrails environment, and as briefly mentioned above, can also be retrieved using the Guardrails API.
Currently, Guardrails Files can be created either via a GraphQL mutation, Terraform, or the Console.
GraphQL
The following mutation can be used to create a Guardrails File via GraphQL.
Mutation:
mutation CreateResource($input: CreateResourceInput!) {
  createResource(input: $input) {
    data
    metadata
    trunk {
      title
    }
    turbot {
      akas
      id
      tags
    }
  }
}
Variables:
{
  "input": {
    "parent": "tmod:@turbot/turbot#/",
    "akas": [
      "guardrailsFile"
    ],
    "data": {
      "group": {
        "prod": "PROD",
        "dev": "DEV"
      }
    },
    "metadata": {
      "title": "Guardrails File",
      "description": "Example Guardrails File"
    },
    "type": "tmod:@turbot/turbot#/resource/types/file"
  }
}
This will create a Guardrails file called Guardrails File, with the aka guardrailsFile,
attached to the root Turbot resource.
Terraform
Administrators can use Terraform to easily deploy and manage Guardrails Files.
resource "turbot_resource" "example_turbot_file" {
  parent   = "tmod:@turbot/turbot#/"
  type     = "tmod:@turbot/turbot#/resource/types/file"
  akas     = ["guardrailsFile"]
  data     = <<EOT
{
  "group": {
      "prod": "PROD",
      "dev": "DEV"
  }
}
EOT
  metadata = <<EOT
{
  "title": "Guardrails File",
  "description": "Example Guardrails File"
}
EOT
}
Example Usage
So far, this guide has gone over how to make a Guardrails File, but not how to use a Guardrails file. This section will cover how to reference a Guardrails file in a calculated policy.
In this example, the organization would like to have a predefined list of allowed CIDR ranges for security groups, but also would like to reference these CIDR ranges for use in a VPC Network Stack. We will not be building a network stack here, but rather show that organizations can define CIDR blocks in a Guardrails File and use them throughout the environment. If a CIDR range needs to be changed, it only needs to be adjusted in the File, as all relevant policies and stacks reference the data within it.
Let us assume that the file has been created with the following metadata in Terraform:
resource "turbot_resource" "cidr_ranges" {
  parent   = "tmod:@turbot/turbot#/"
  type     = "tmod:@turbot/turbot#/resource/types/file"
  akas     = ["cidrs"]
  data     = <<EOT
{
  "cidrs": {
      "cidr_1": "0.0.0.0/0",
      "cidr_2": "10.0.0.0/8",
      "cidr_3": "10.153.13.0/28",
      "cidr_4": "192.168.1.1/32"
  }
}
EOT
  metadata = <<EOT
{
  "title": "CIDR Ranges",
  "description": "Org defined CIDR range list"
}
EOT
}
Things to note:
- The file is titled CIDR Ranges.
- The AKA is defined as cidrs.
- The file's parent is the root Guardrails resource.
Next, we want to reference this data in a policy that will be governing security groups. We will assume that the Approval controls are configured. The following code would be the Terraform for the policy AWS > VPC > Security Group > Ingress Rules > Approved. We want to allow specific cidr ranges if specific tags match:
resource "turbot_policy_setting" "security_group_ingress_rules_approved_rules" {
  resource   = turbot_policy_pack.test_smart_folder.id
  type = "tmod:@turbot/aws-vpc-security#/policy/types/securityGroupIngressRulesApprovedRules"
template_input = <<QUERY
    {
      securityGroup {
        turbot {
          tags
        }
      }
      cidr_list: resource(id:"cidrs") {
        data
      }
    }
    QUERY

    template= <<EOT
    {%- if $.securityGroup.turbot.tags['cidr_range'] == 'cidr_1'}
    APPROVE $.turbot.cidr:{{ cidr_list.data.cidrs.cidr_1 }}
    {%- endif -%}
    {%- if $.securityGroup.turbot.tags['cidr_range'] == 'cidr_2'}
    APPROVE $.turbot.cidr:{{ cidr_list.data.cidrs.cidr_2}}
    {%- endif -%}
    {%- if $.securityGroup.turbot.tags['cidr_range'] == 'cidr_3'}
    APPROVE $.turbot.cidr:{{ cidr_list.data.cidrs.cidr_3}}
    {%- endif -%}
    {%- if $.securityGroup.turbot.tags['cidr_range'] == 'cidr_4'}
    APPROVE $.turbot.cidr:{{ cidr_list.data.cidrs.cidr_4 }}
    {%- endif -%}
    REJECT *
    EOT
}
Things to note:
- The policy will test the tag
cidr_rangeto see which value it matches. If a value matches, the corresponding CIDR block defined in the Guardrails File is added as an approved block. - We can call the Guardrails File by its AKA, in this case that AKA is
cidrs. - Policies can reference any Guardrails File in the workspace.
- Policies can reference multiple resource types in the query - generally, this will be the specific resource the policy is targeting and a Guardrails File, if needed.
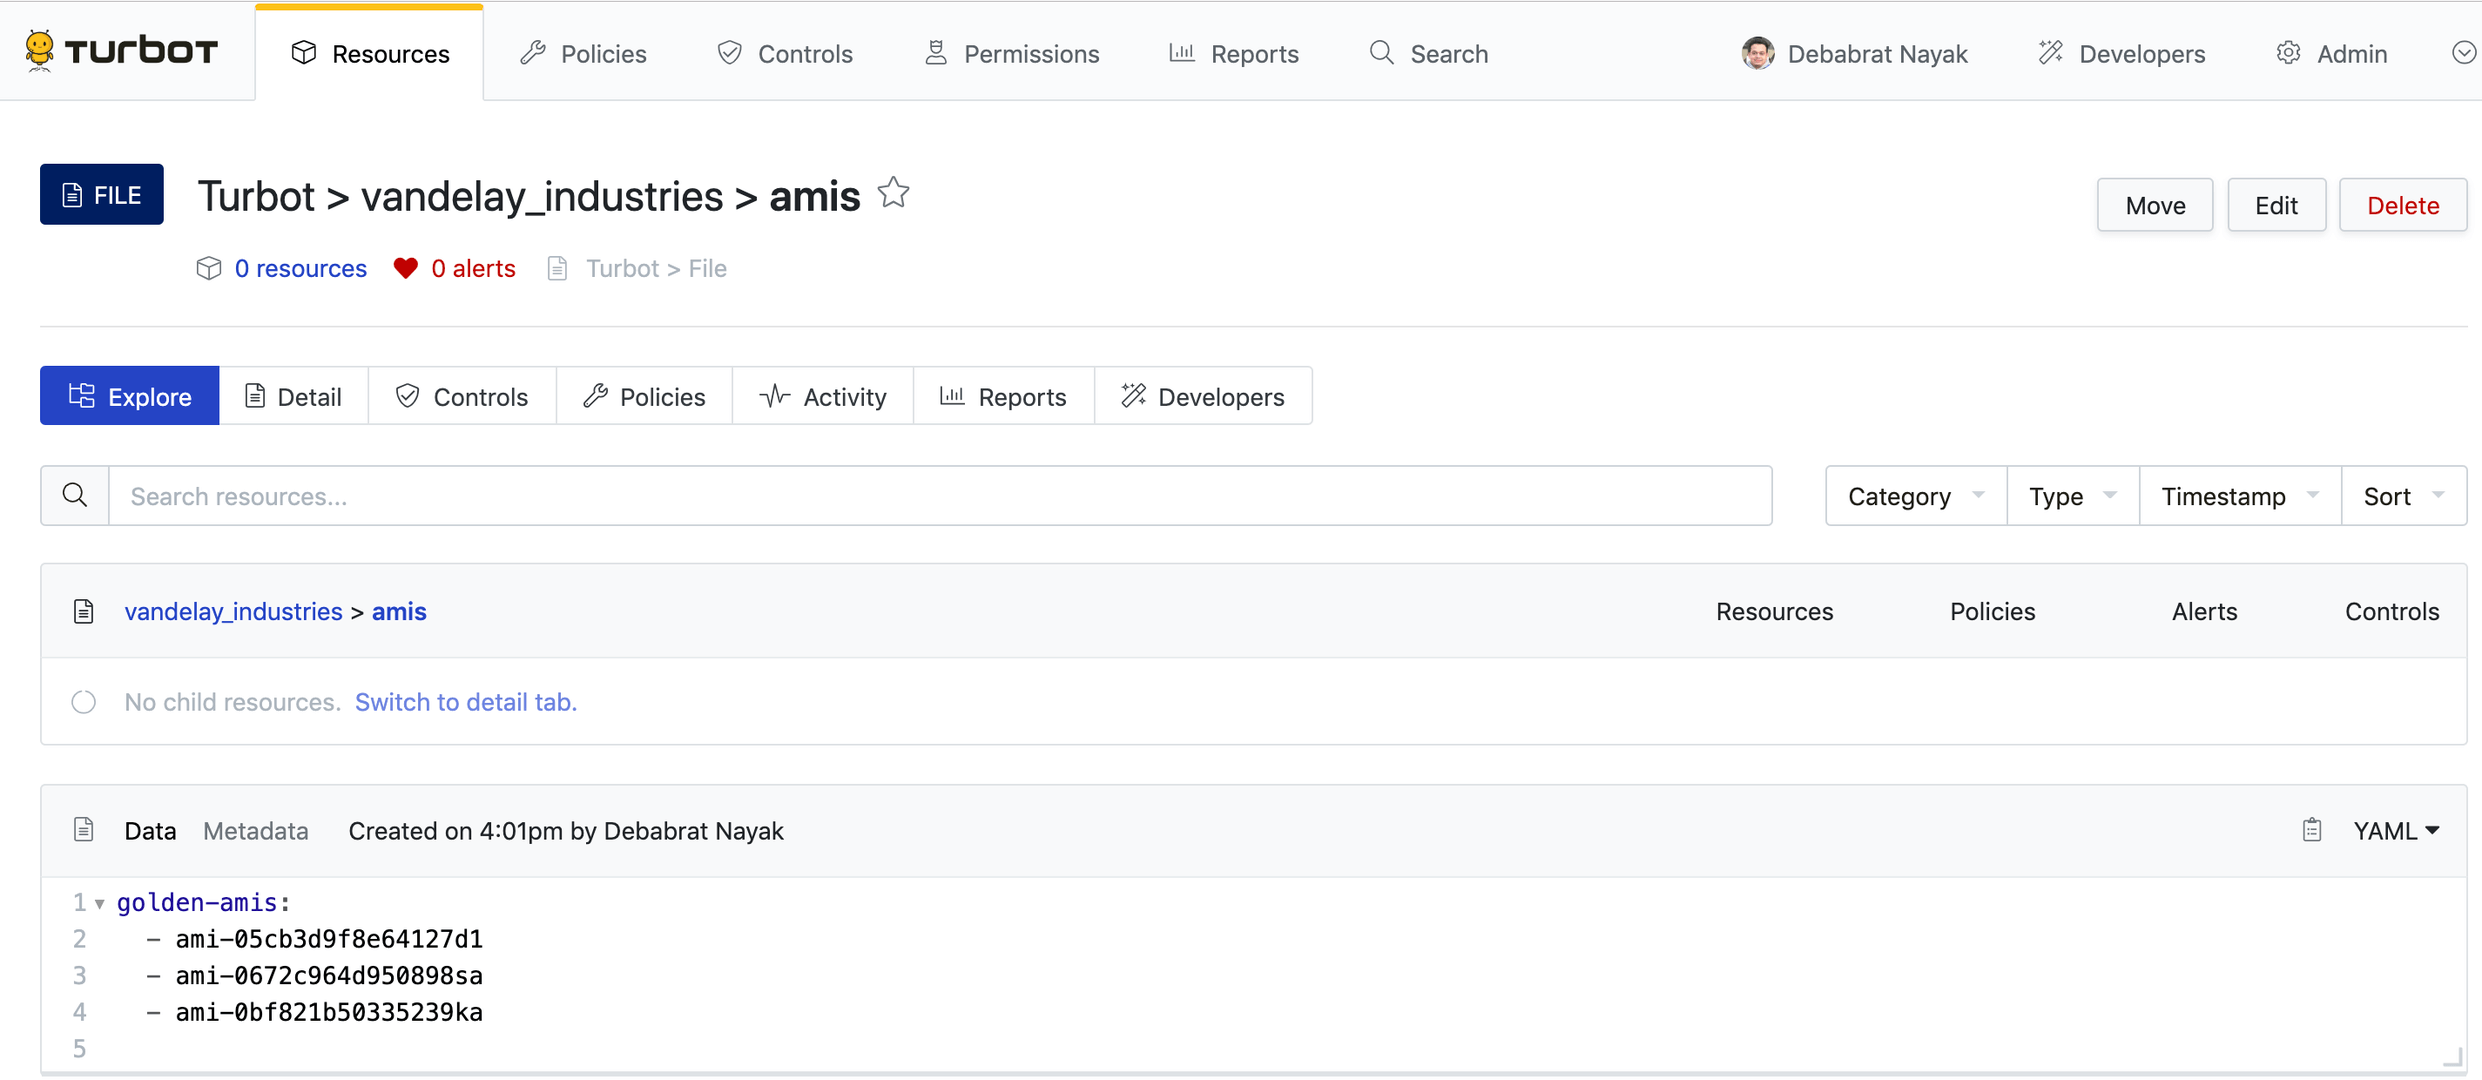
Alternate - creating Guardrails File via the Guardrails Console (UI)
Guardrails Files can be created via console.
- Login as a Turbot/Admin.
- Click on RESOURCES card.
- Go to the folder where you want to create the file. Click New button displayed in the right top corner of the page marked in green.
- Select Resource Type as File, enter Name as amis, enter Description as golden-amis, and enter content with a valid JSON schema. For example:
{
  "golden-amis": [
    "ami-05cb3d9f8e64127d1",
    "ami-0672c964d950898sa",
    "ami-0bf821b50335239ka"
  ]
}
This will create a Guardrails file called amis as a child of the selected
folder. 