Observe GCP Activity
Observe GCP Resource Activity
In this guide you will learn how Guardrails detects and reacts to events in your GCP account. You will manually create and modify a GCP bucket in your account and explore how to view that activity in the Guardrails console.
This is the third guide in the Getting started with GCP series.
Prerequisites
Completion of the previous guides in this series.
Access to the Guardrails console with administrative privileges.
Console access to a GCP project the ability to create and modify S3 buckets.
[!NOTE] We will use the bucket name
guardrails_bucket_example_01in this guide.
Step 1: Prepare to create a GCP bucket
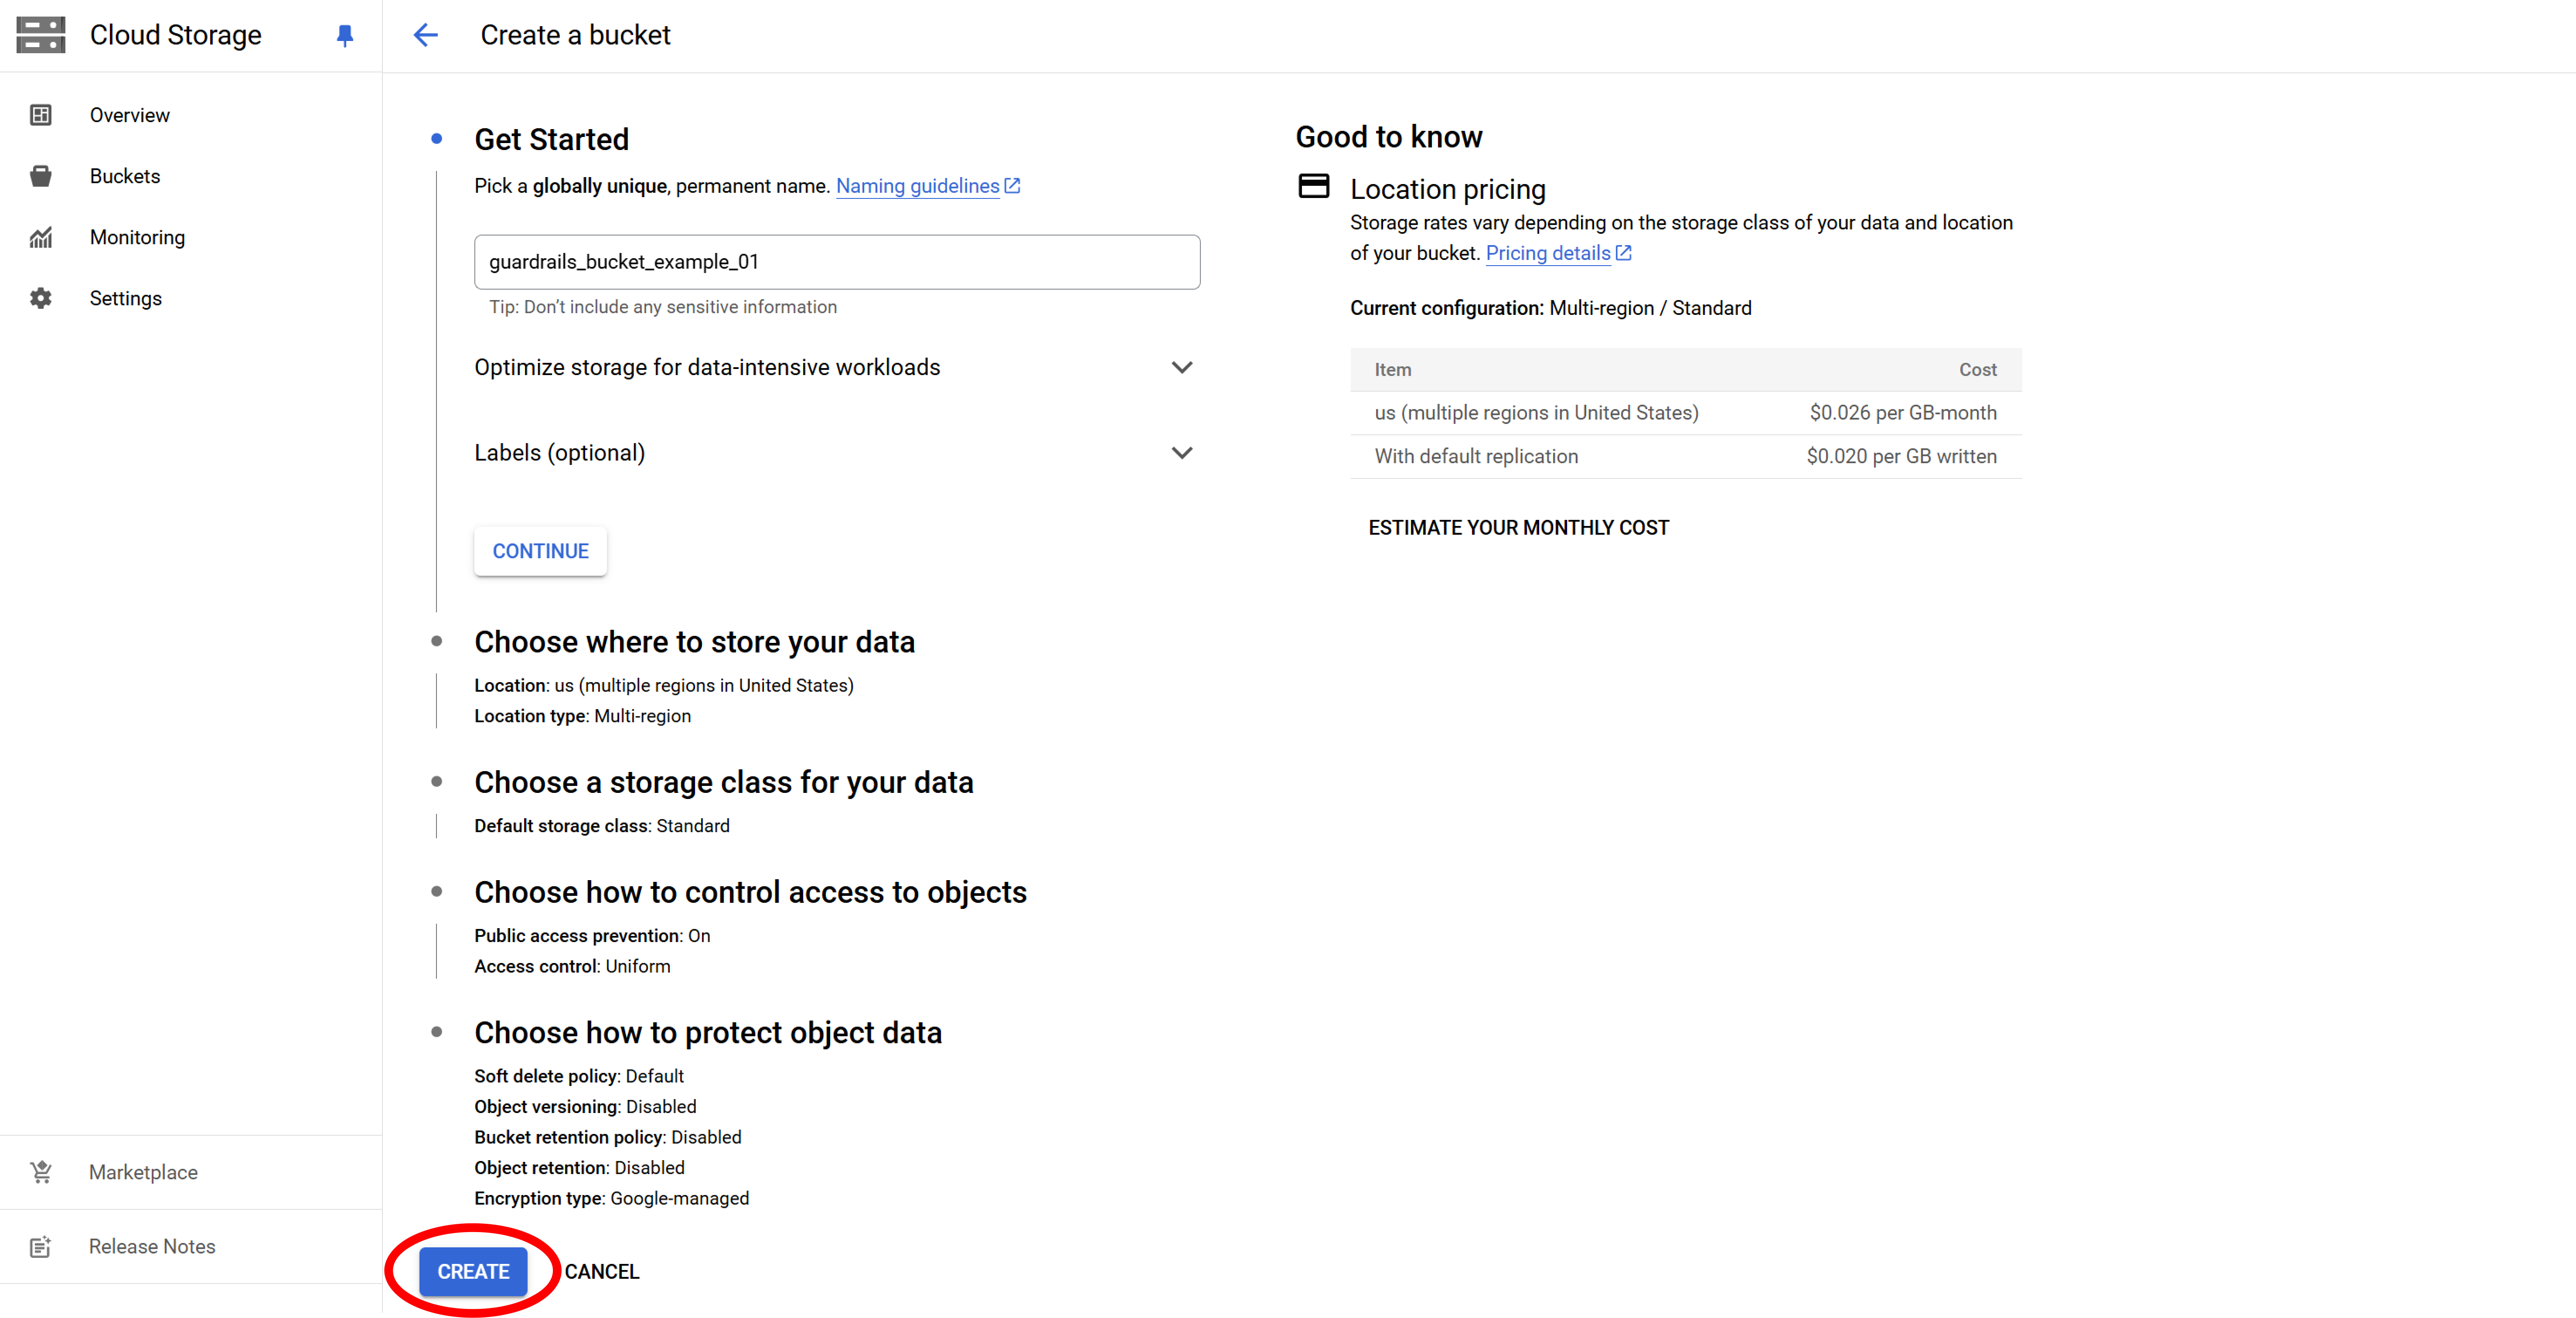
In the GCP console, navigate to Cloud Storage, select Buckets, and select Create.

Step 2: Create the bucket
Give your bucket a name that is easy to remember, accept all the defaults, and choose Create.
Step 3: Resource Activities report
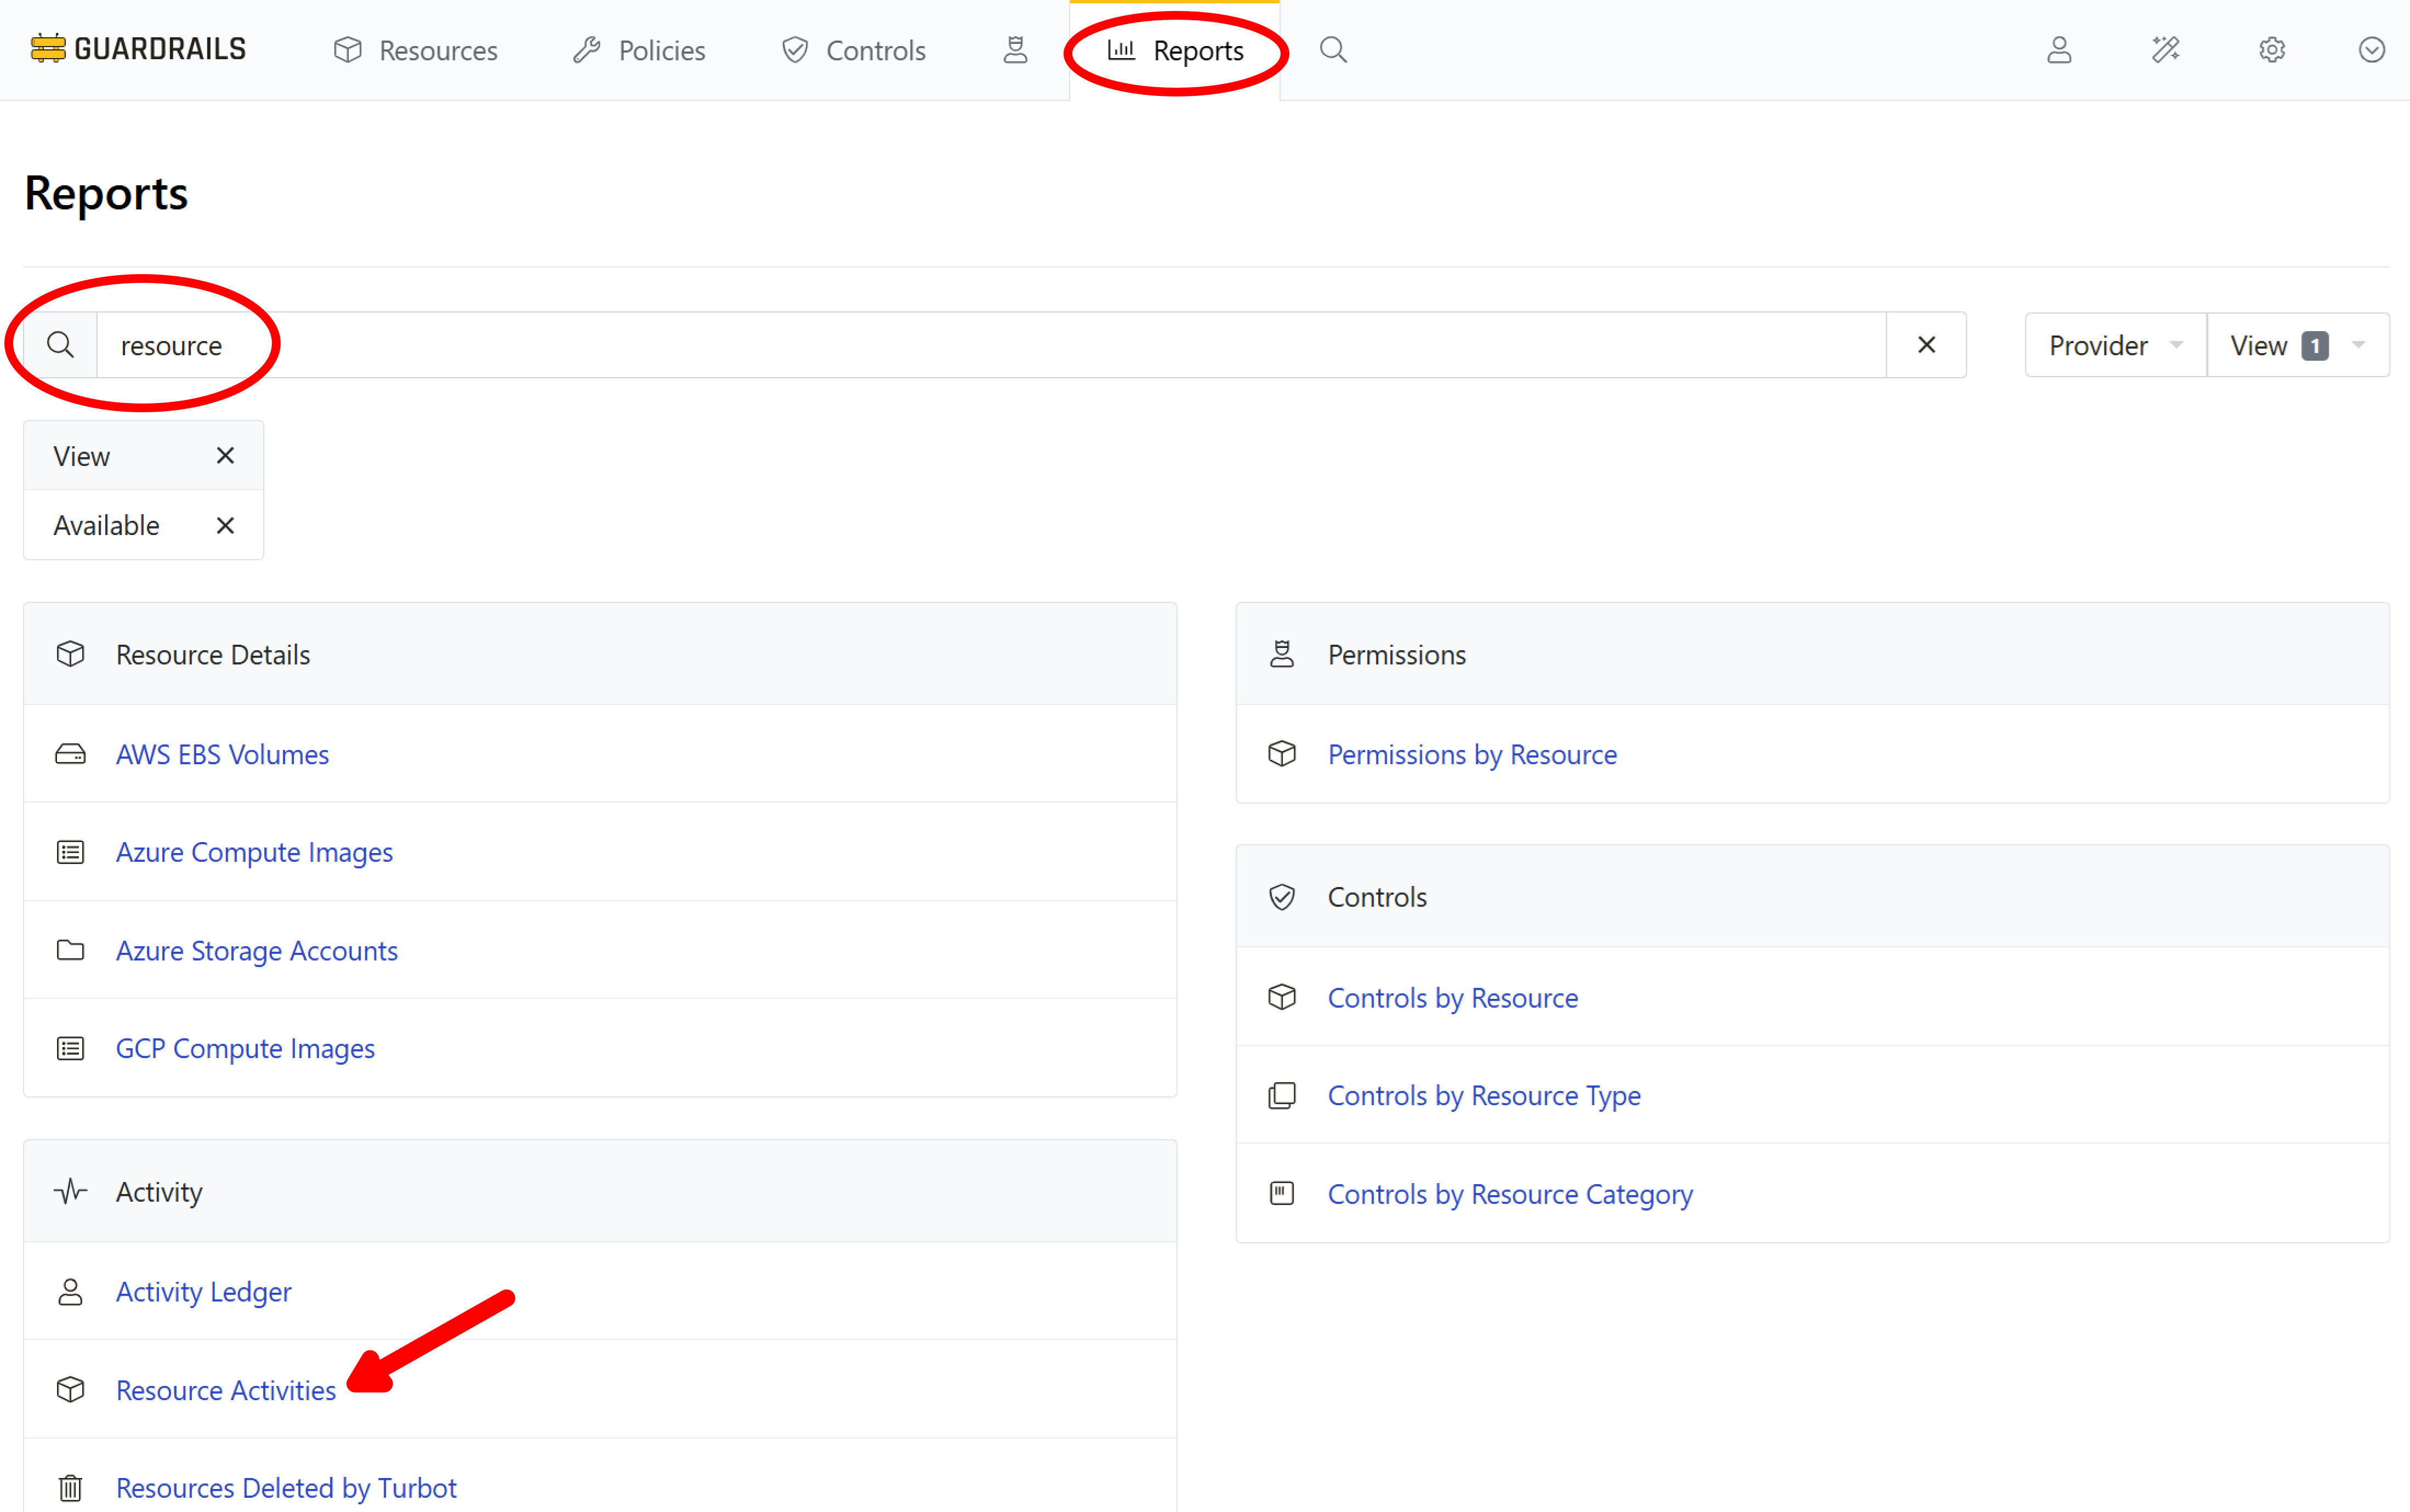
Select Reports from the top navigation bar. Search for the word "resource" and select Resource Activities.
Step 4: Filter by type
From the filter bar, expand the Resource Type dropdown.
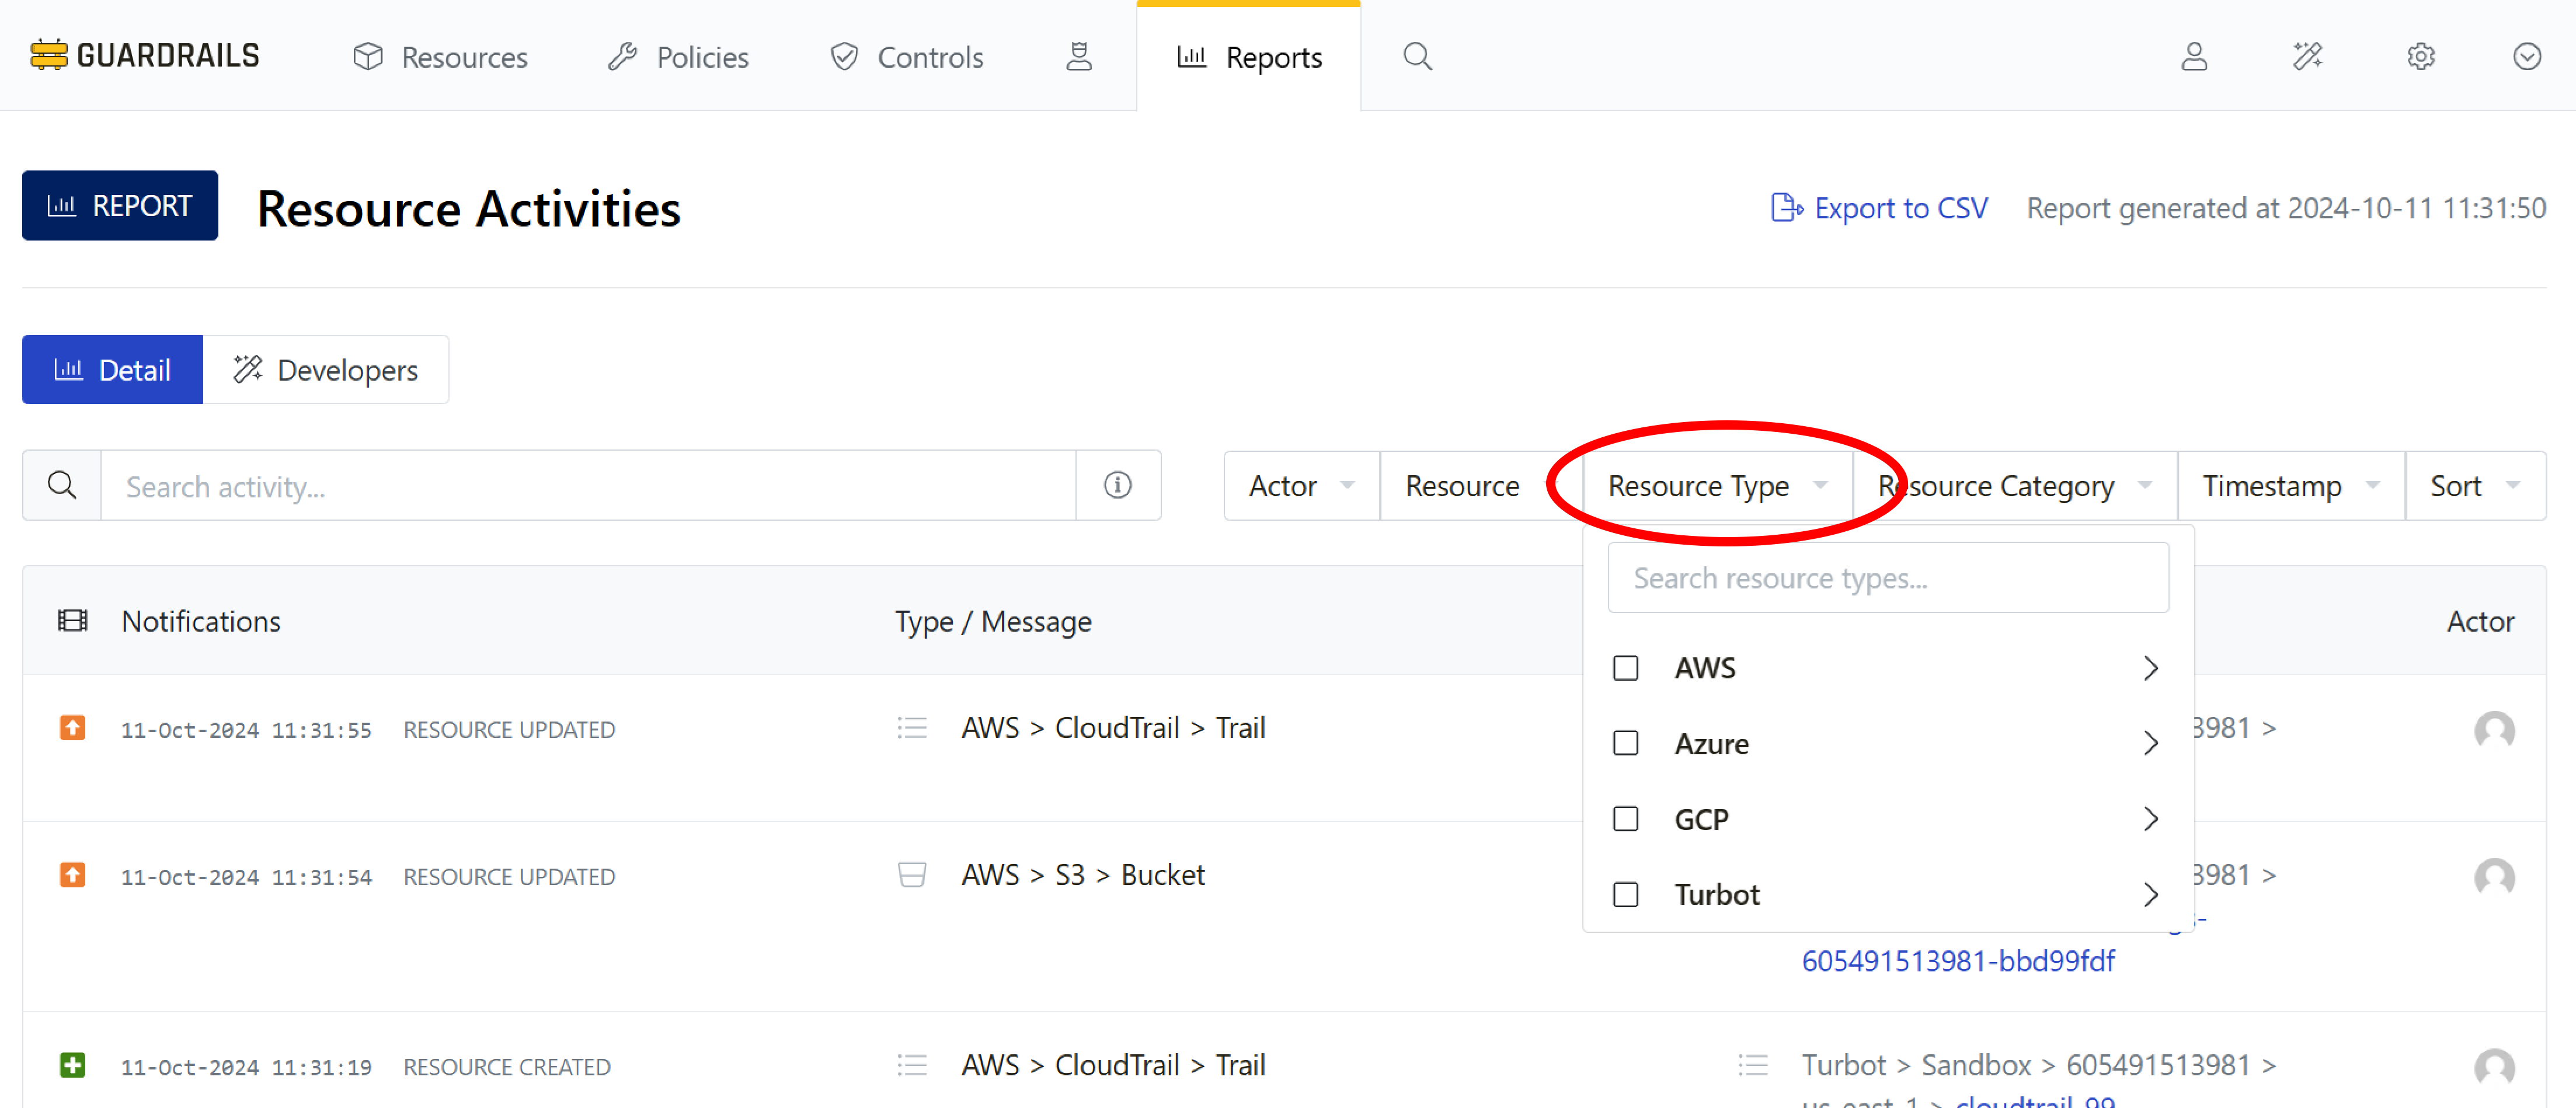
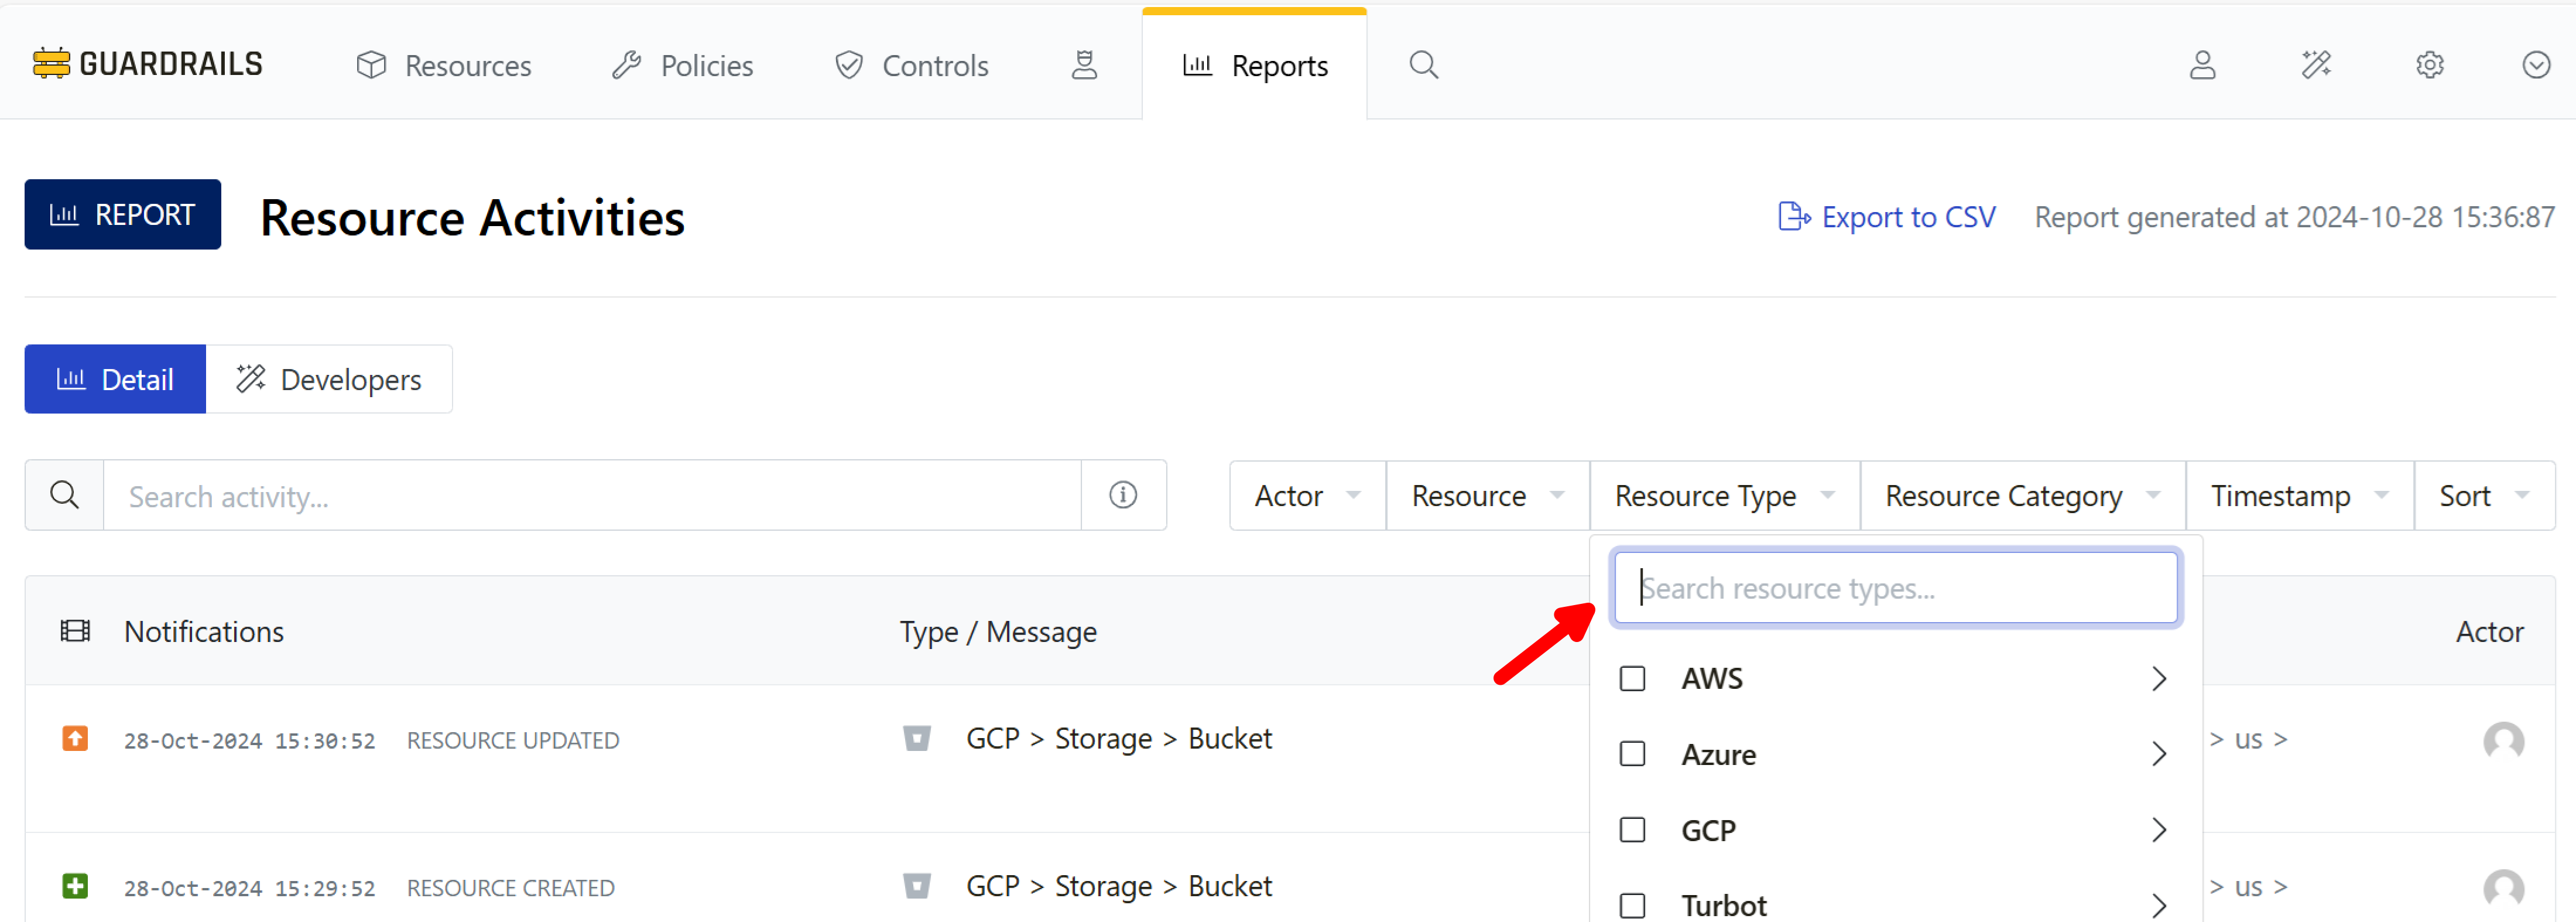
Set the filter to GCP > Storage > Bucket. You can do this by typing gcp storage bucket into the search box, as shown here. When you see GCP > Storage > Bucket appear in the list, select the checkbox next to it.
Step 5: Select the filter
Enable the checkbox to limit the report to only GCP buckets.

Step 5: Observe activity
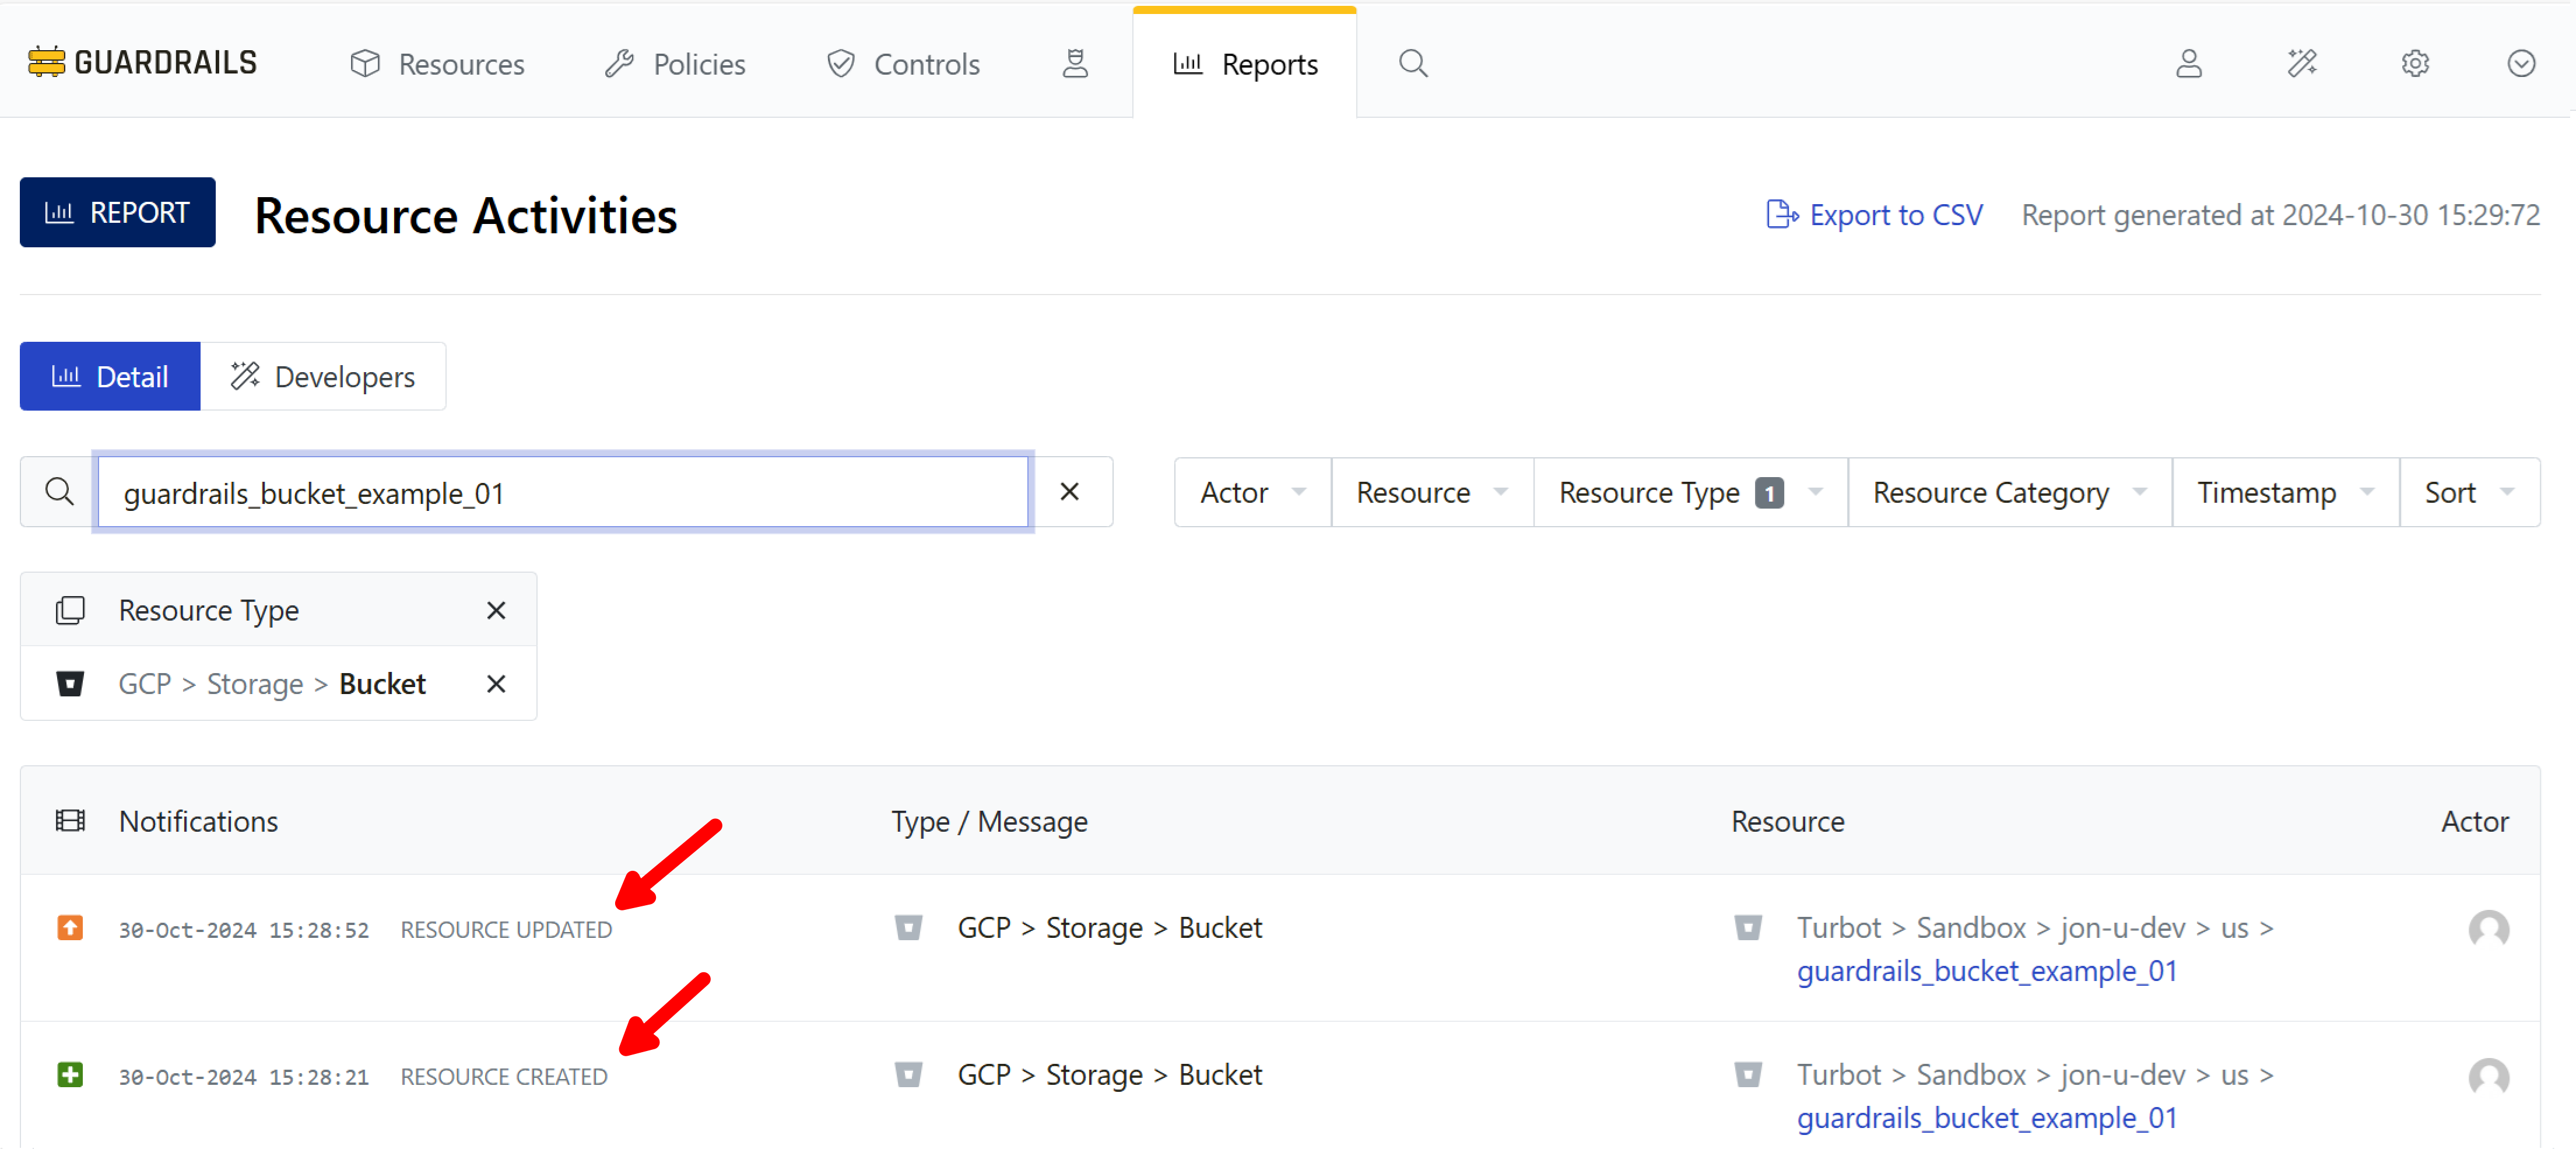
You can scope the resource activity report to a specific bucket by searching for the name of your bucket. To do this, type its name into the search field. Guardrails will show all notifications related to the bucket. In the screen below, the RESOURCE CREATED activity represents Guardrails discovery of the bucket and RESOURCE UPDATED indicates that Guardrails has updated the CMDB entry with additional details about the bucket.
Step 6: Change a bucket property
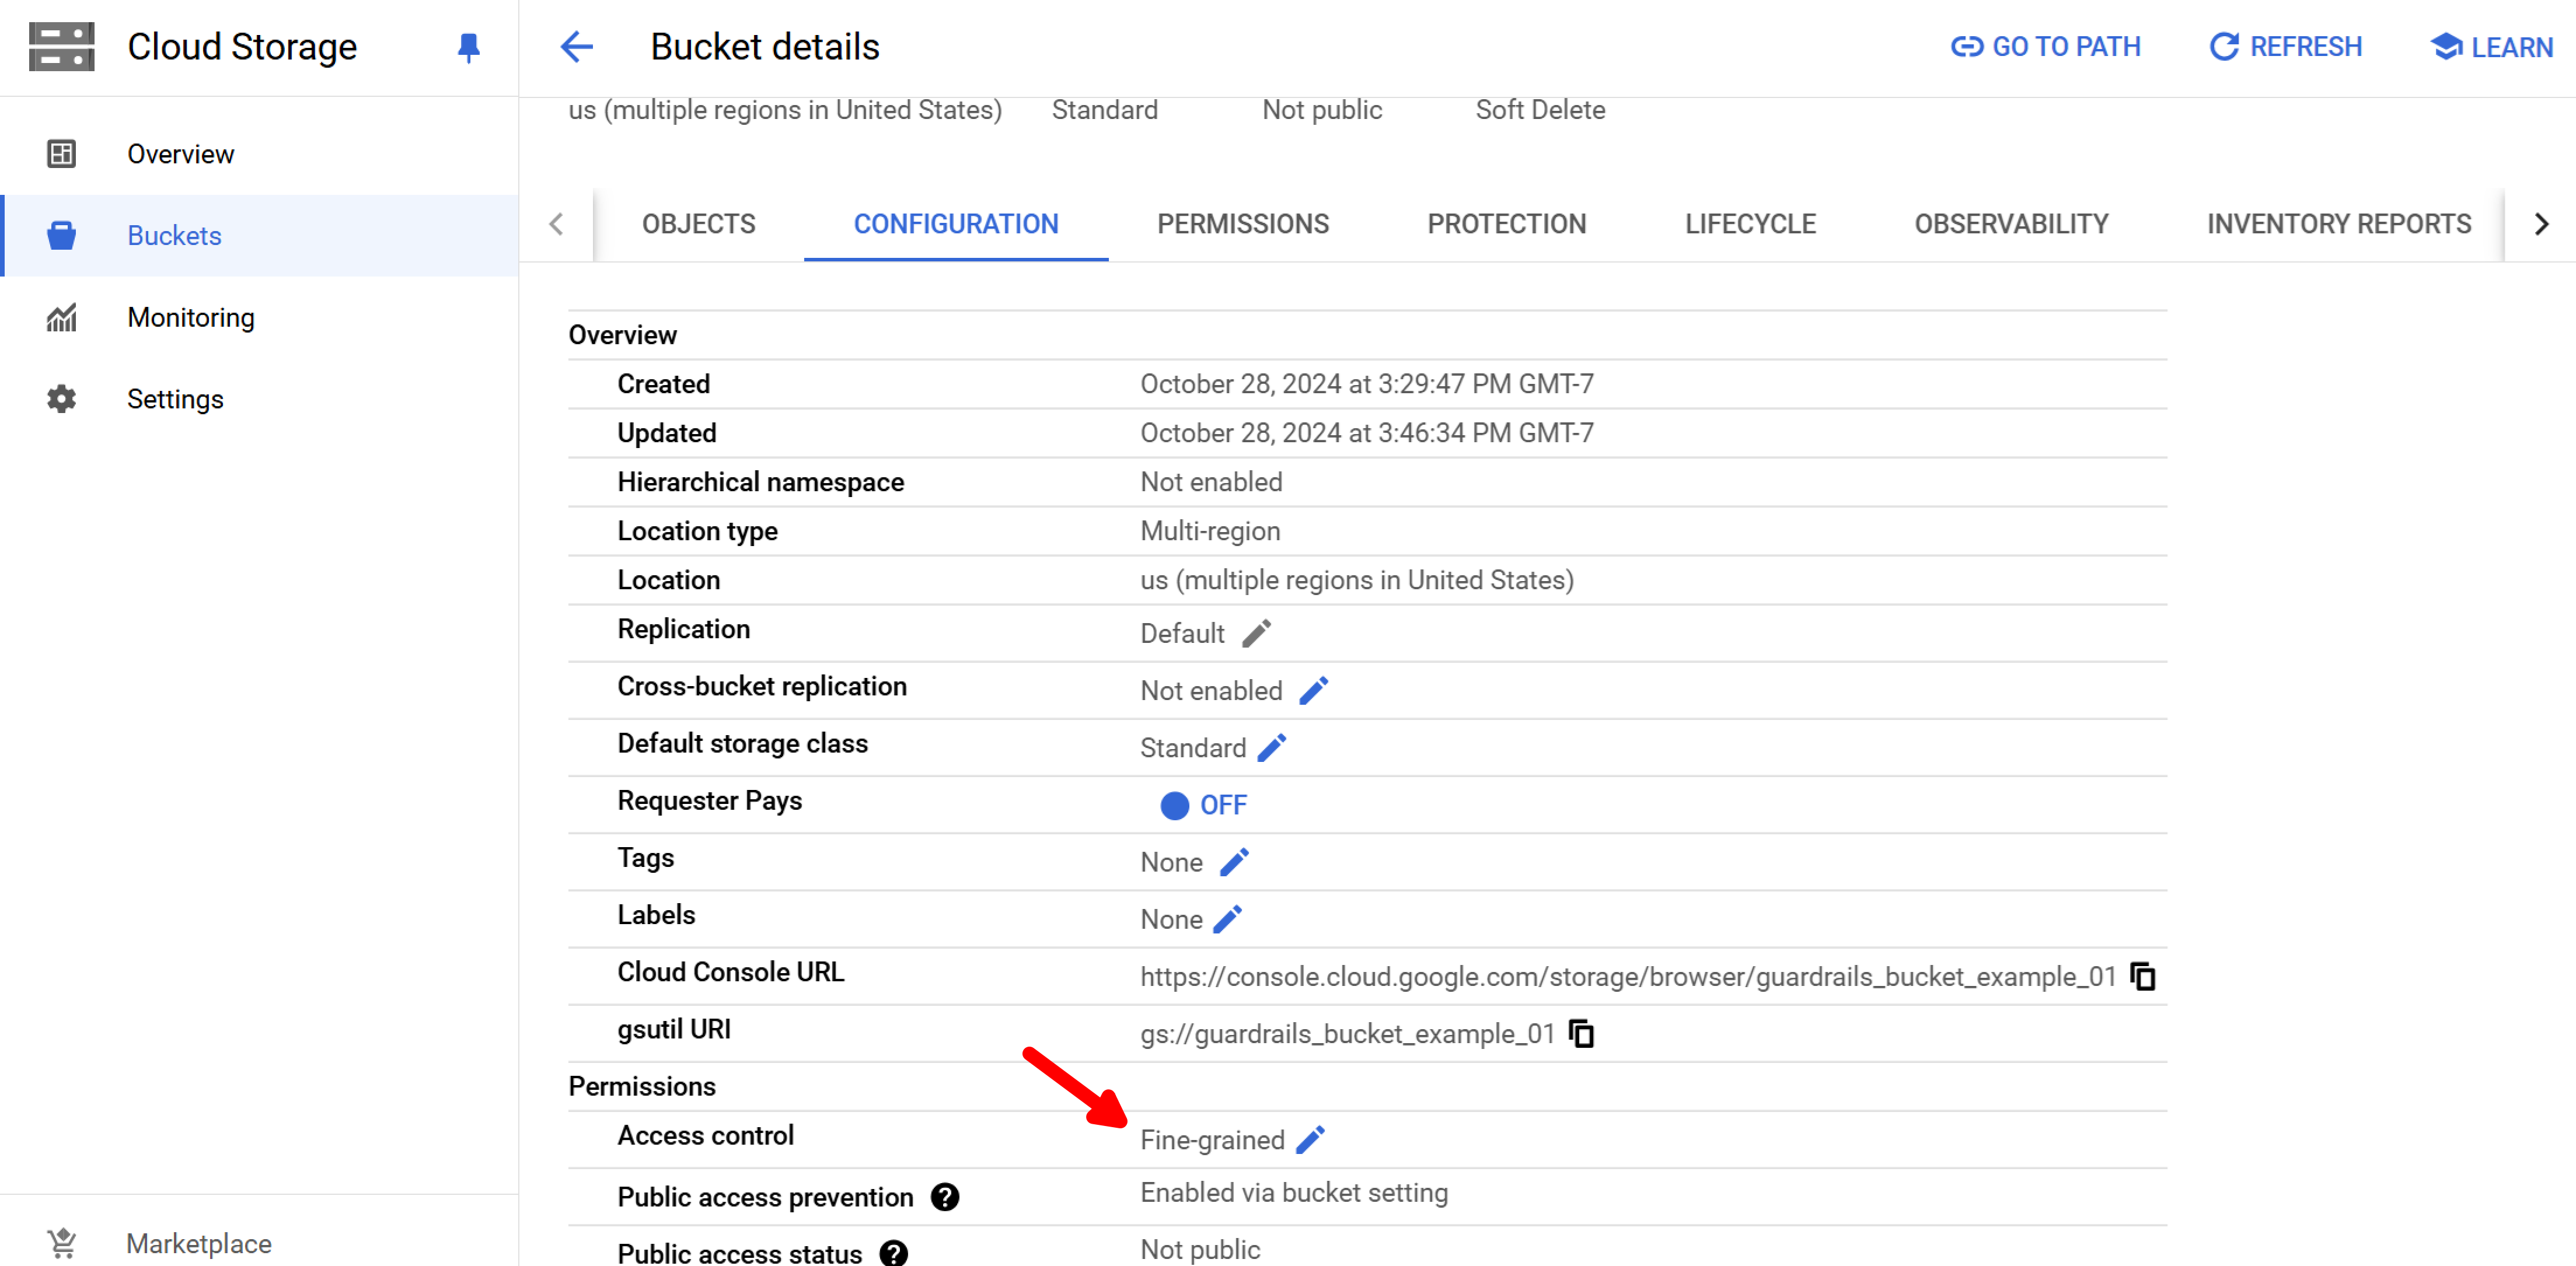
Now visit your bucket in the GCP console, and switch access control from the default, Uniform, to Fine-grained.
Step 7: Observe events
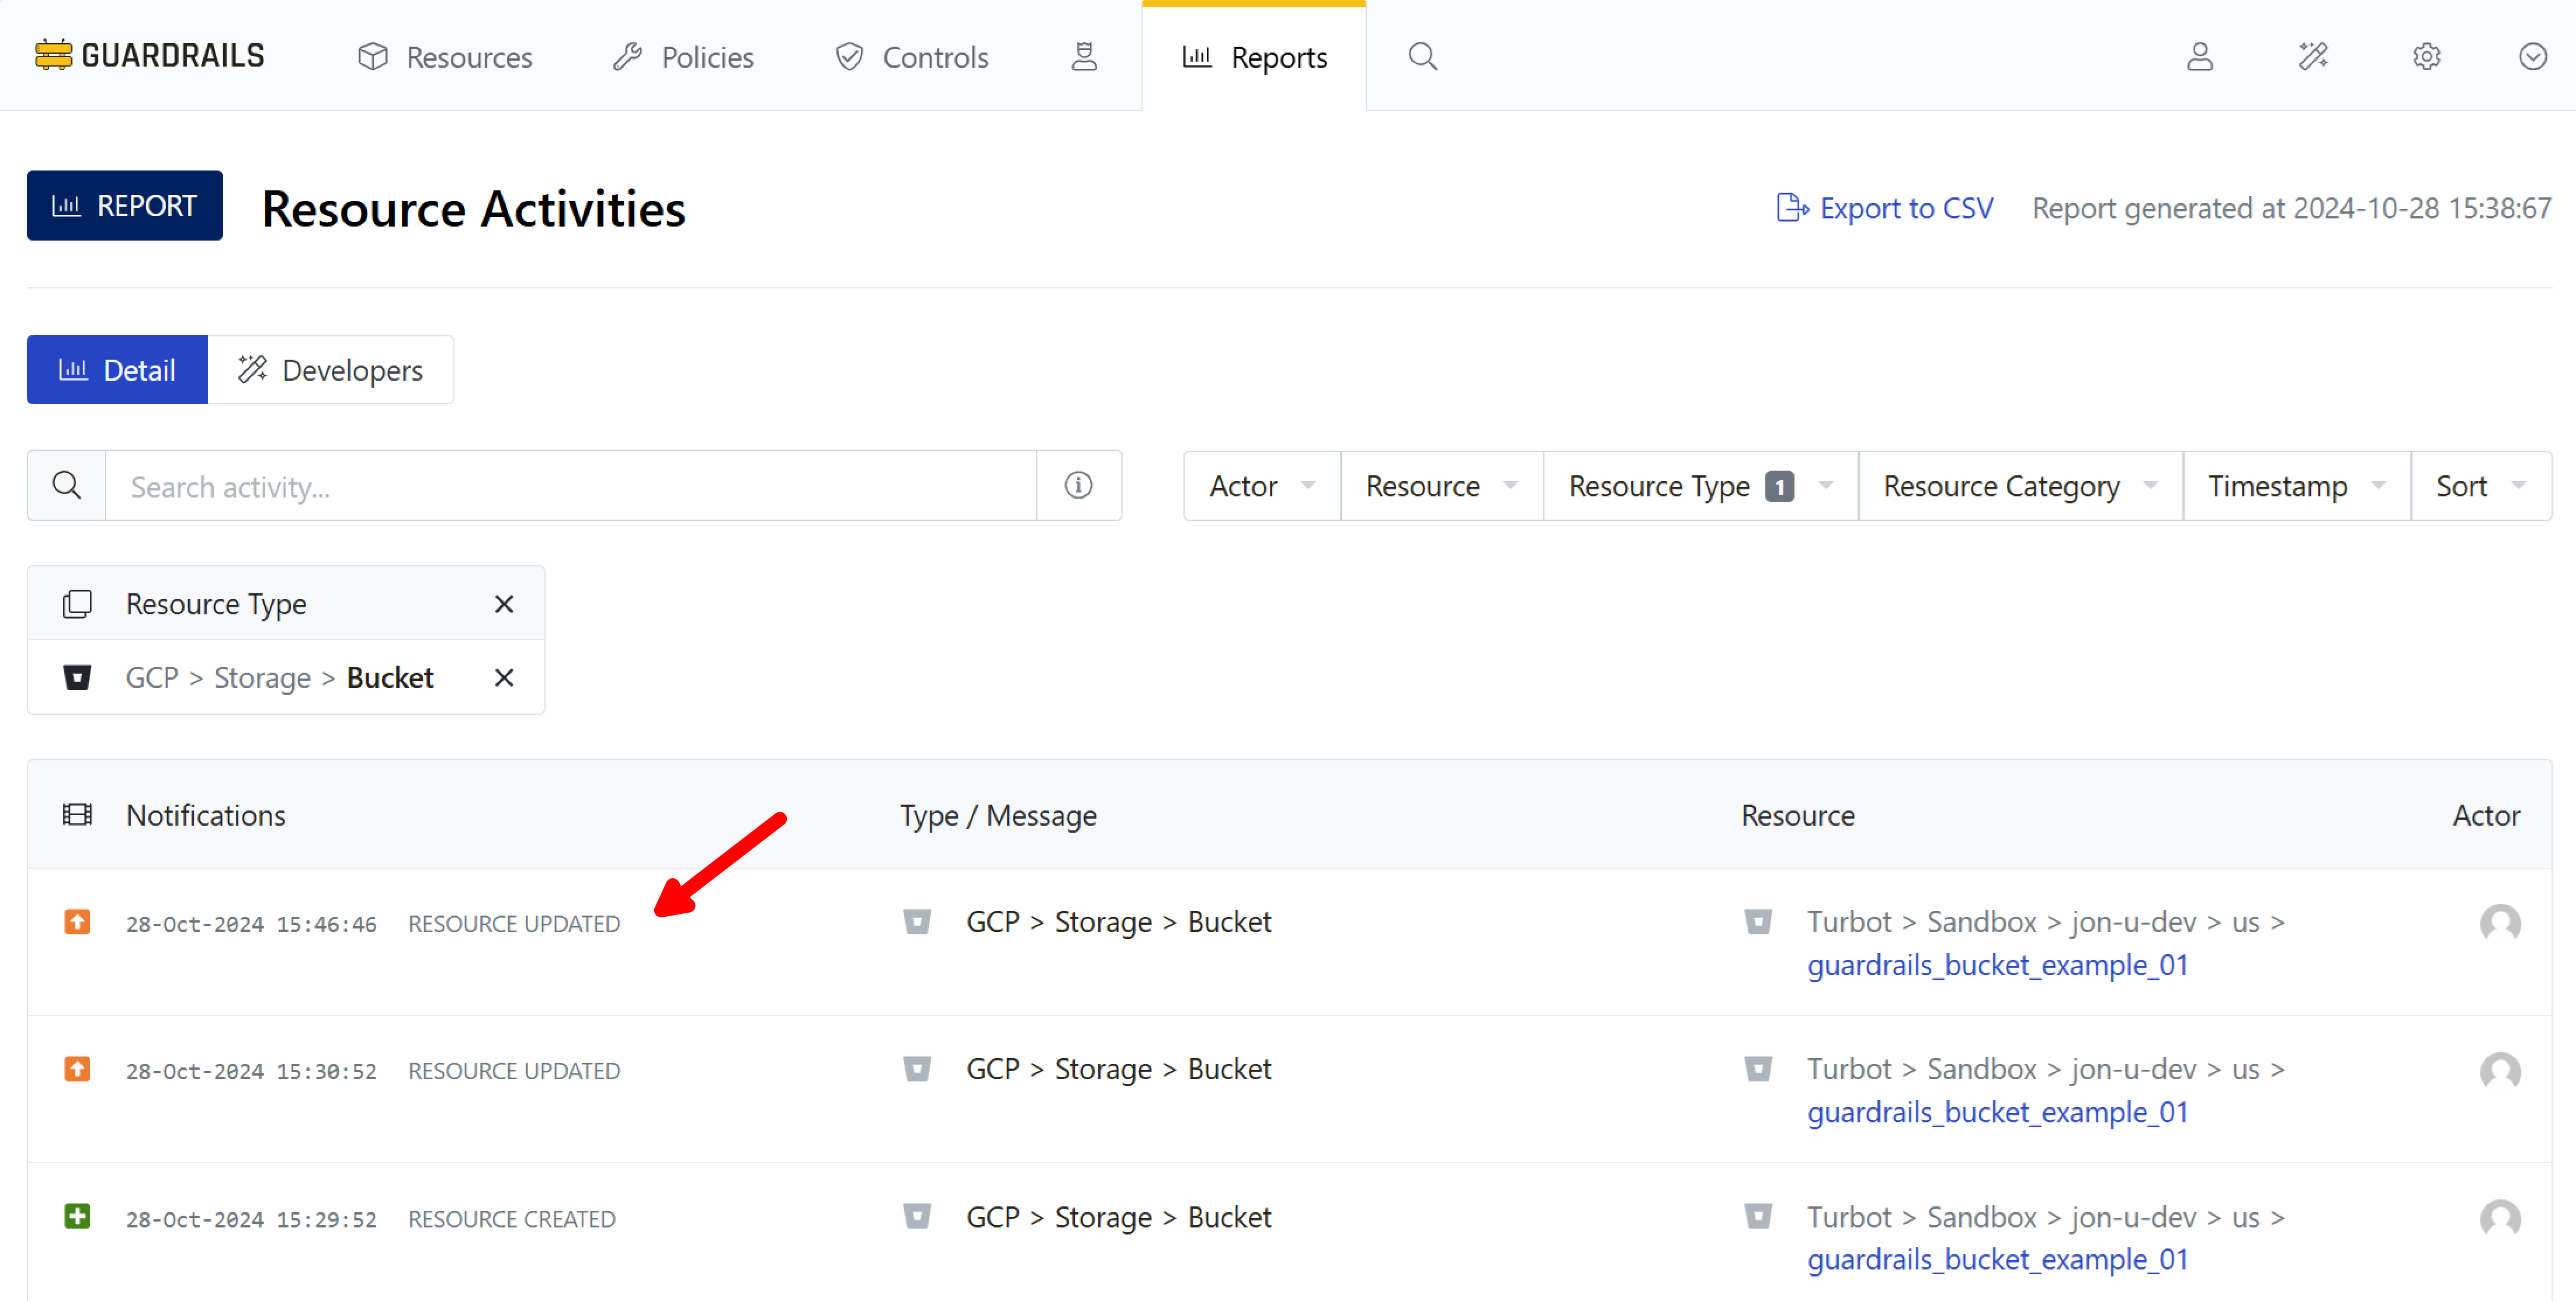
Switch back to the Guardrails console browser tab. Guardrails' event processing system will soon detect the change, and a new RESOURCE UPDATED notification will appear in the list. Select that new notification from the Activities list.
Step 8: Audit resource change
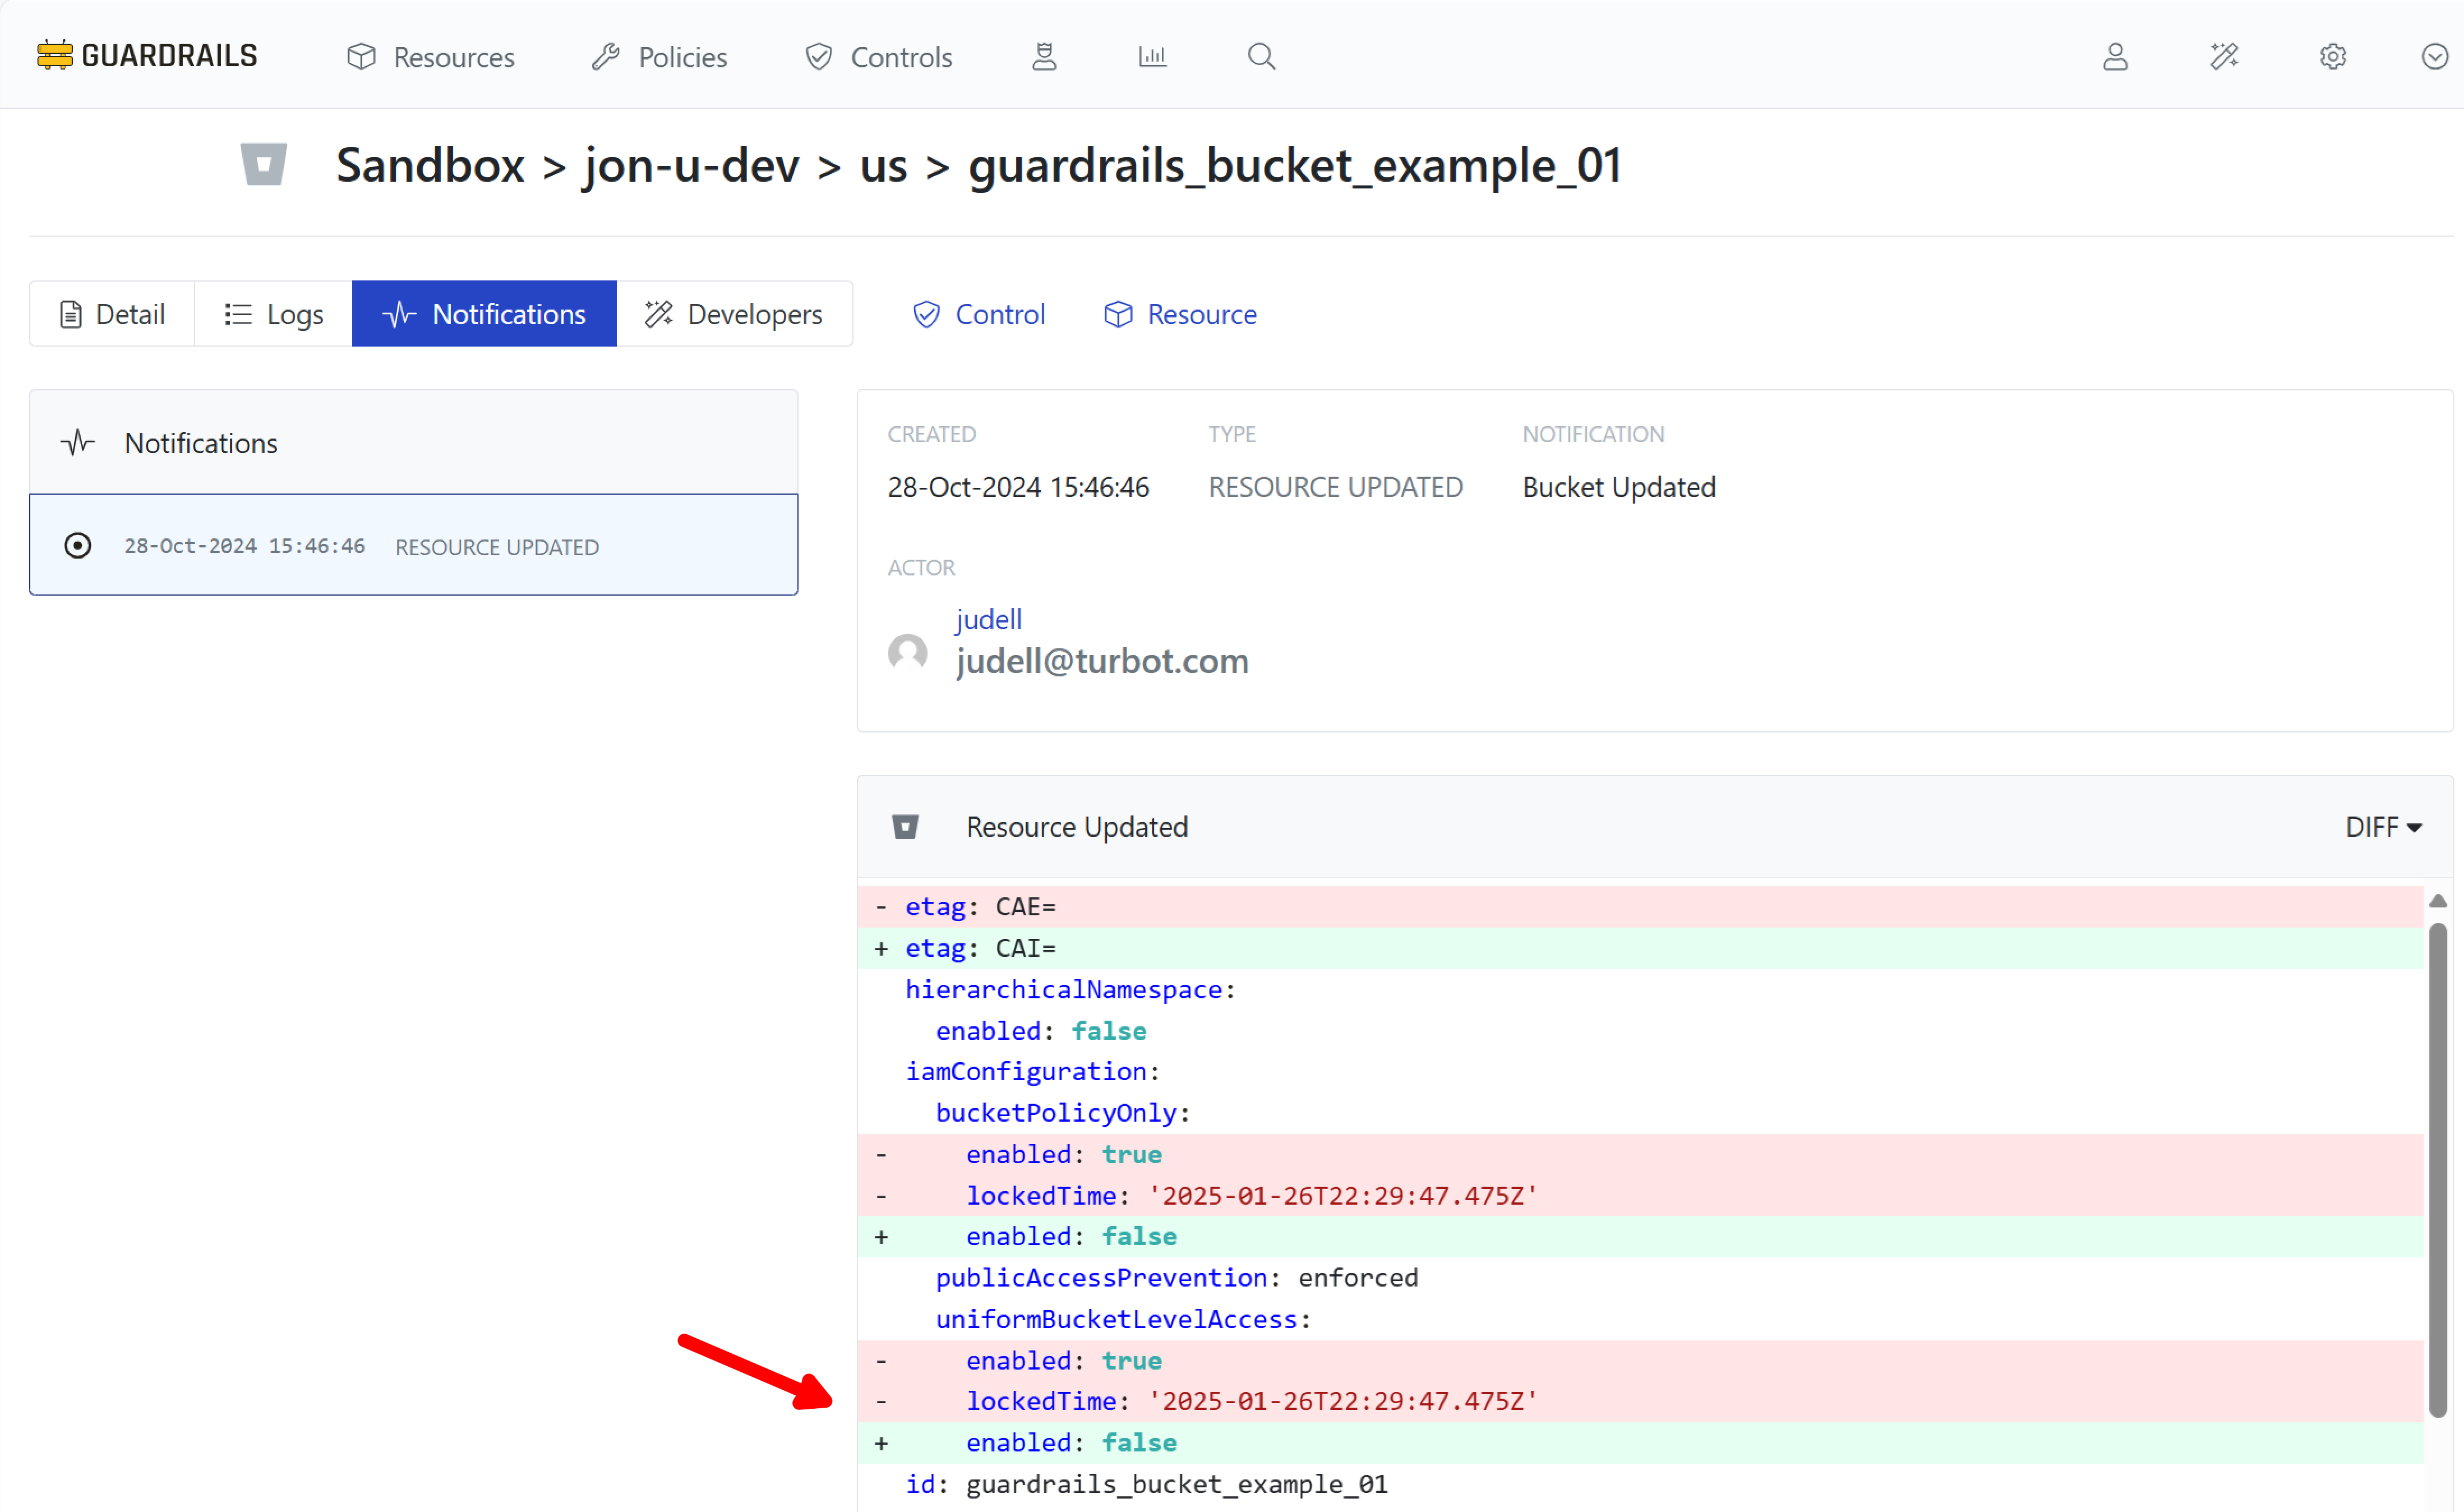
On the notifications detail page, you can see metadata about the change and even audit the changes in configuration between the previous known state and the observed change. Scroll down in the DIFF section to observe the changes that Guardrails has recorded.
Step 9: Review
In this guide you changed the access control property of a GCP bucket and observed how Guardrails recorded the change.
Next Steps
Next we'll explore how to enable a policy pack that requires buckets to enable uniform access.
Progress tracker
- [x] Prepare a GCP Project for Import to Guardrails
- [x] Connect a GCP Project to Guardrails
- [x] Observe GCP Activity
- [ ] Enable Your First Guardrails Policy Pack
- [ ] Review Project-Wide Governance
- [ ] Create a Static Exception to a Guardrails Policy
- [ ] Create a Calculated Exception to a Guardrails GCP Policy
- [ ] Send an Alert to Email
- [ ] Apply a Quick Action
- [ ] Enable Automatic Enforcement