Create a Calculated Exception to a Guardrails Policy
Create a Calculated Exception to a Guardrails AWS Policy
In this guide you'll learn how to make dynamic policy exceptions based on resource tags. These Calculated Policies enable you to implement business logic when designing your governance controls.
Some typical examples of how to use calculated polices are:
- Dynamic tagging of resources based on resource metadata.
- Creating policy exceptions for different classes of resources.
- Taking enforcement action for based on resource tags.
This guide will walk you through a simple calculated policy based on resource tags.
This is the seventh guide in the Getting started with AWS series.
Prerequisites
- Completion of the previous guides in this series.
- Access to the Guardrails console with administrative privileges.
- Access to the AWS console with permissions to tag S3 buckets.
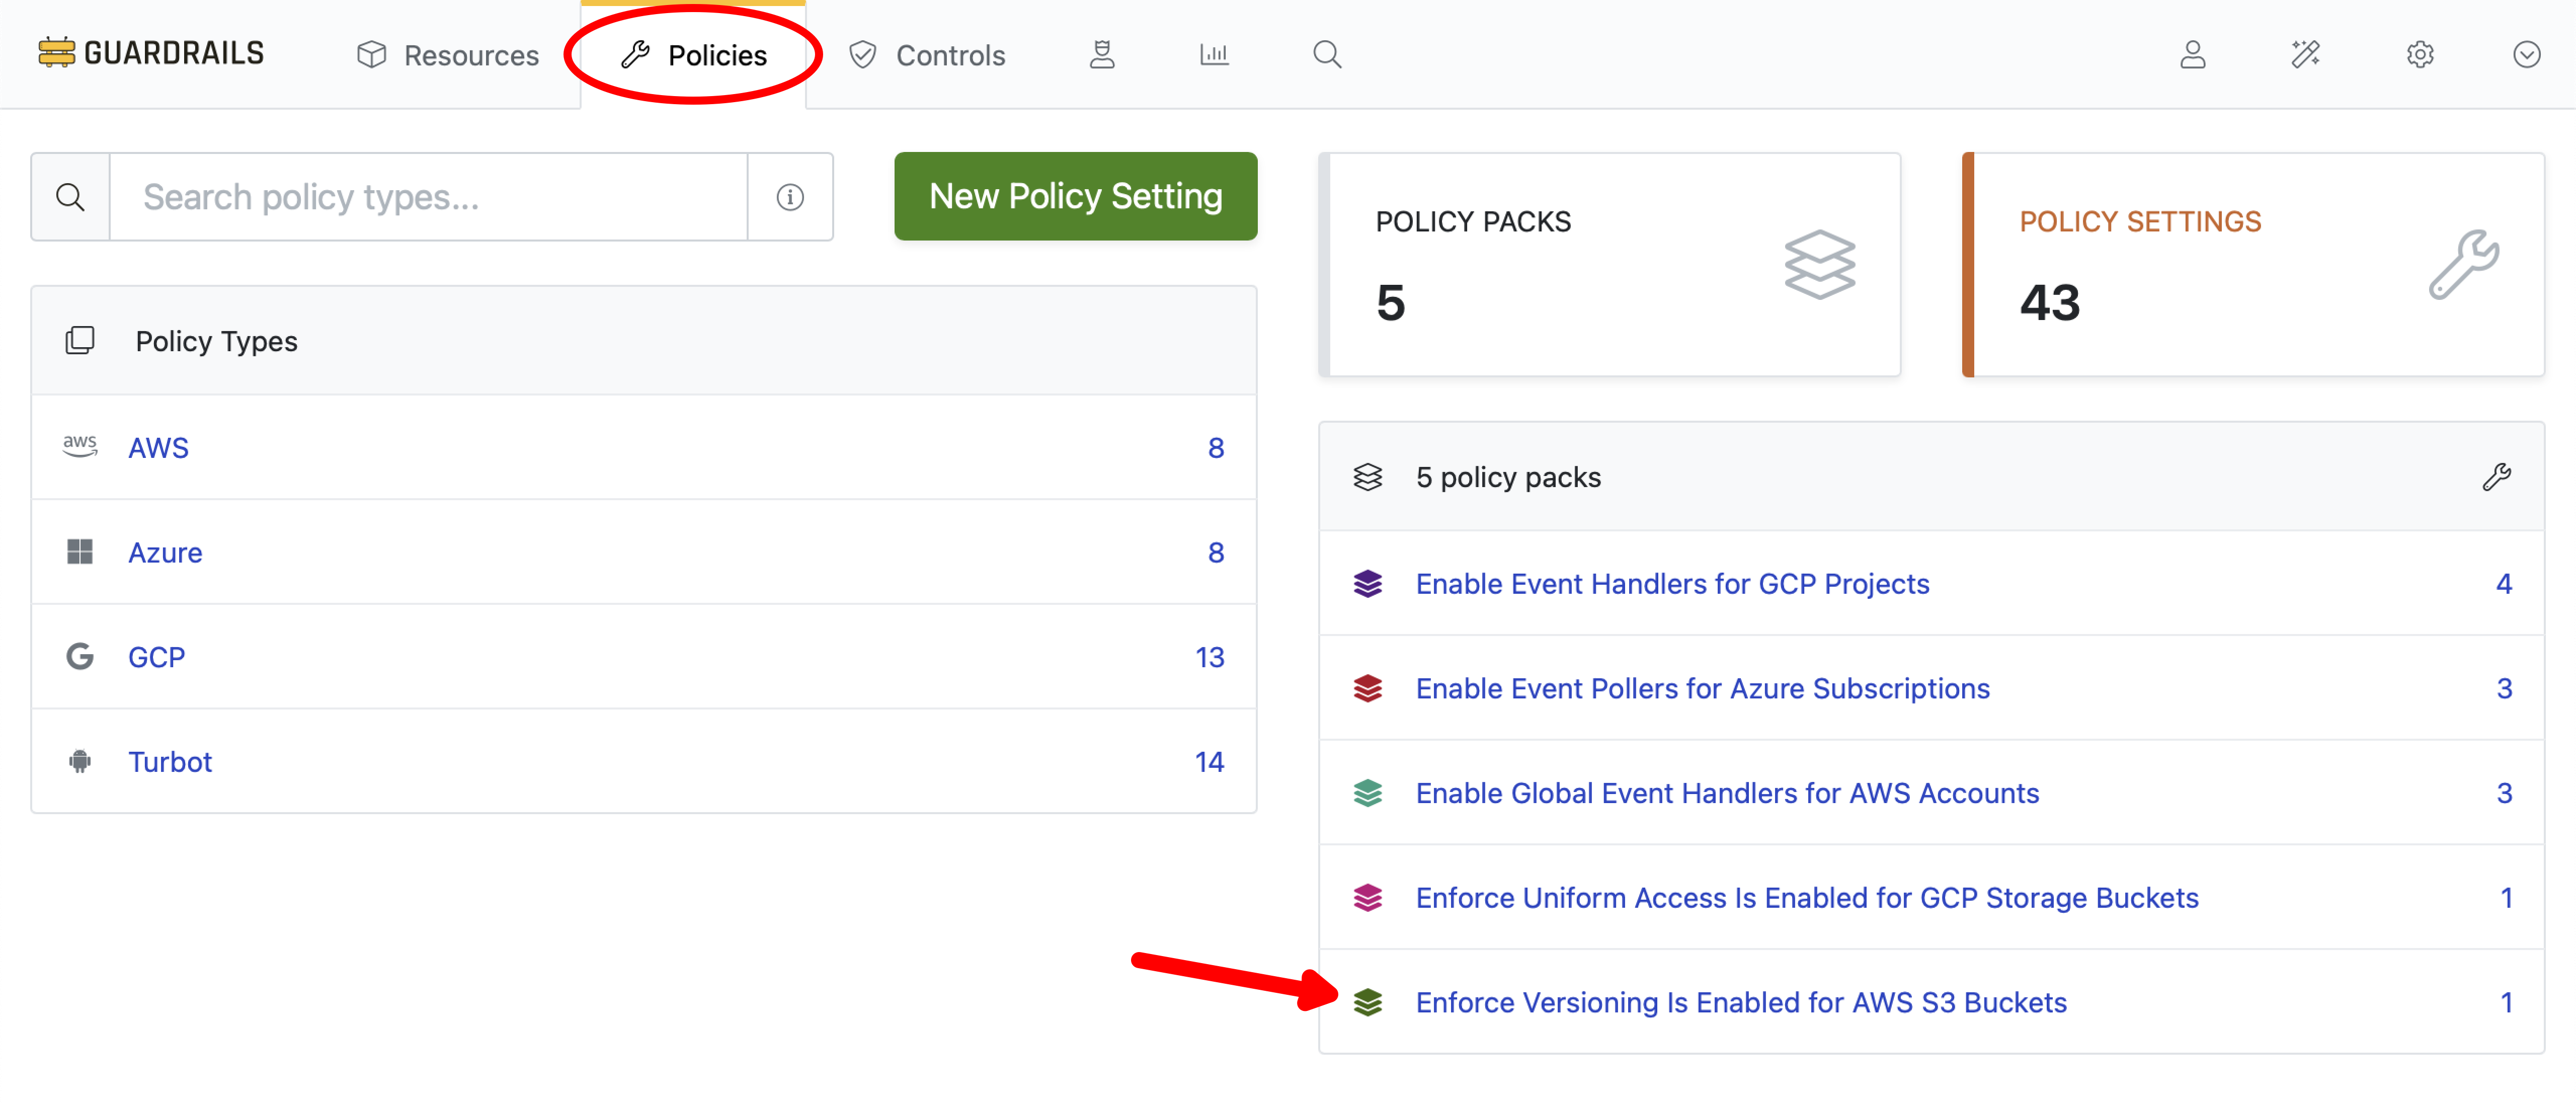
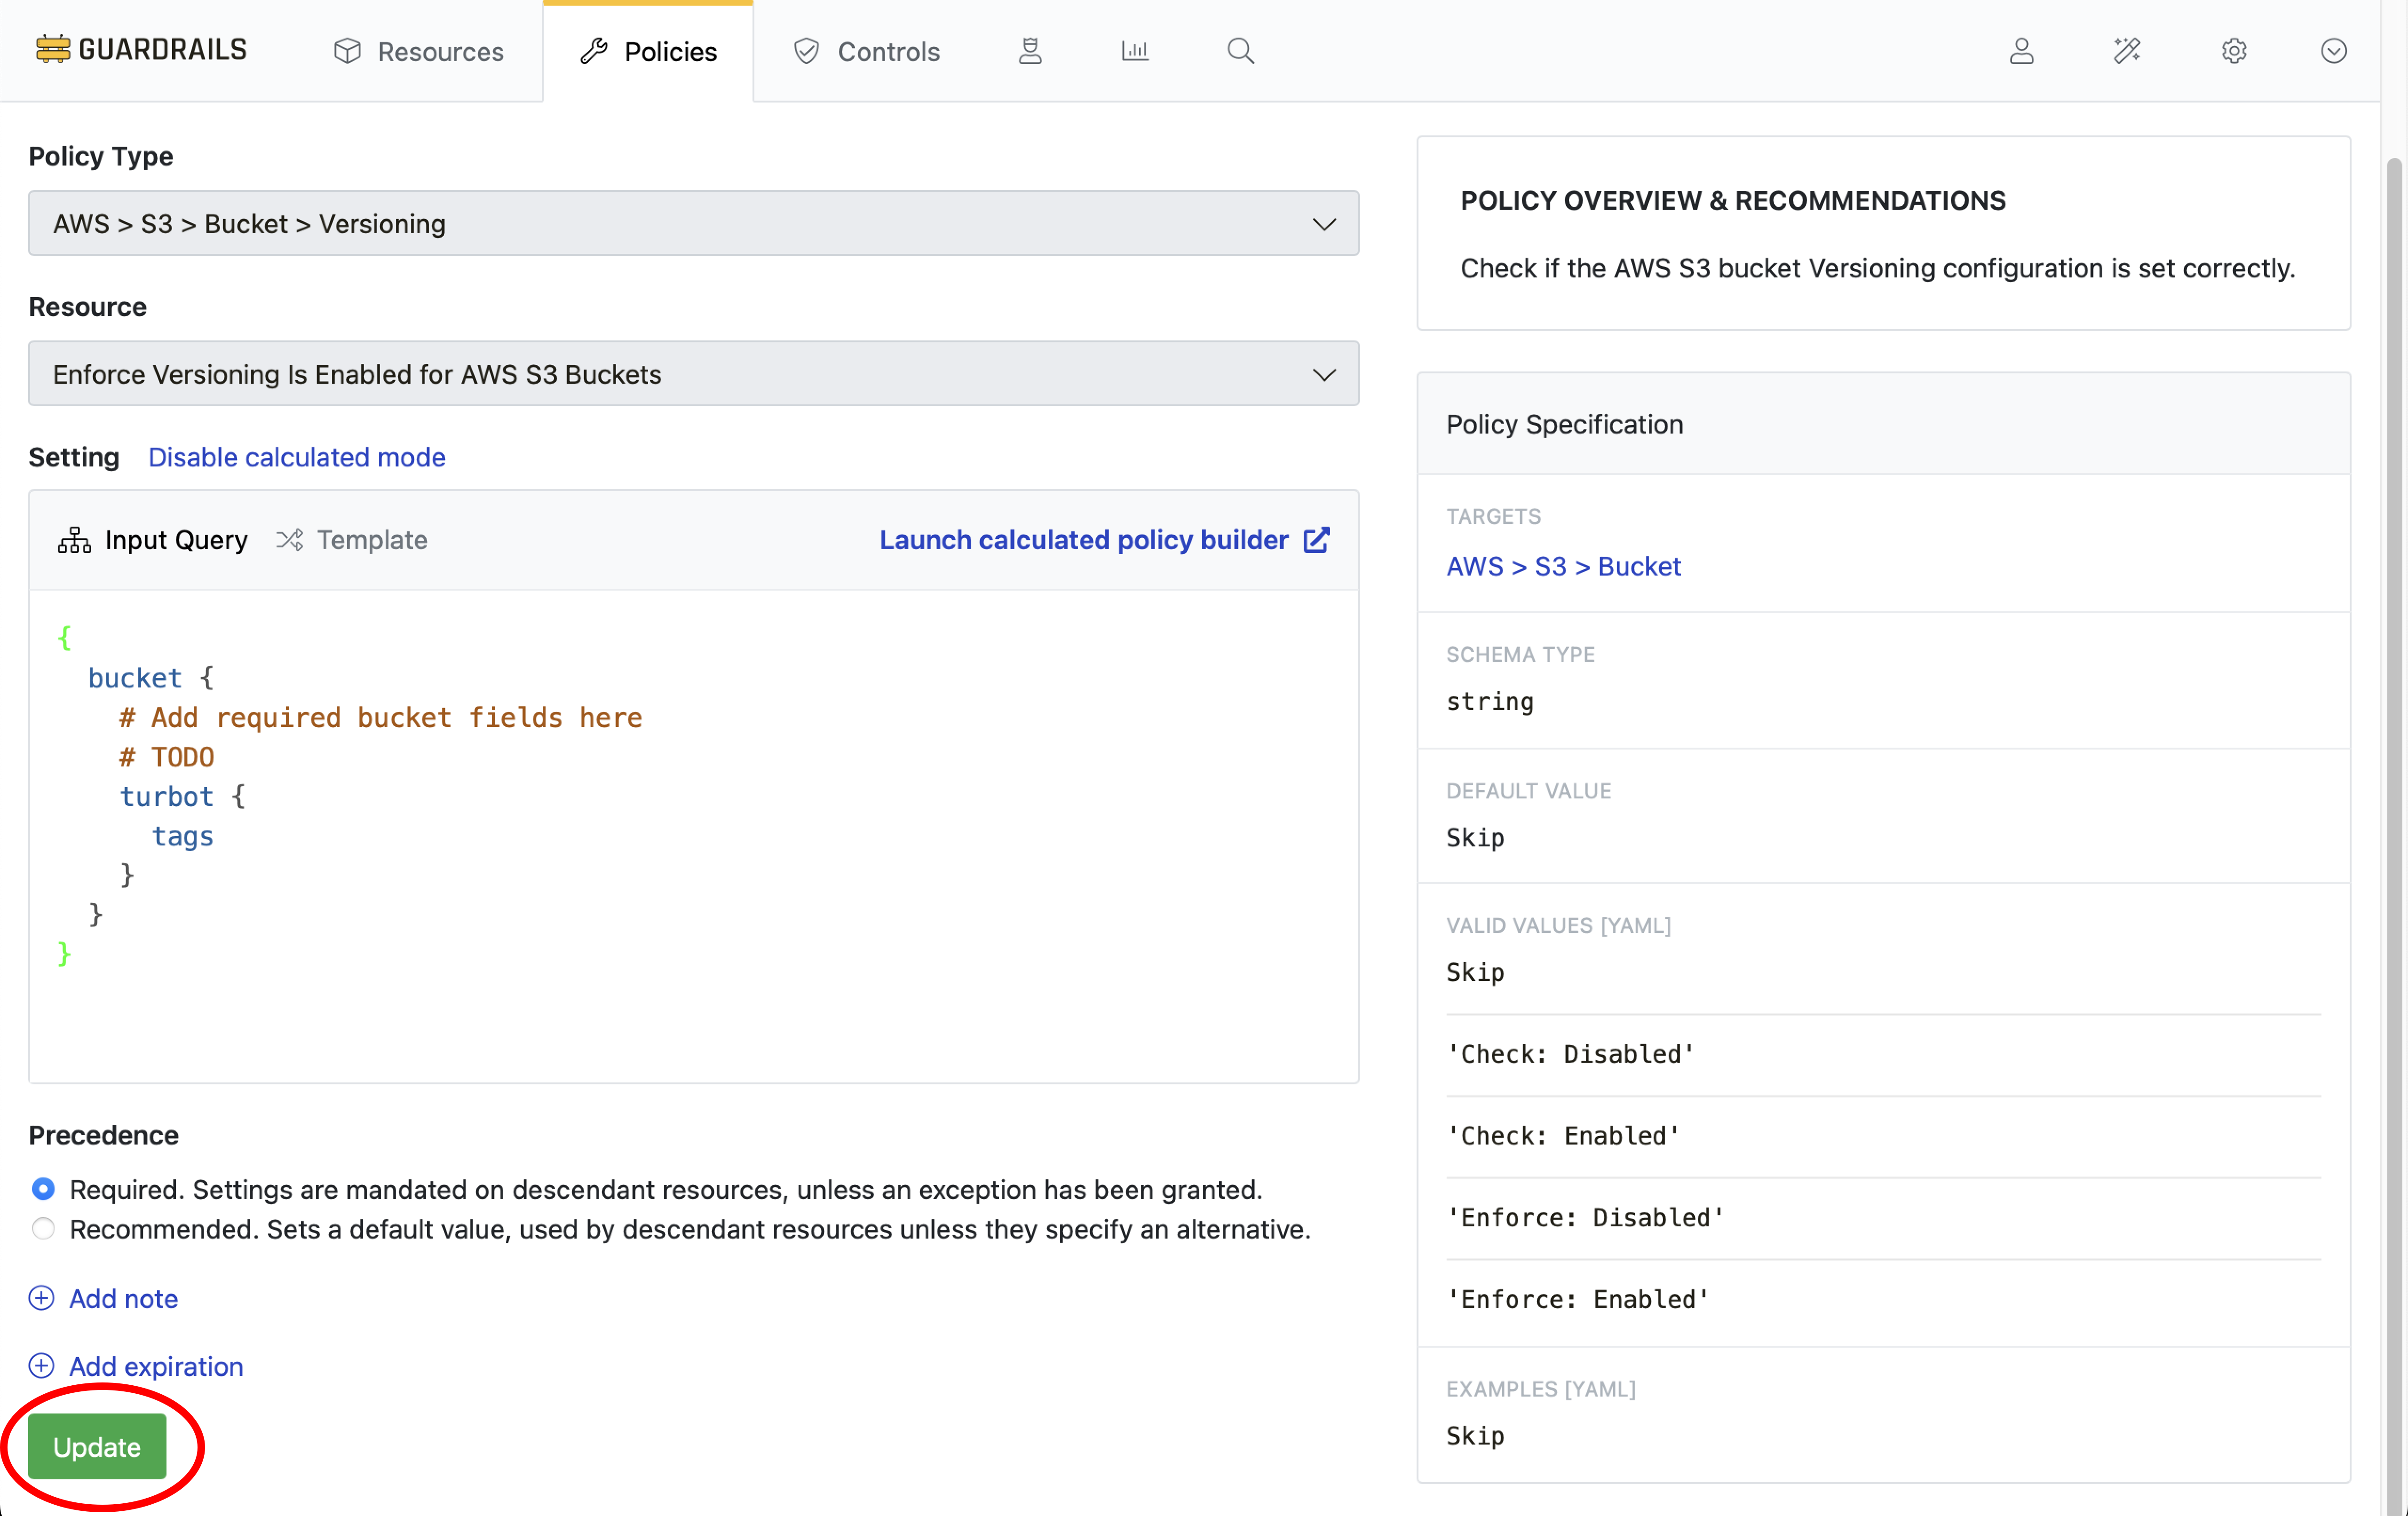
Step 1: Open the policy pack
Choose Policies from the top navigation bar. Select the Enforce Versioning is Enabled for AWS S3 Buckets Policy Pack from the list on the right.
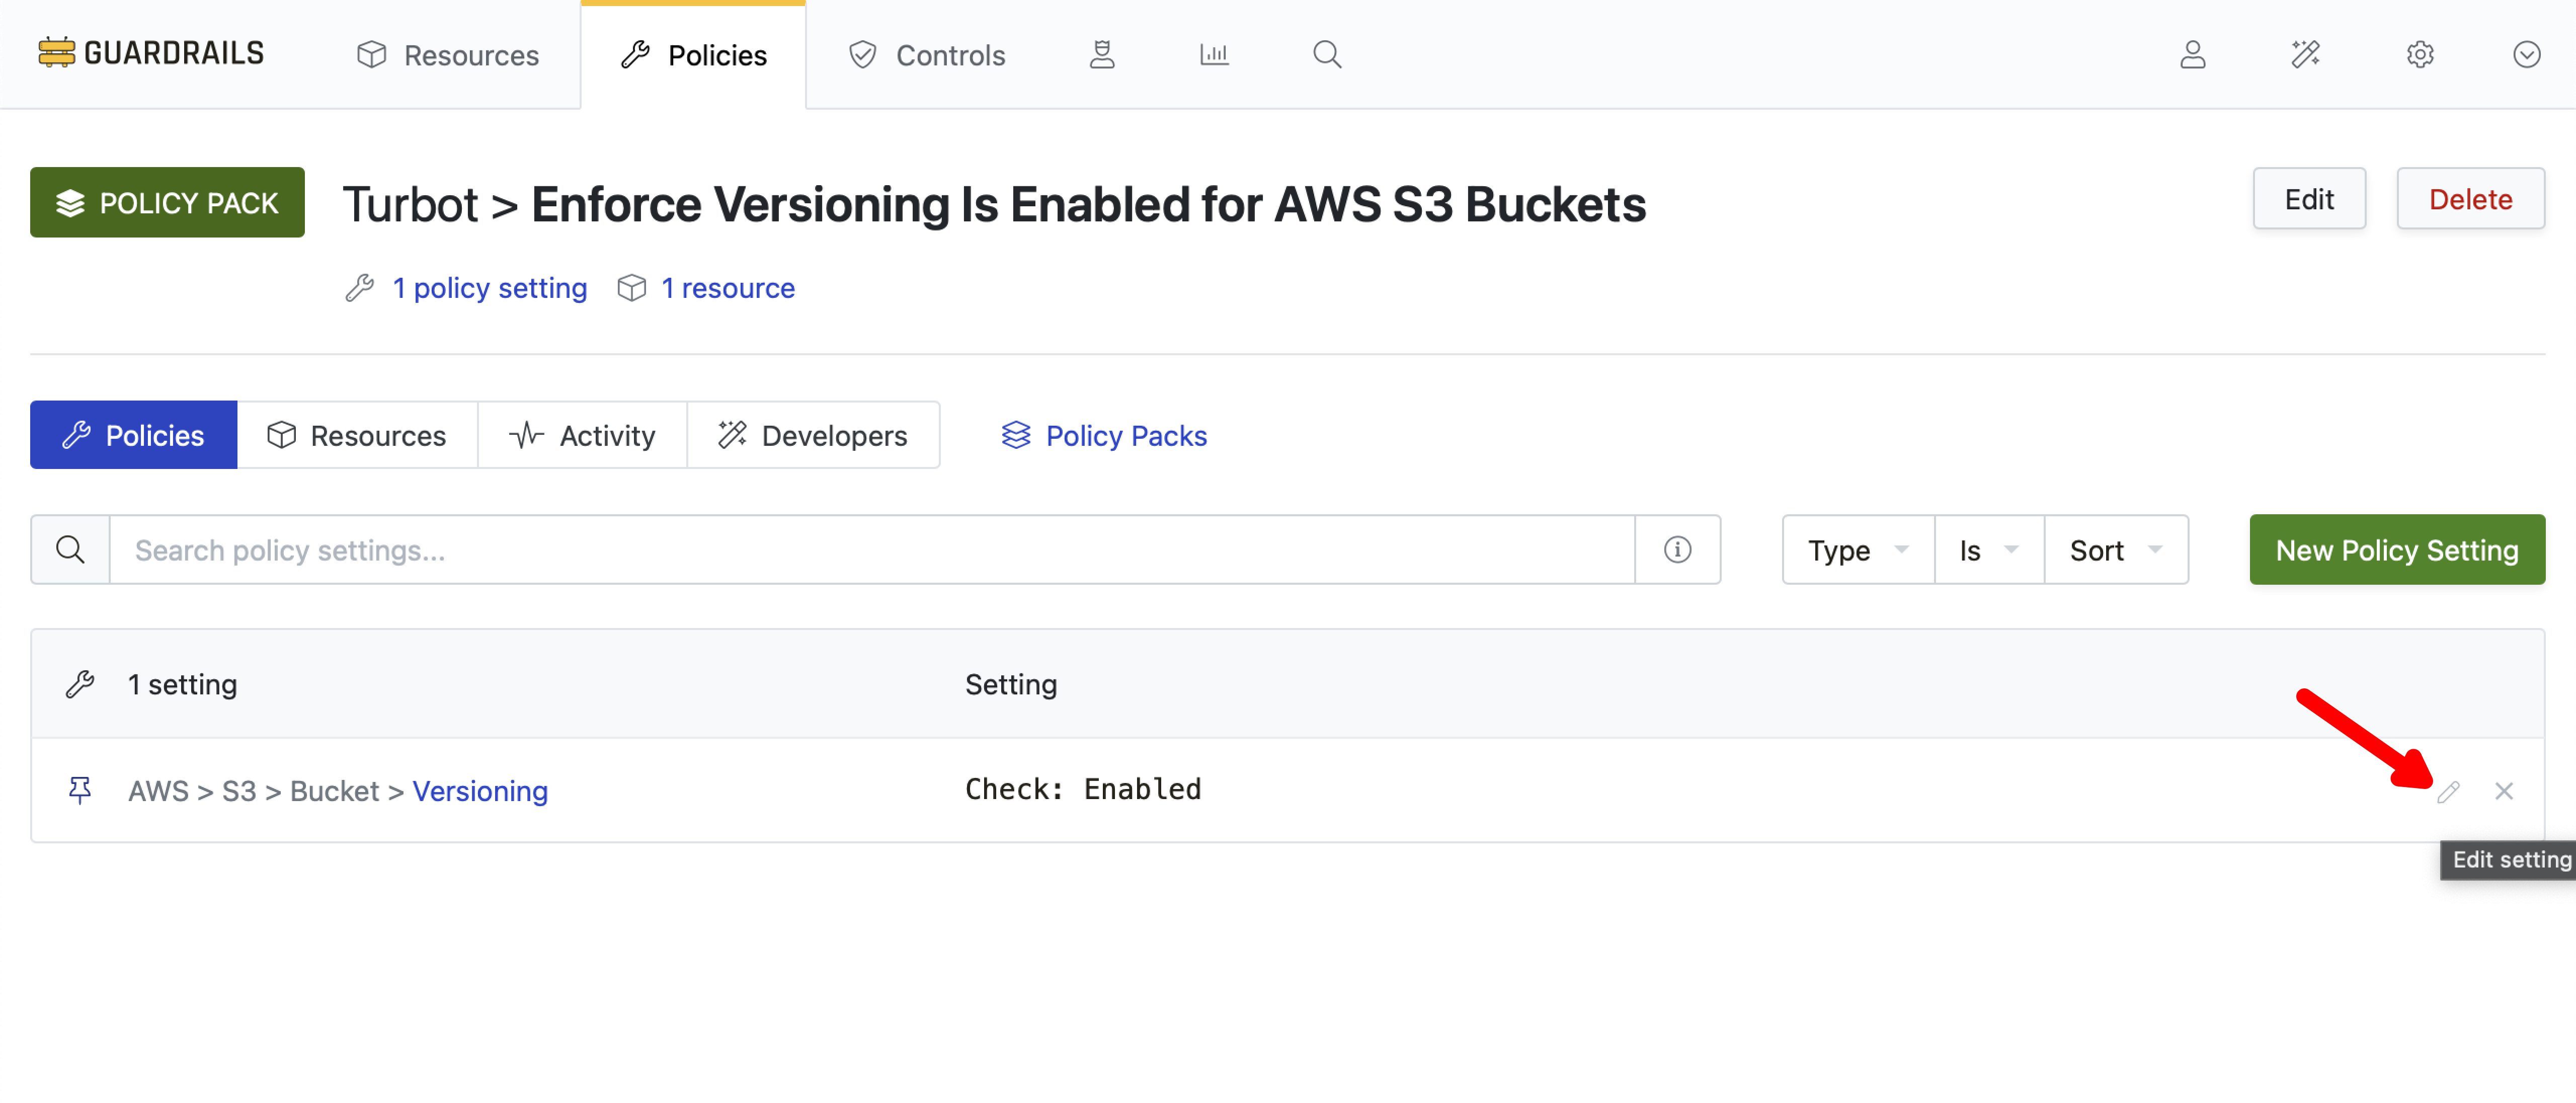
Step 2: Modify the policy setting
The bucket versioning policy is currently statically set to Check: Enabled. Use the pencil icon on the right side of the policy setting to edit the policy.
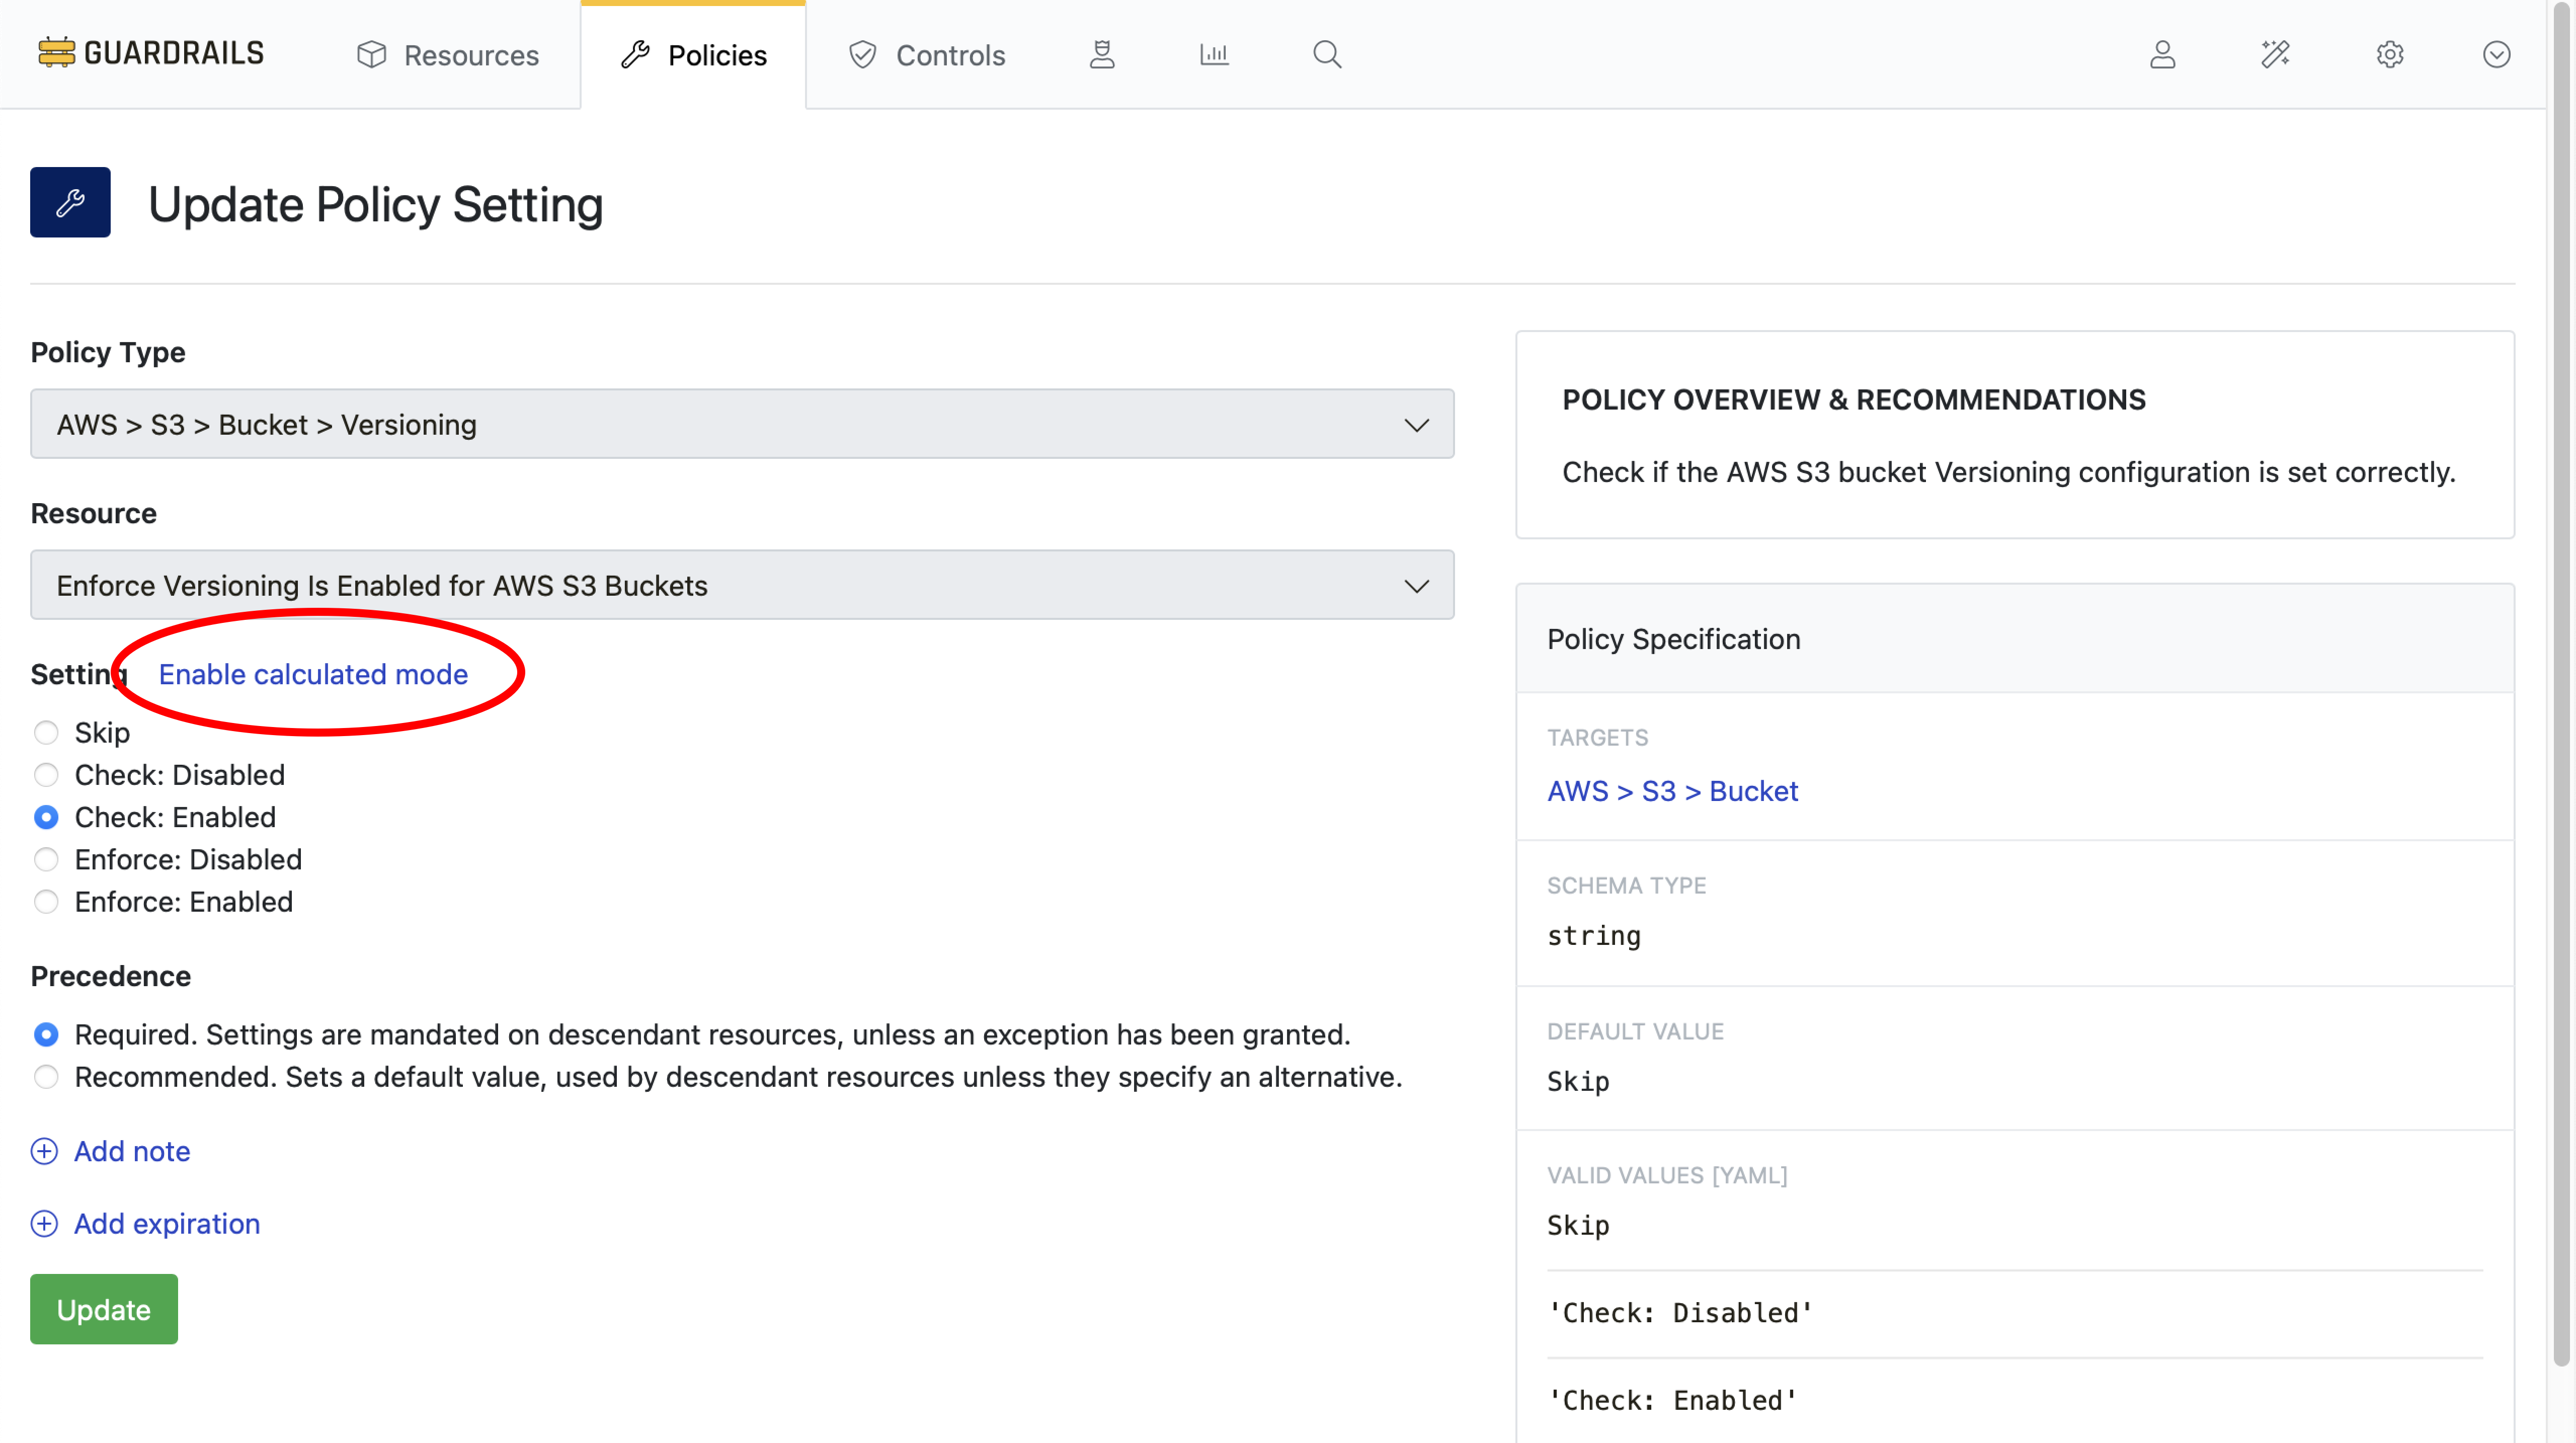
Step 3: Enable calculated mode
Select the blue Launch calculated policy builder link.
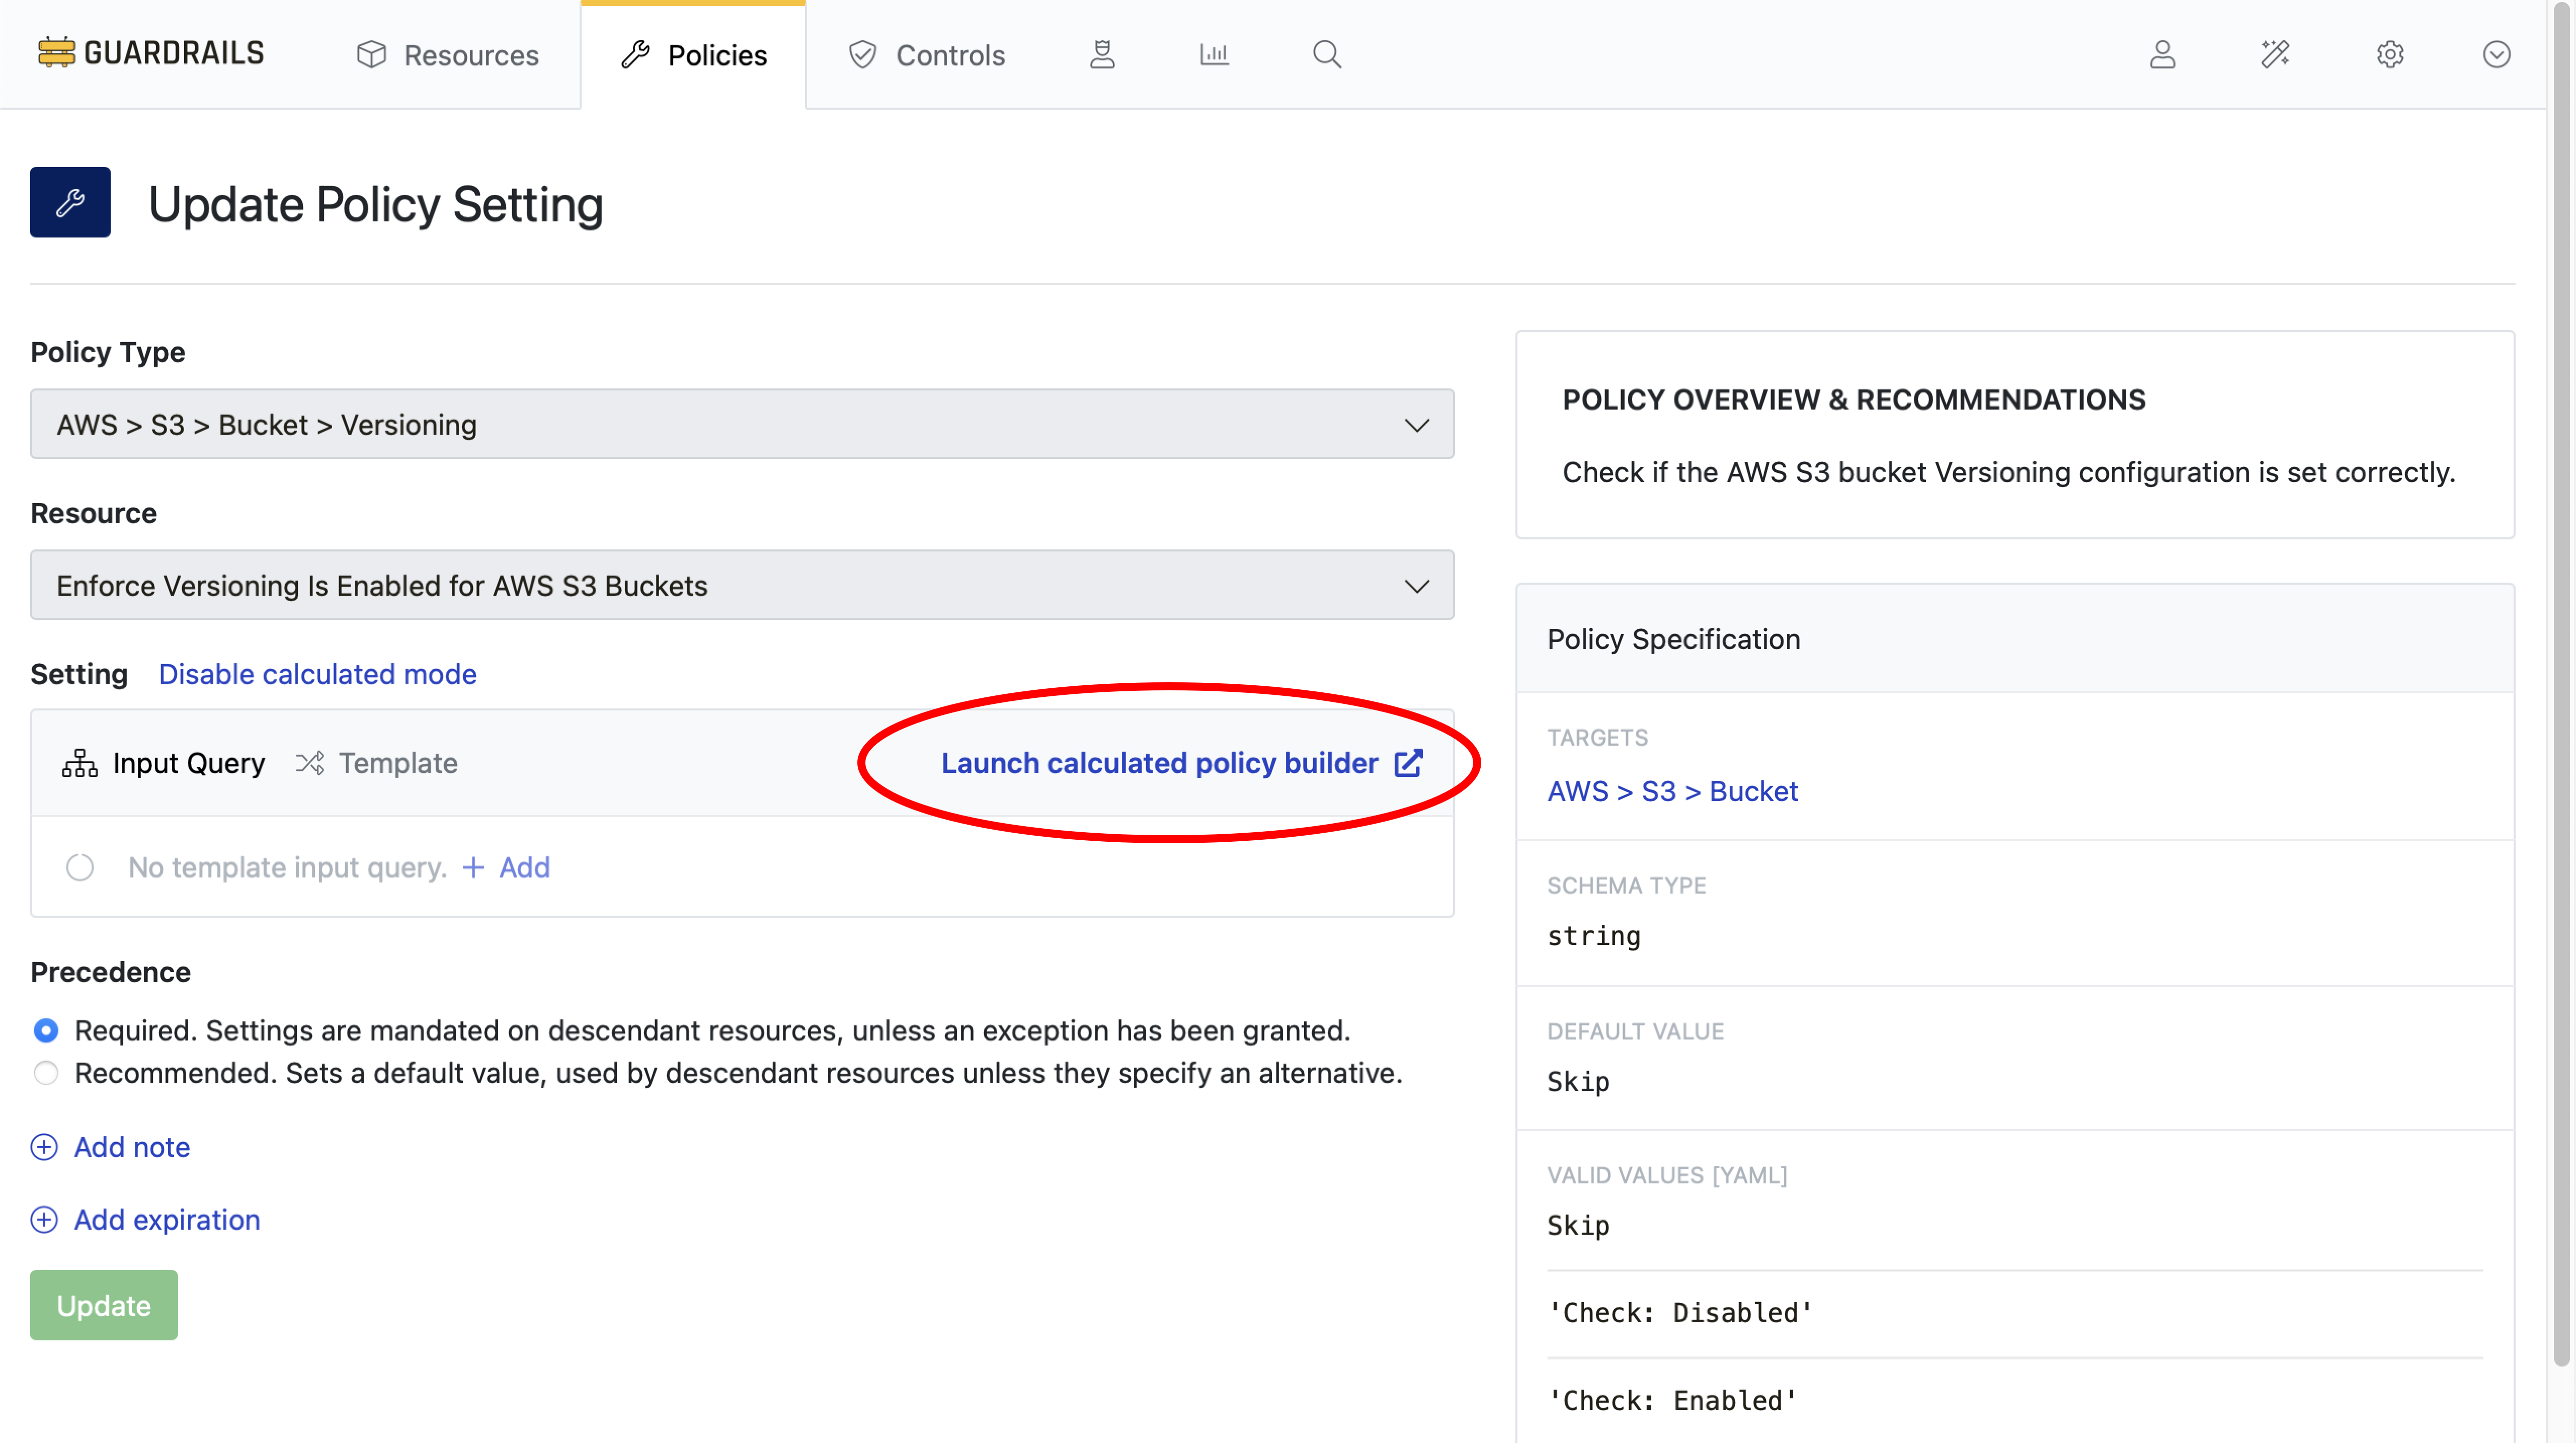
Step 4: Launch calculated policy builder
Select Launch calculated policy builder.
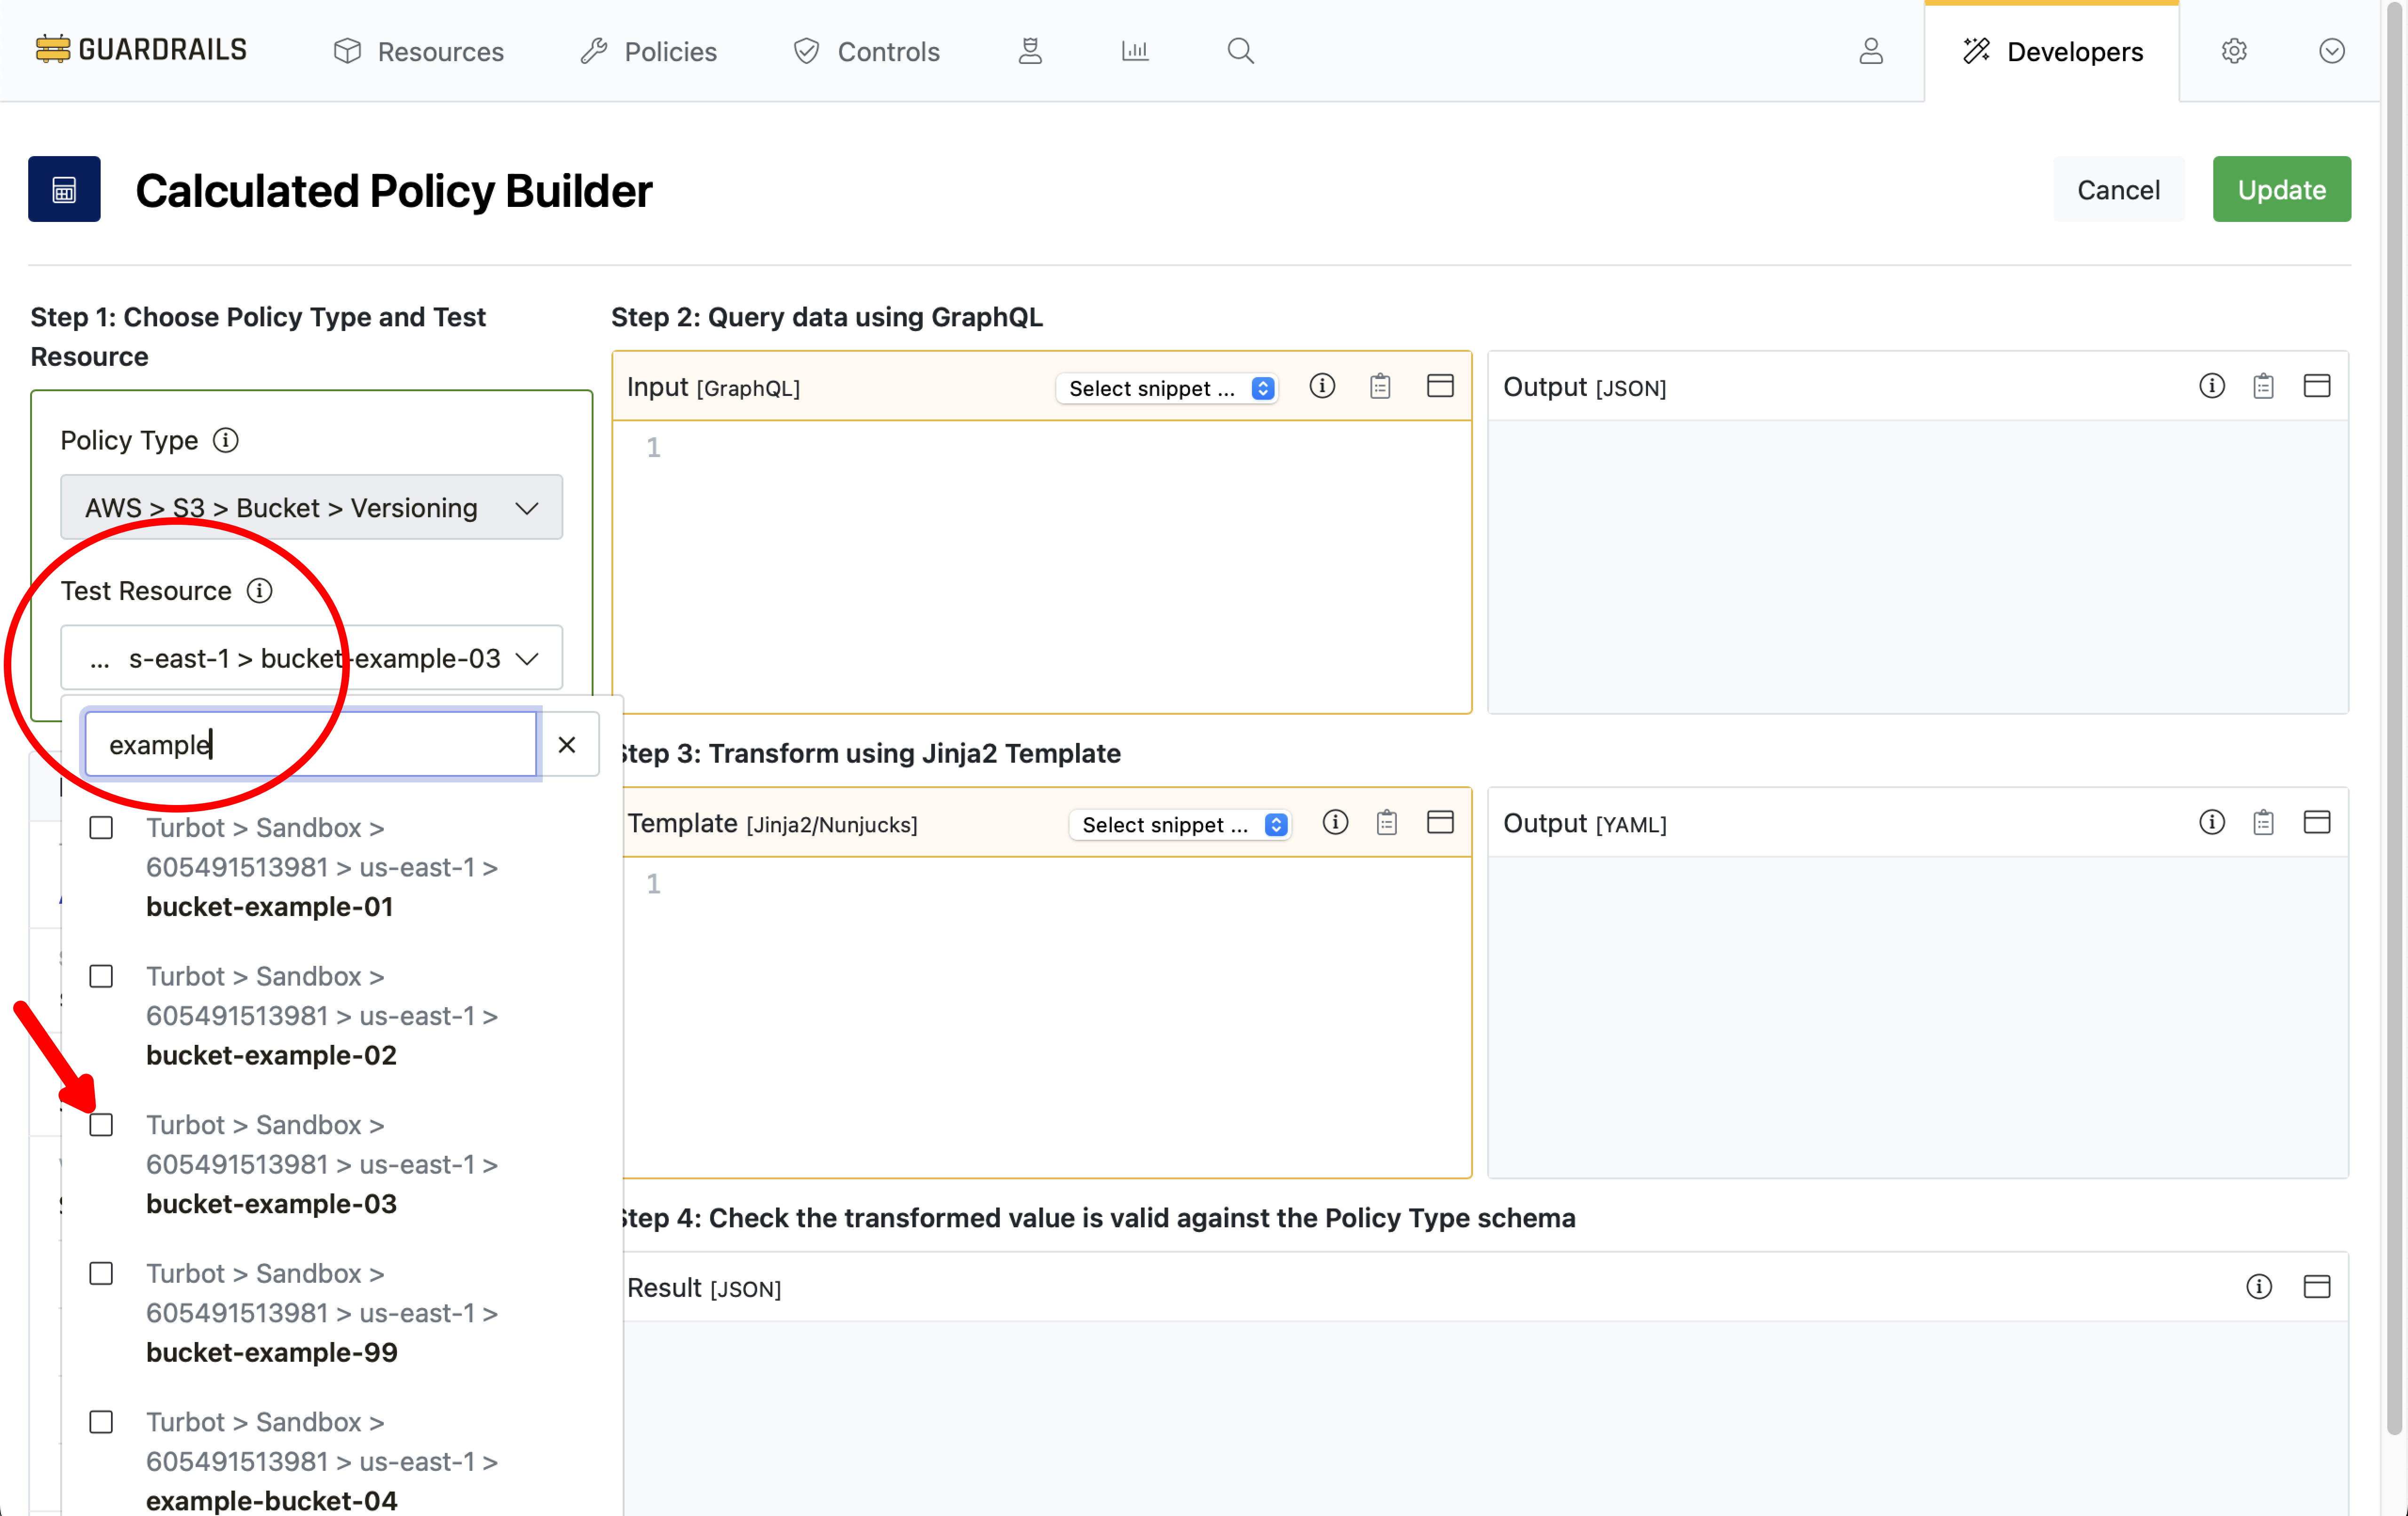
Step 5: Choose test resource
Calculated policies work across all resources in scope of the policy setting. While building a calc policy it is useful to test the business logic against real resources in your environment. For this guide you will find and select one of the previously-created test buckets by searching for its name in the Test Resource field.
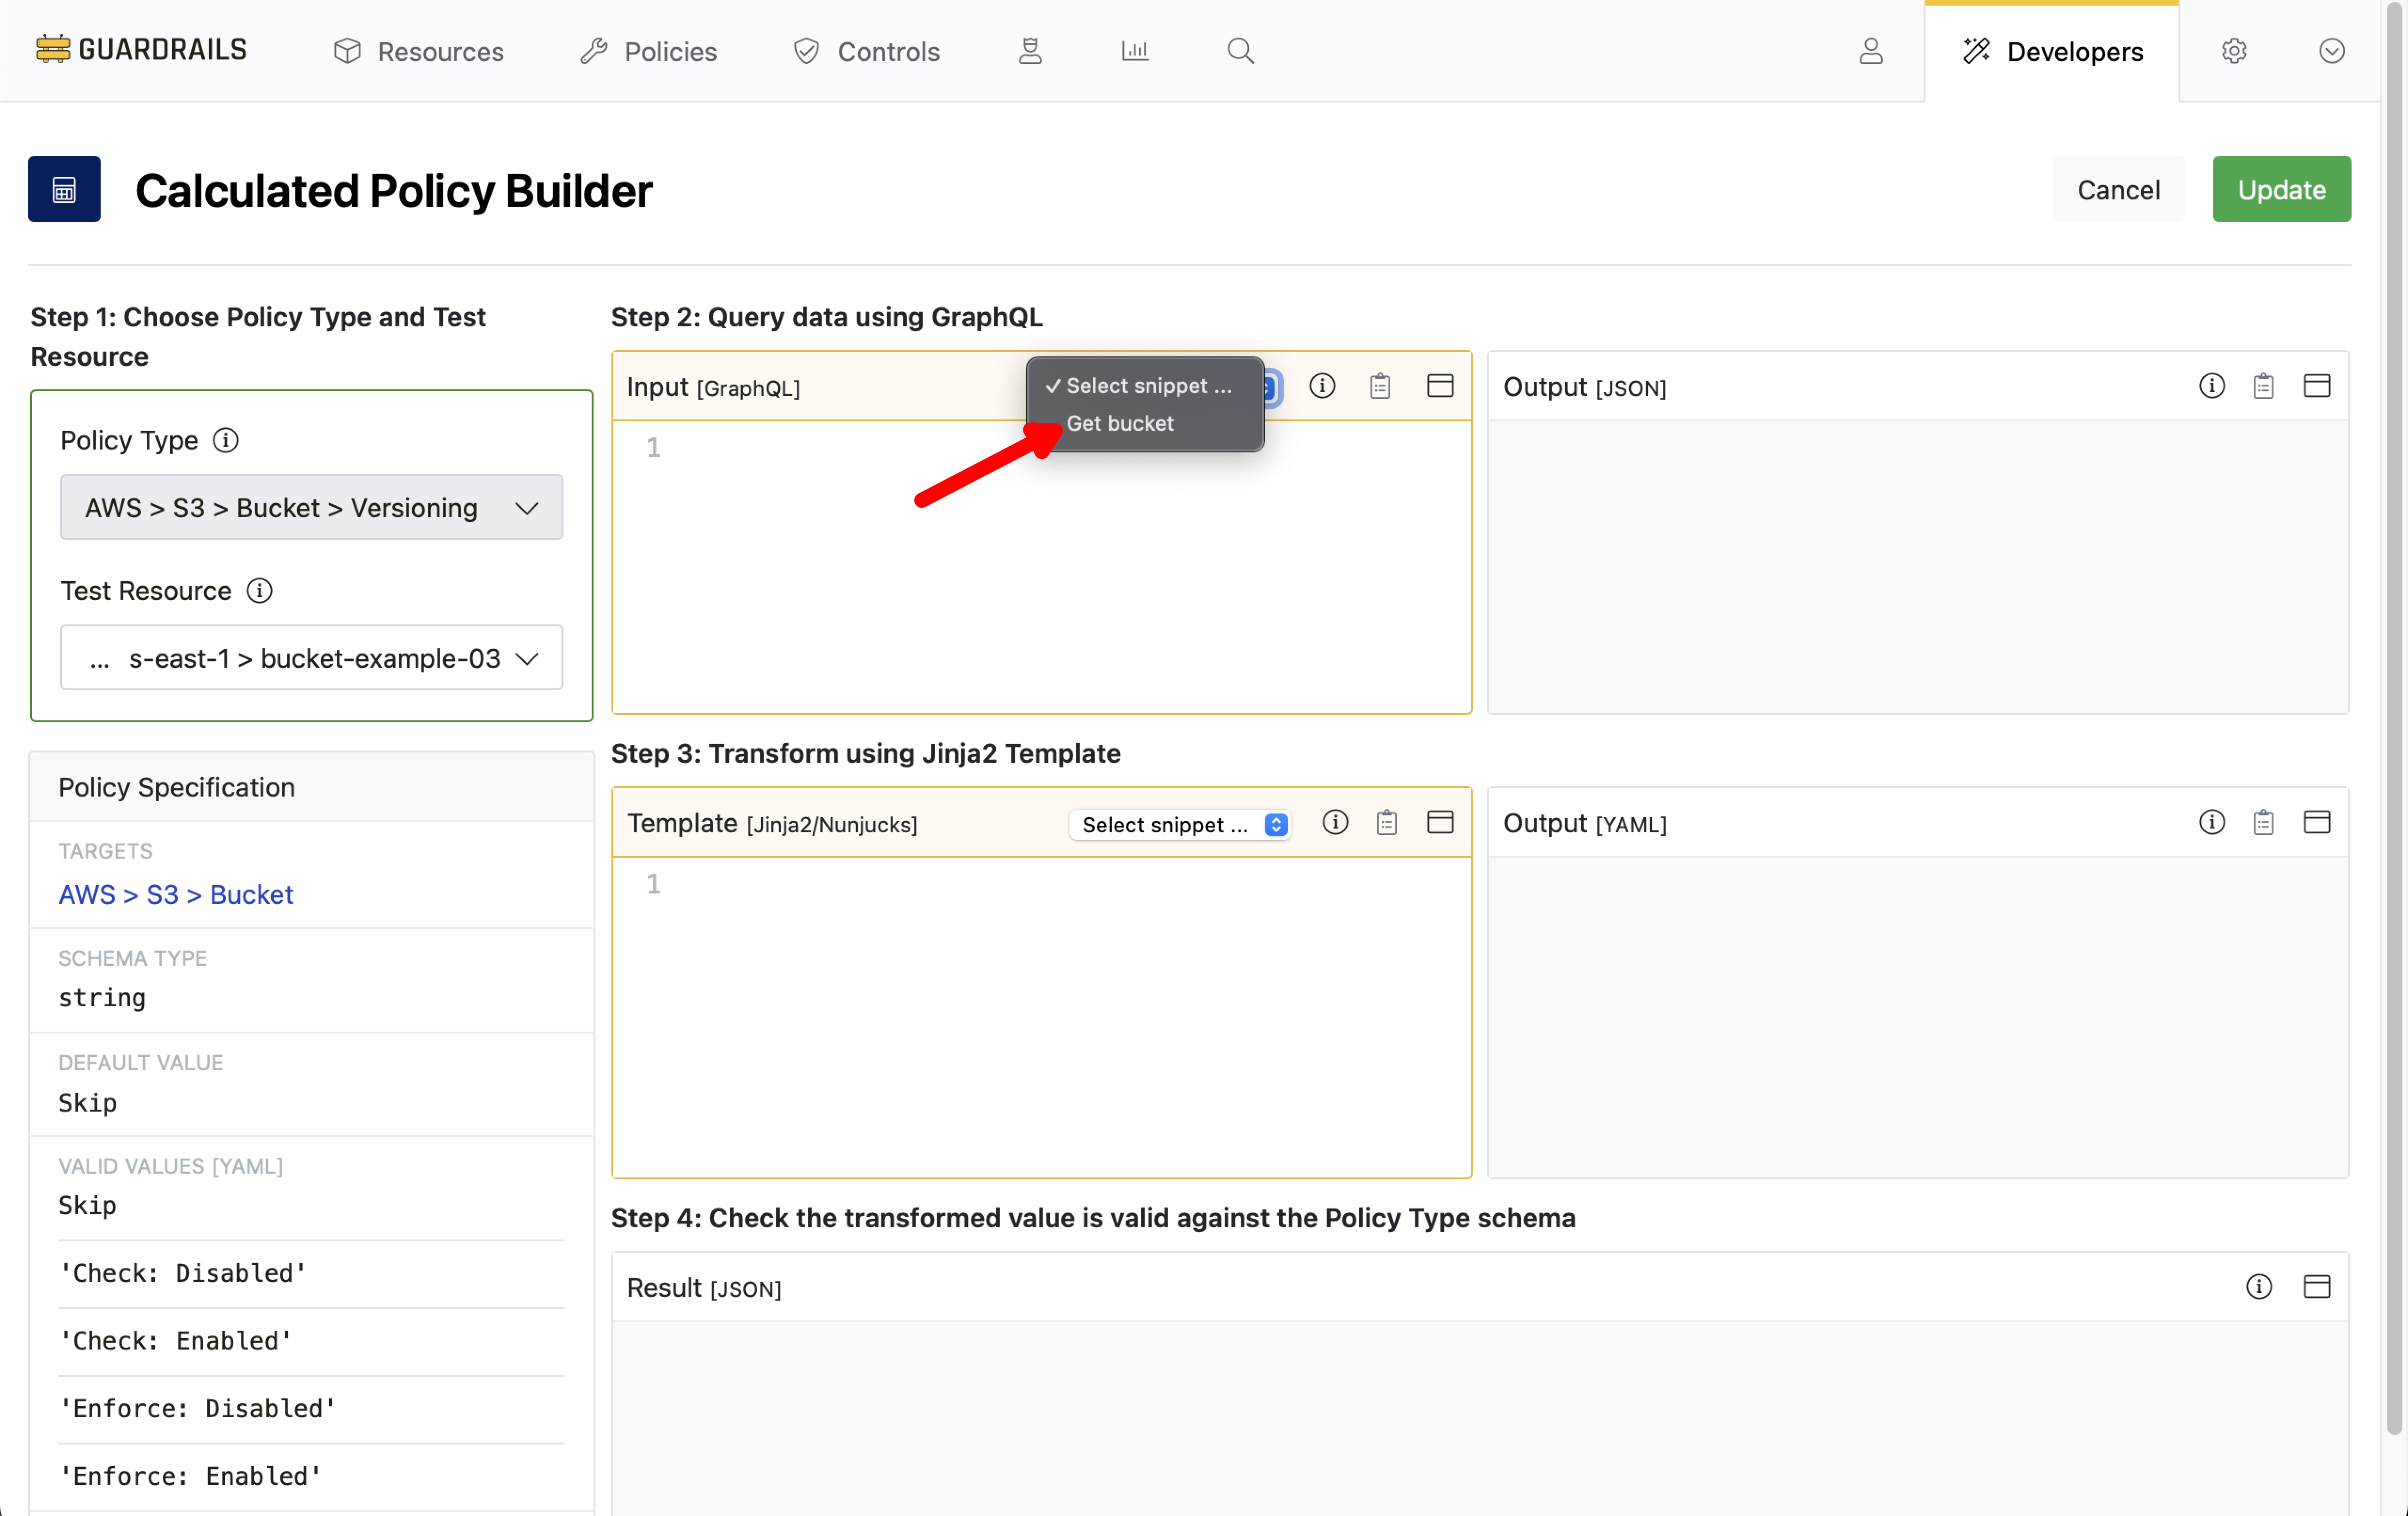
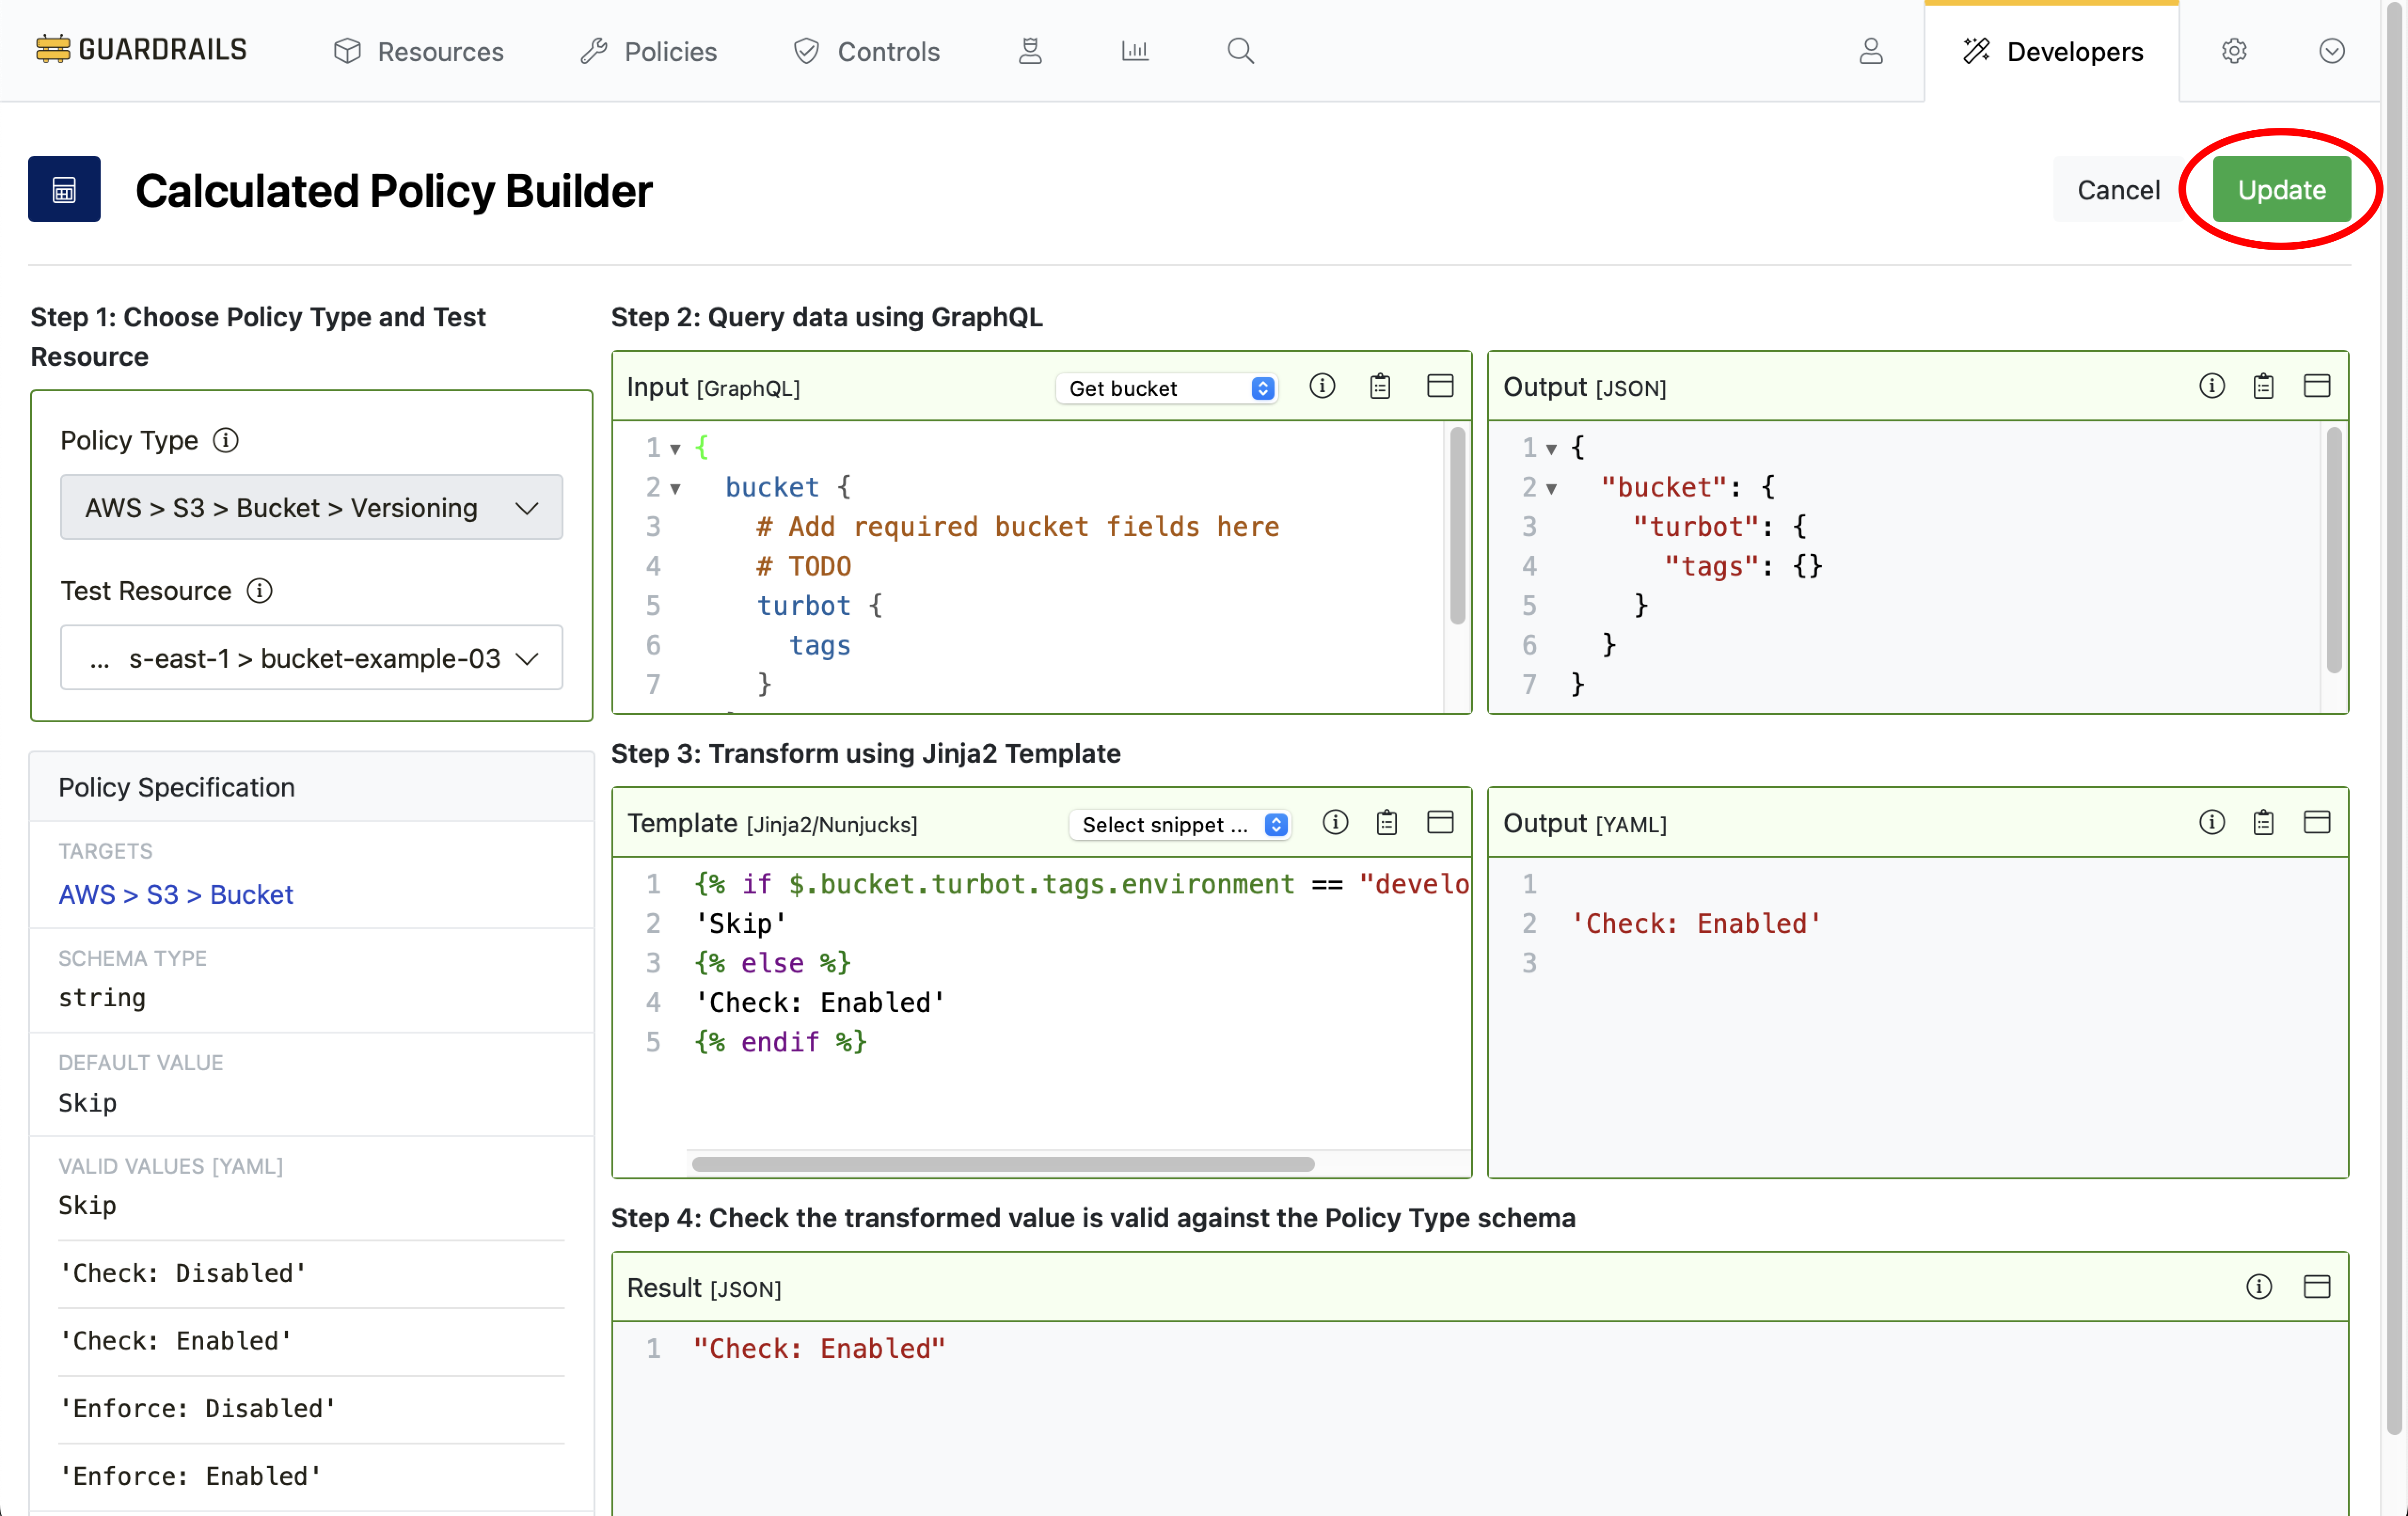
Step 6: Build query
In the Query Input field we will use Select Snippet to prepopulate our GraphQL query. Choose Get bucket from the dropdown.
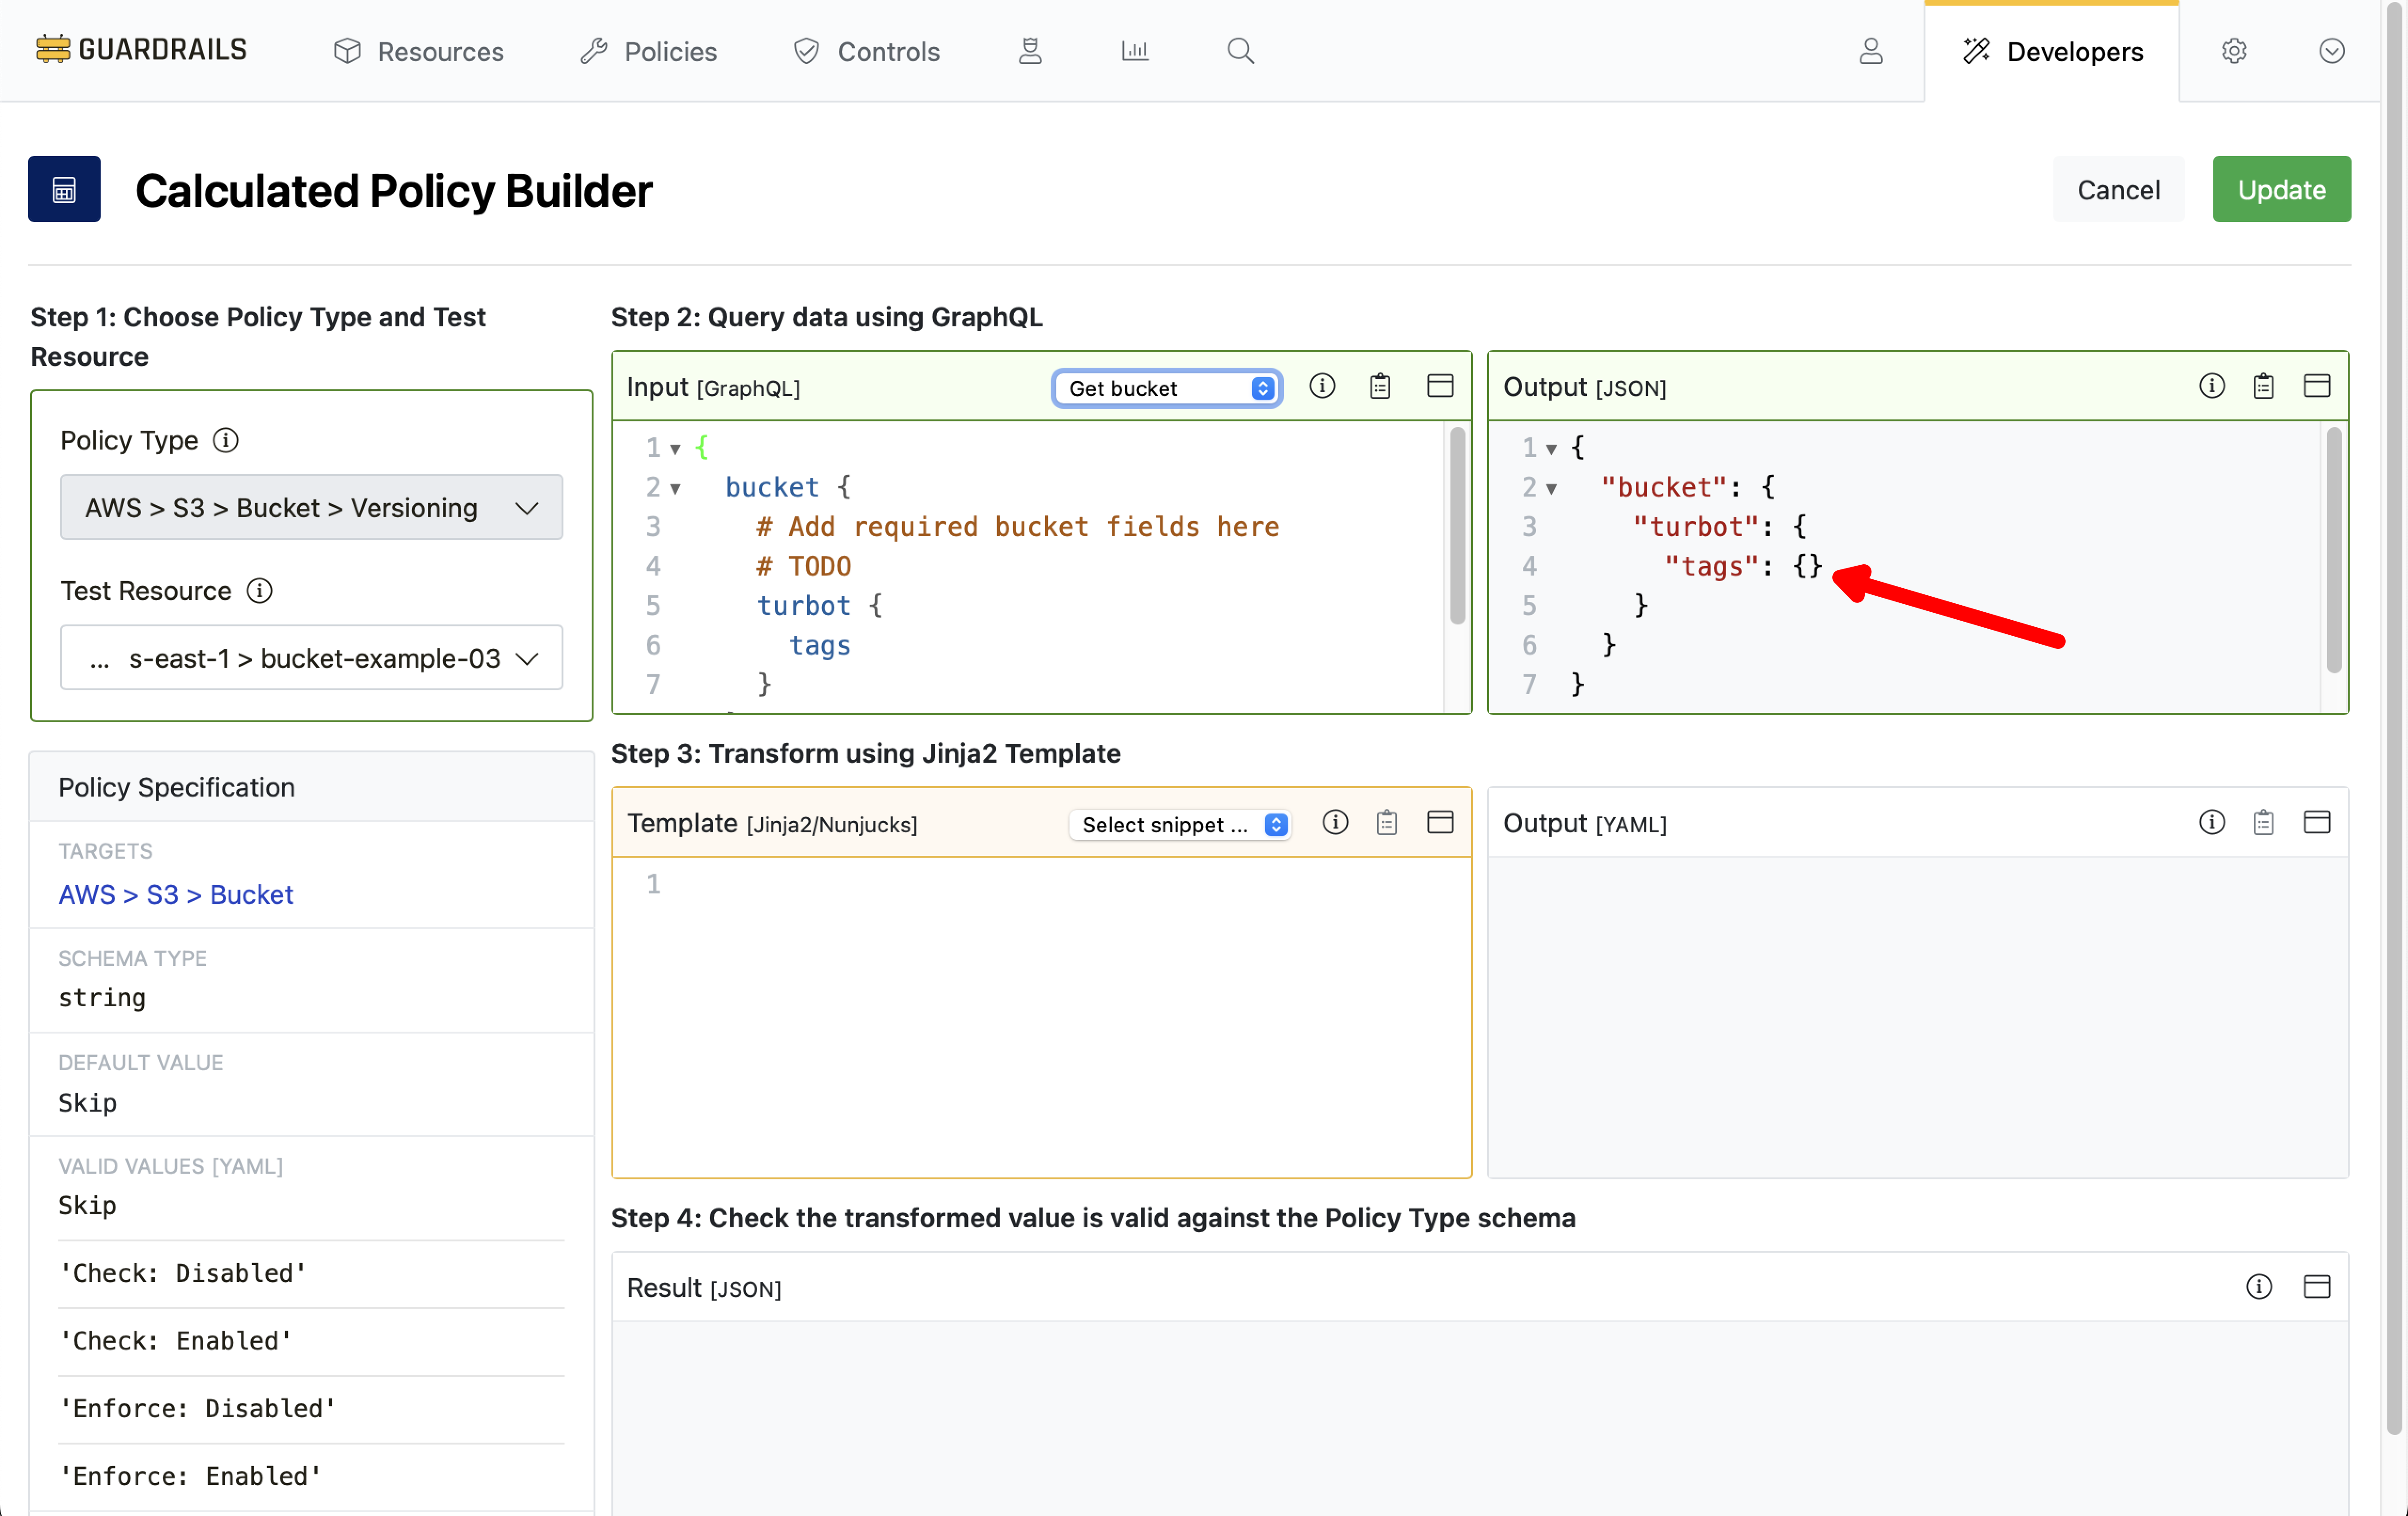
Step 7: View query result
Guardrails inserts a GraphQL query for bucket tags into the Input pane, and then runs the query against the selected test resource. The result, in the Output pane, shows there are no tags on the bucket.
Step 8: Add the Jinja2 template
Our business logic is created in the Template section, using Nunjucks syntax.
Copy this template code:
{% if $.bucket.turbot.tags.environment == "development" %}
'Skip'
{% else %}
'Check: Enabled'
{% endif %}
And paste it into the template pane.
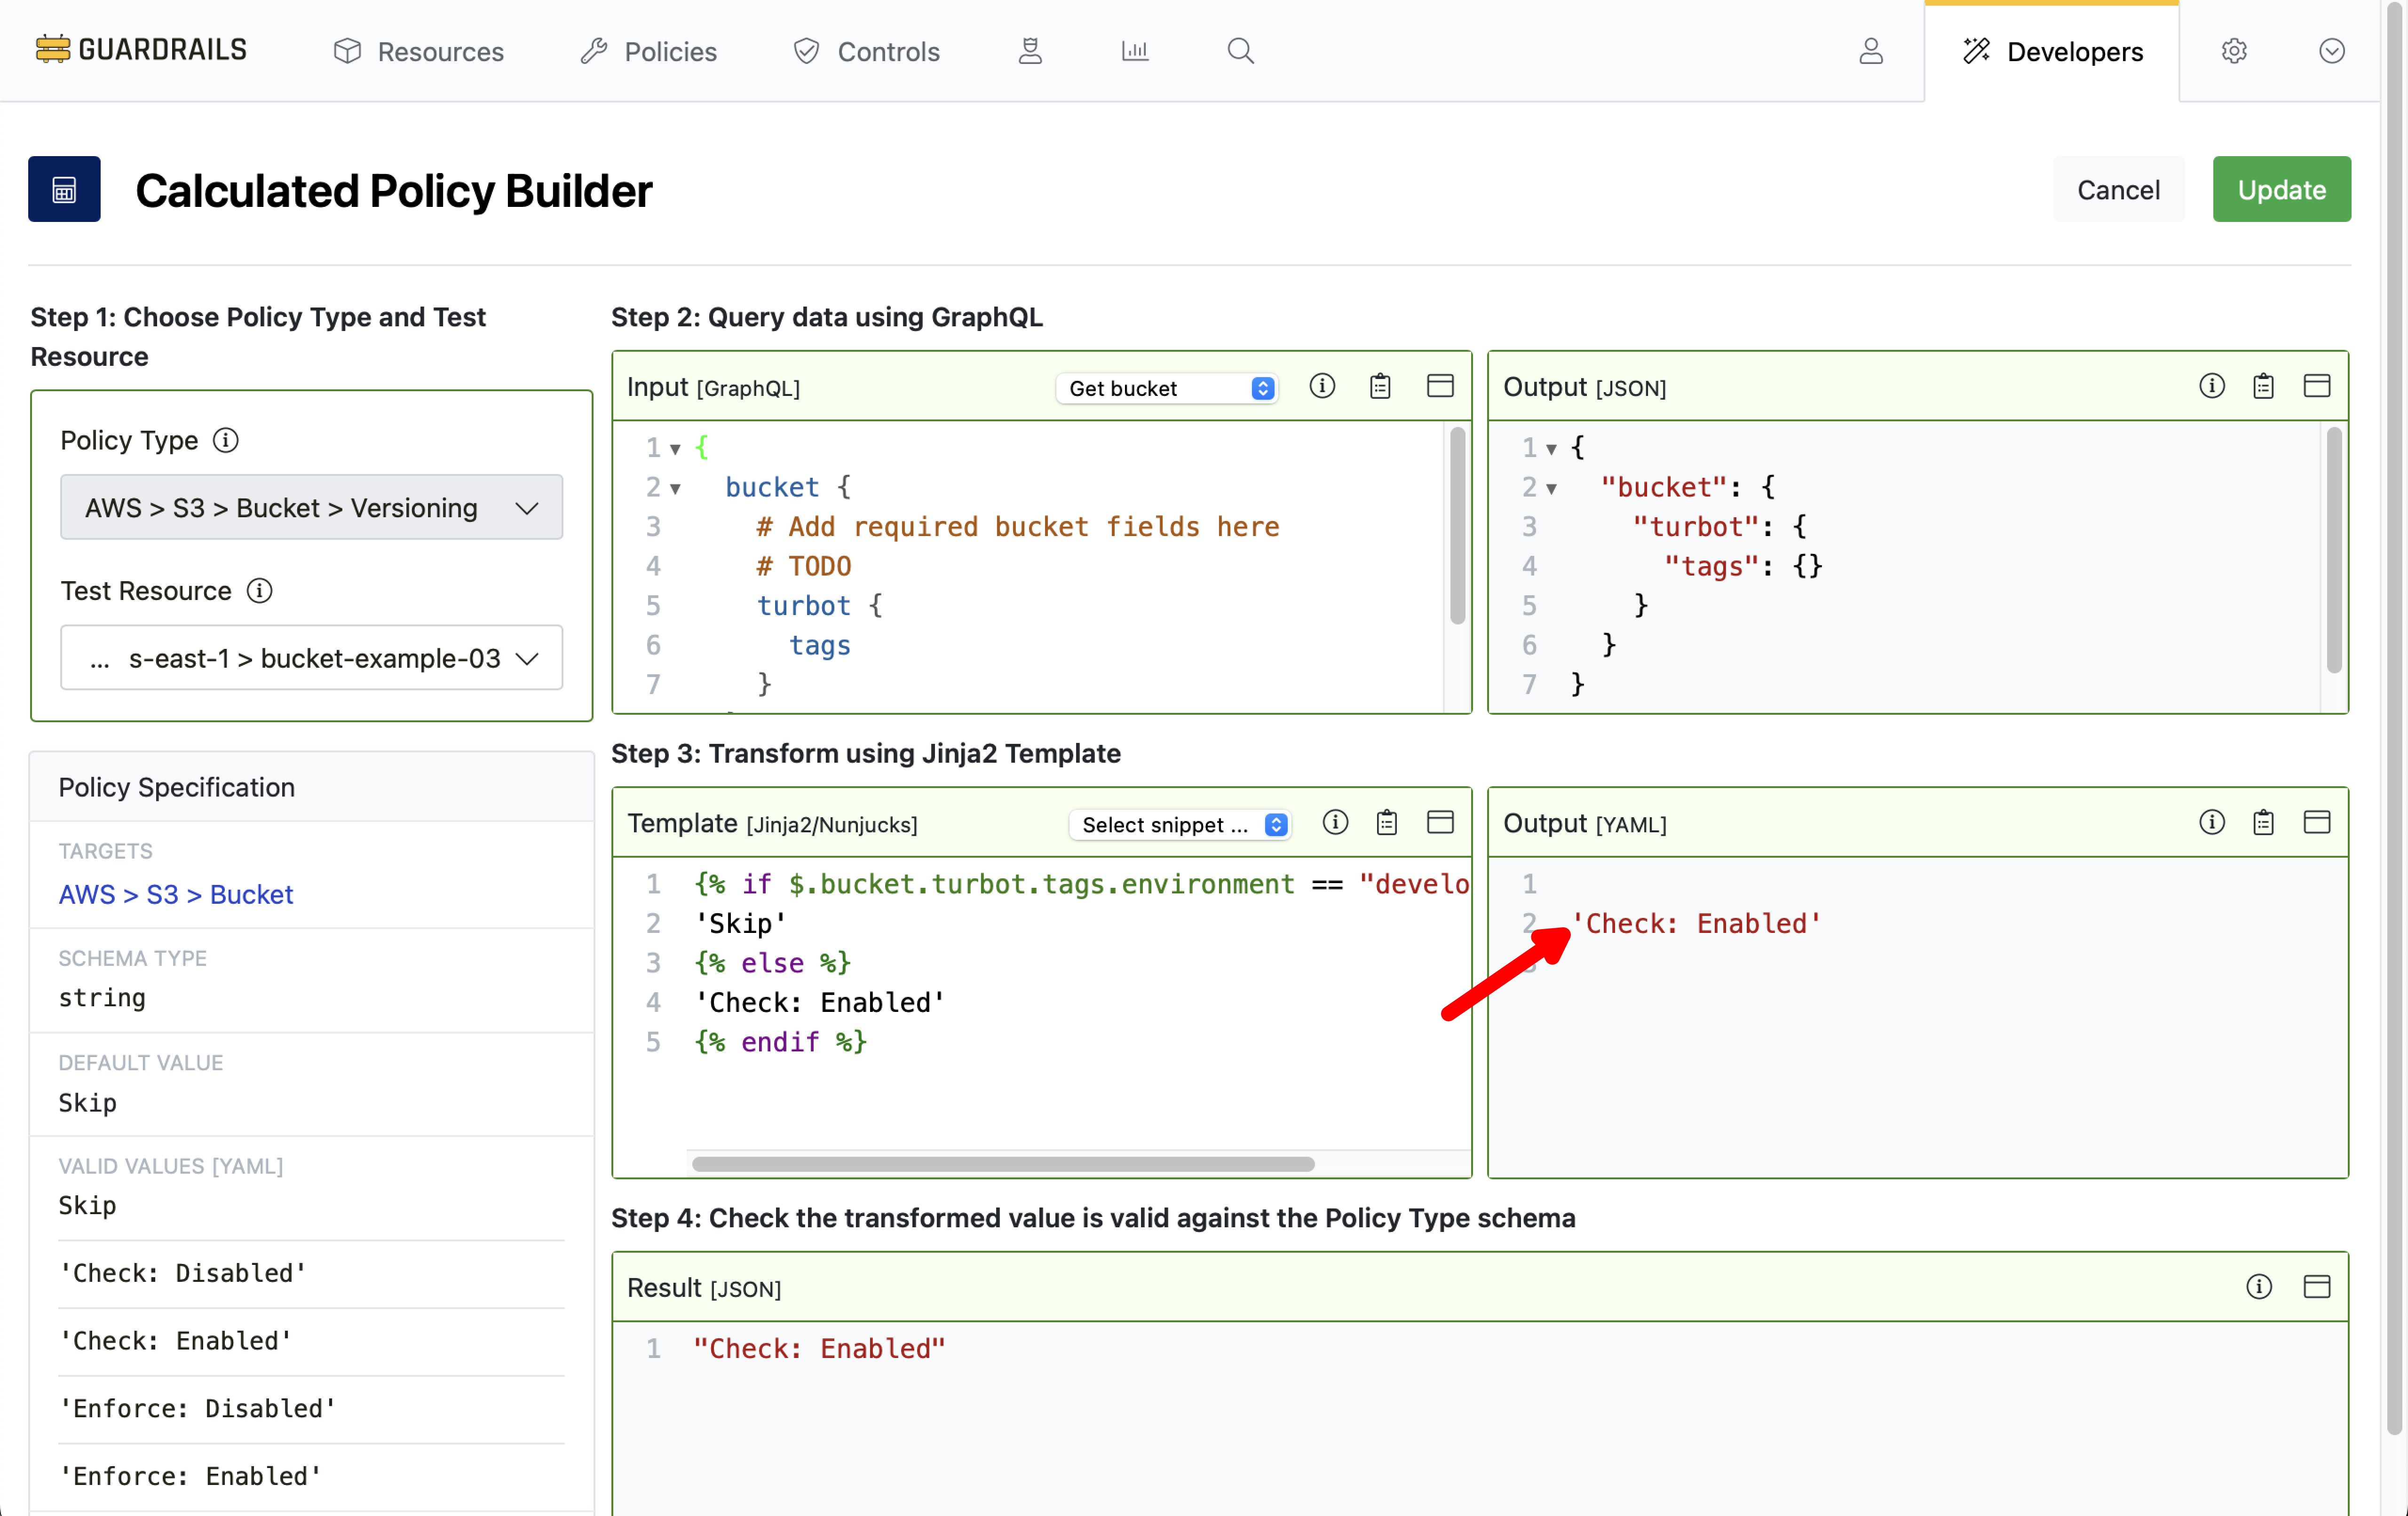
Guardrails immediately evaluates the template in the context of the chosen Test Resource. The template output, Check: Enabled, is the calculated policy value that will govern any bucket’s AWS > S3 > Bucket > Versioning policy if the bucket is tagged with environment:development. For all others buckets, Guardrails will go into Alarm state if versioning is not enabled.
The result we see for our test resource confirms that Check: Enabled is the applicable setting for this bucket. Why? Because the test bucket does not have a tag { "environment": "development" }.
Select Update.
Step 9: Save the calculated policy to the policy pack
Select Update.
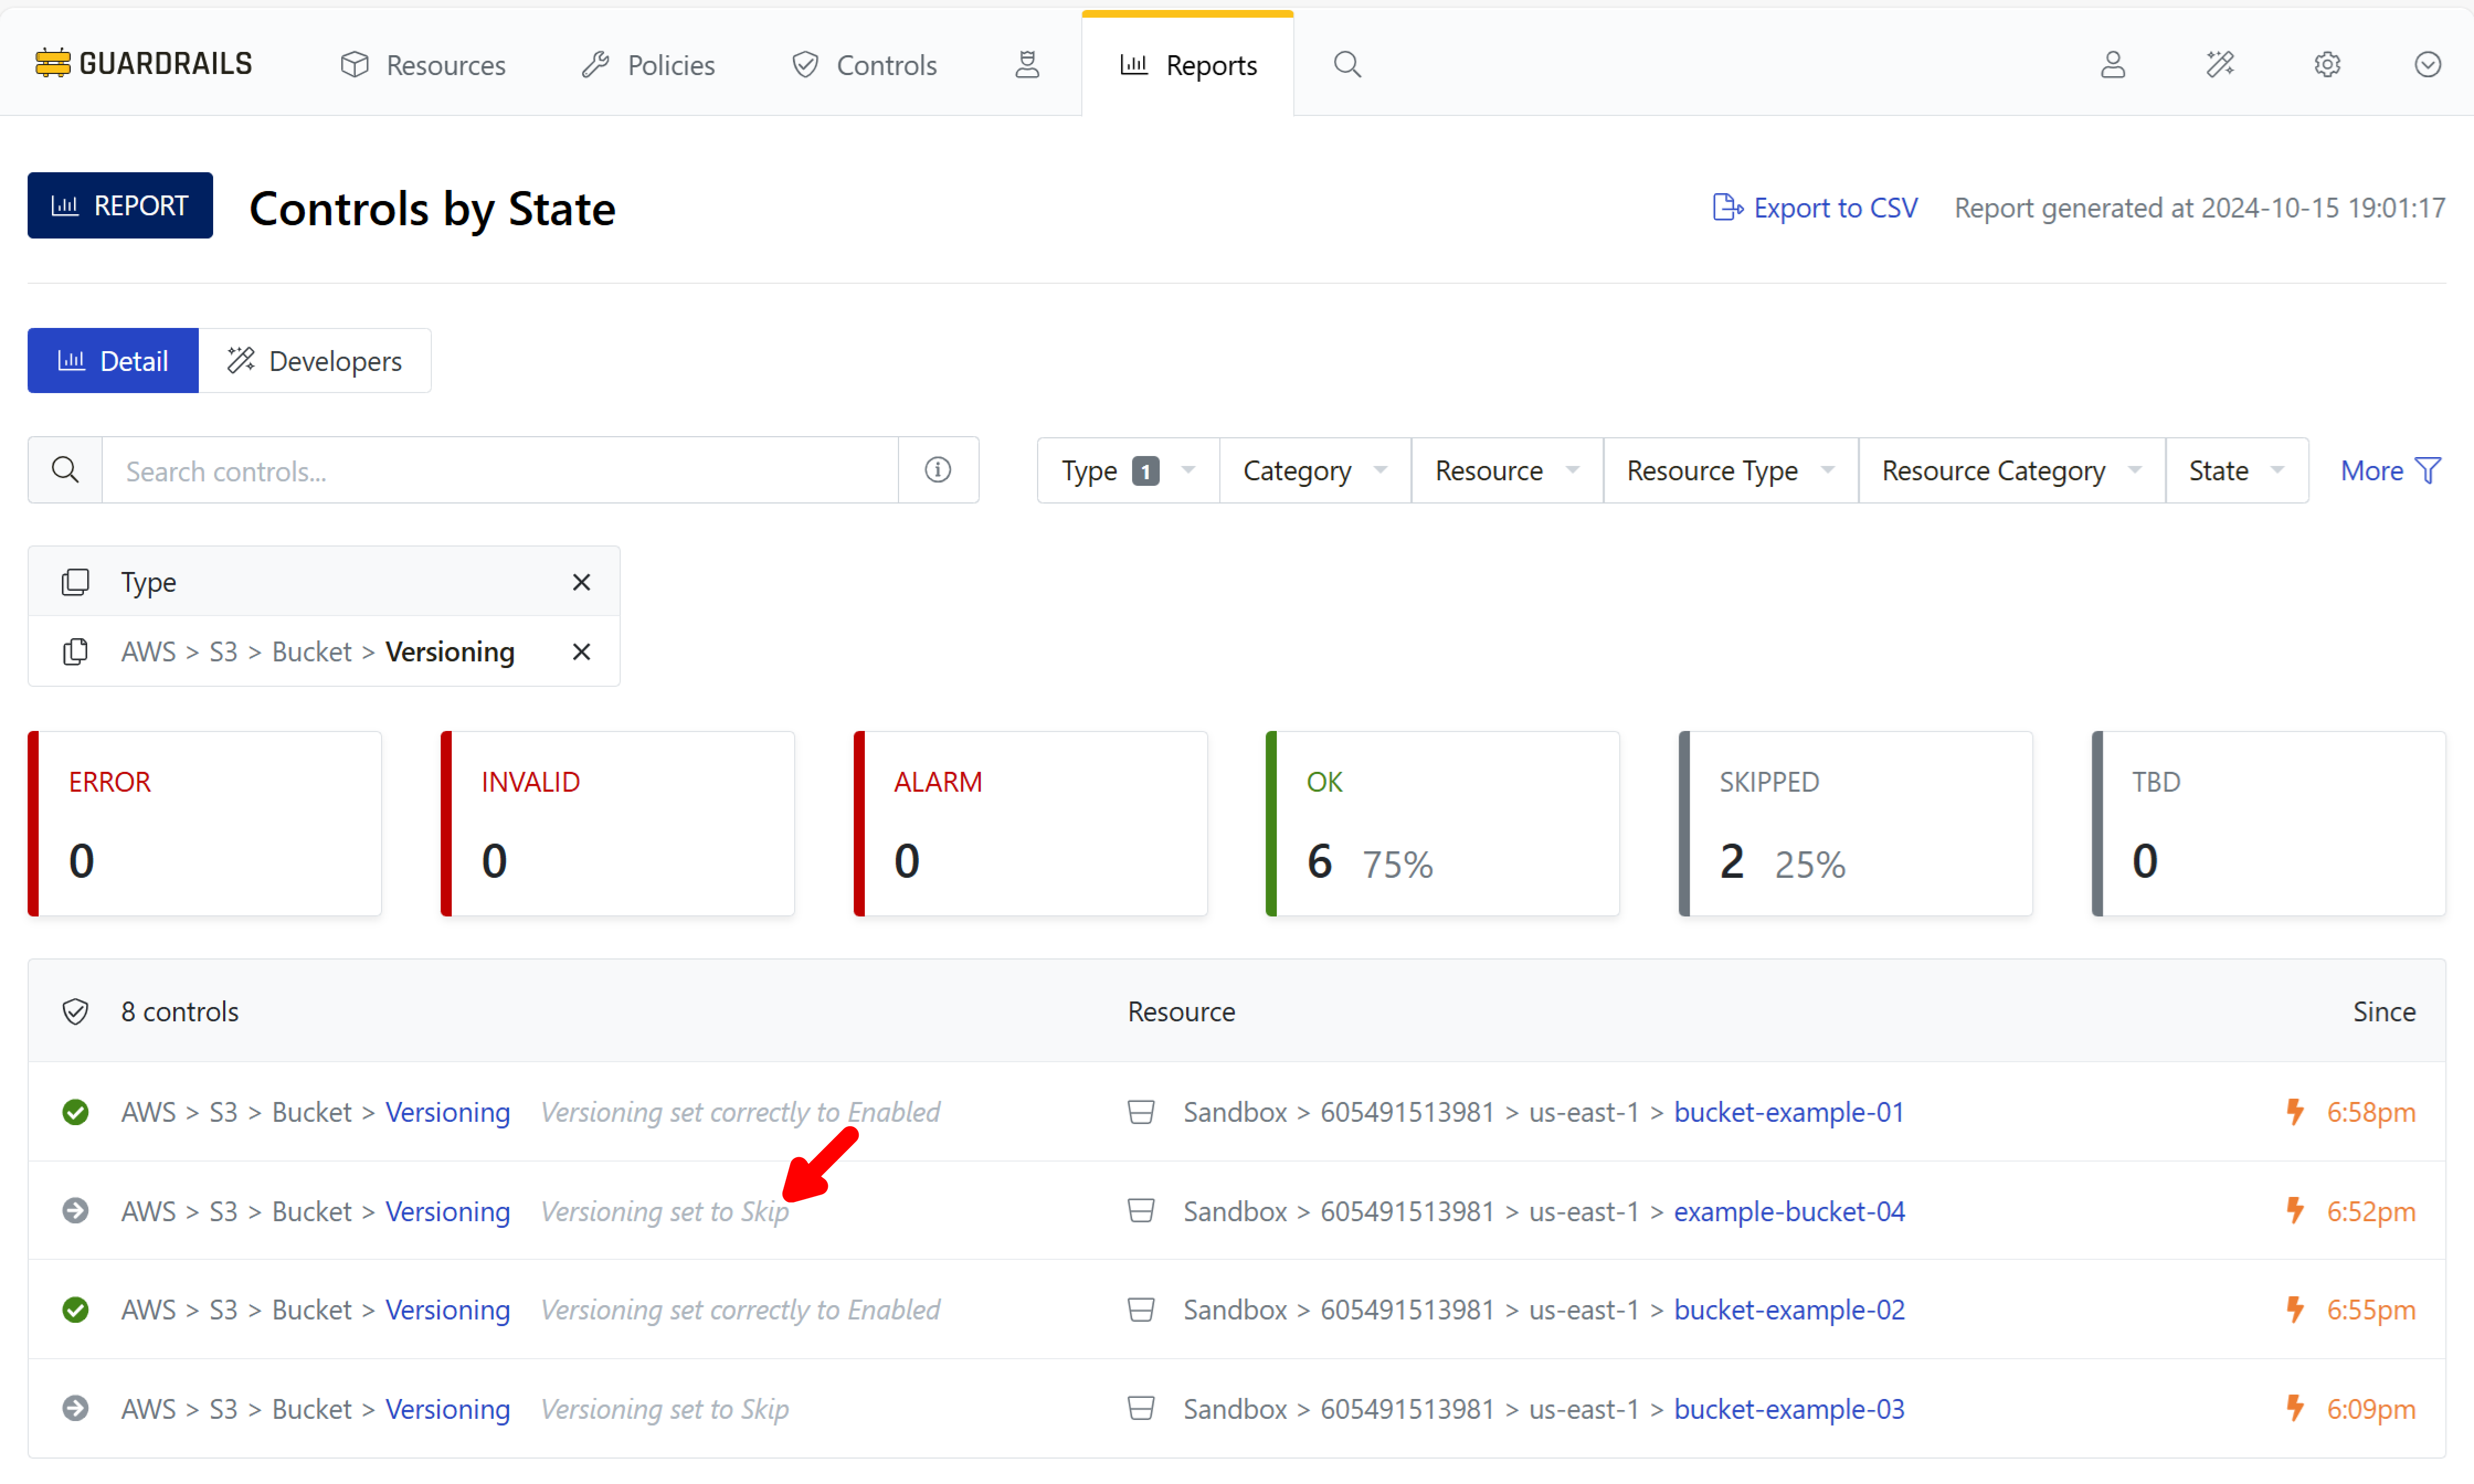
Step 10: Observe controls for bucket versioning
Navigate back to the Controls by State report and set the Type filter to AWS > S3 > Bucket > Versioning. Buckets with versioning enabled will be in the OK state. Find a bucket in the Alarm state to modify, and note its name.

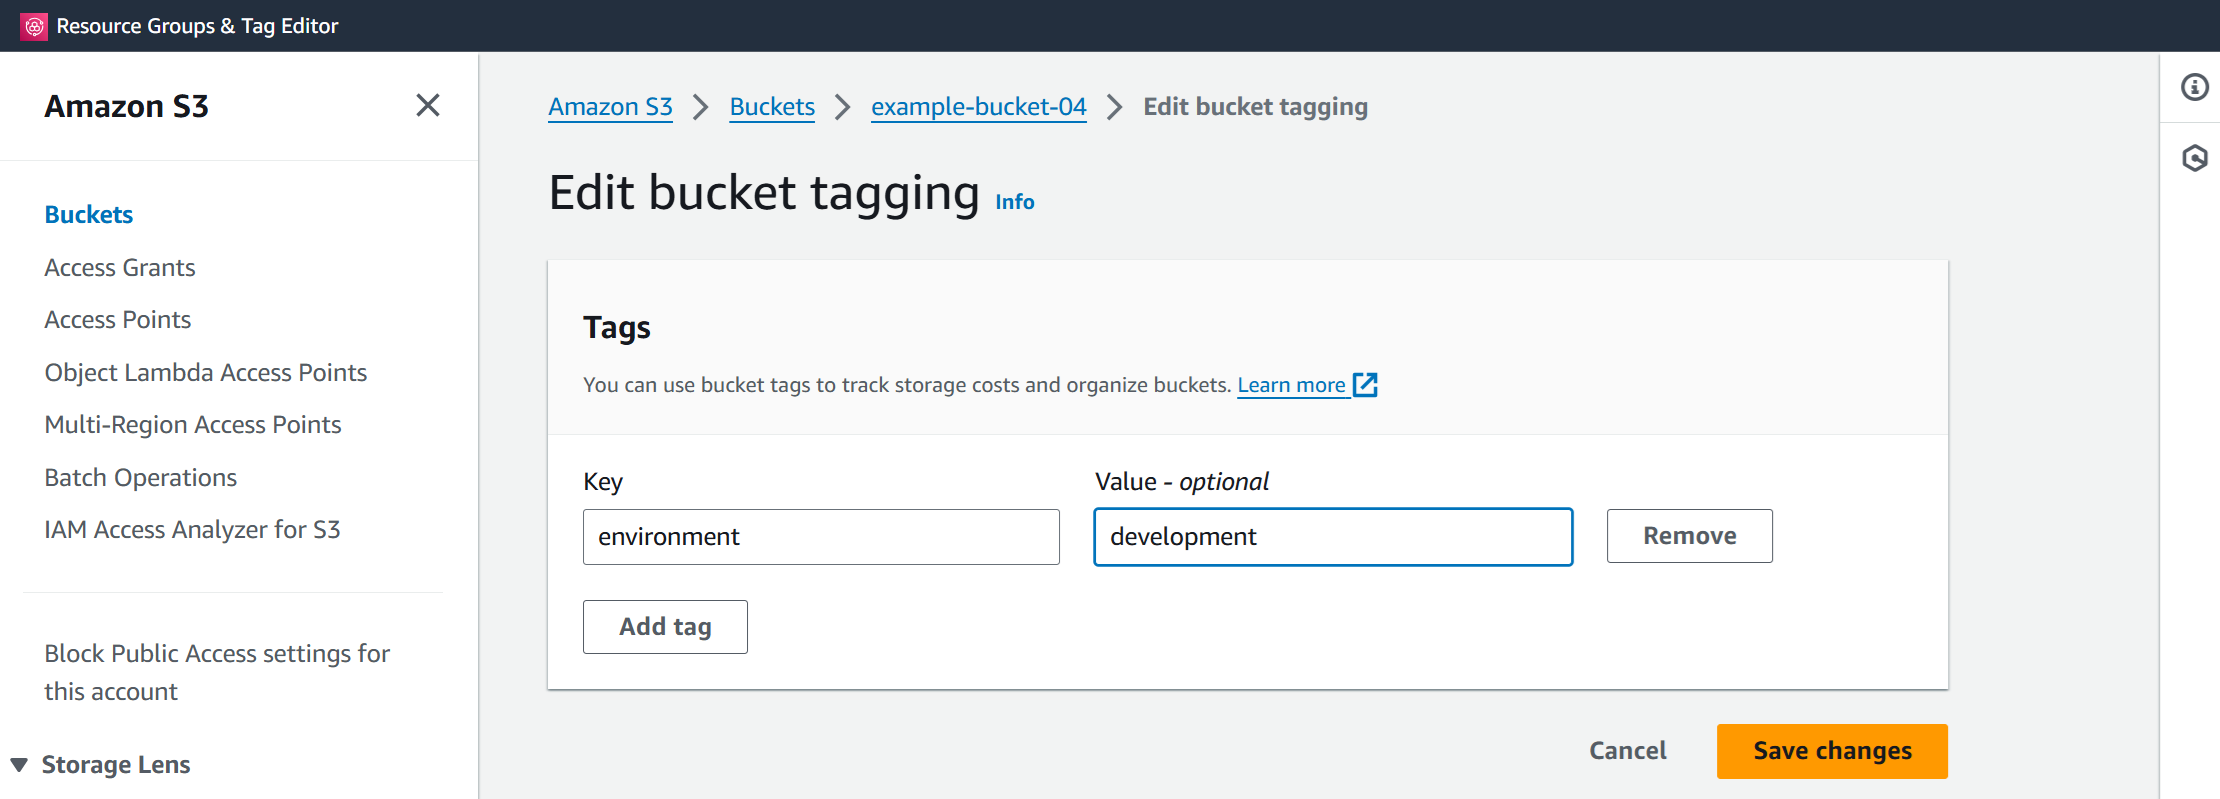
Step 11: Tag the bucket
Open the AWS console in another tab, navigate to the bucket identified in the previous step, and assign the tag environment:development to it.
Step 12: Observe the effect
Return to the Controls by State report in the previous browser tab. Observe that Guardrails notices the change, reevaluates the resource, runs the calculated policy, and changes the status from Alarm to Skipped.
Step 13: Review
In this guide you created your first calculated policy and tested it using the S3 bucket versioning control.
Next Steps
In the next guide we’ll see how to subscribe to these status alerts via email, Slack, or MS Teams.
Progress tracker
- Prepare an AWS Account for Import to Guardrails
- Connect an AWS Account to Guardrails
- Observe AWS Resource Activity
- Enable Your First Policy Pack
- Review Account-Wide Governance
- Create a Static Exception to a Guardrails Policy
- Create a Calculated Exception to a Guardrails Policy
- Send an Alert to Email
- Apply a Quick Action
- Enable Automatic Enforcement