Create Workspace
Create Workspace
In this guide, you will:
- Use AWS CloudFormation service to create Turbot Guardrails Workspace through Workspace Manager CloudFormation Template.
A Workspace is an independent tenant of Guardrails, with its own version and its own schema (logical shard) in a hive. Each Workspace has its own root resource as Turbot, its own set of mods, and its own web console endpoint. Workspaces will use the Collective, Hive, and versions that you deployed previously, using the TEF, TED, and TE products in the Service Catalog.
Workspaces are deployed and managed using Guardrails Workspace Manager, which is implemented as a CloudFormation custom resource.
Prerequisites
- Ensure the Guardrails TEF, TED and TE stacks are successfully installed.
- Access to the Guardrails AWS account with Administrator Privileges.
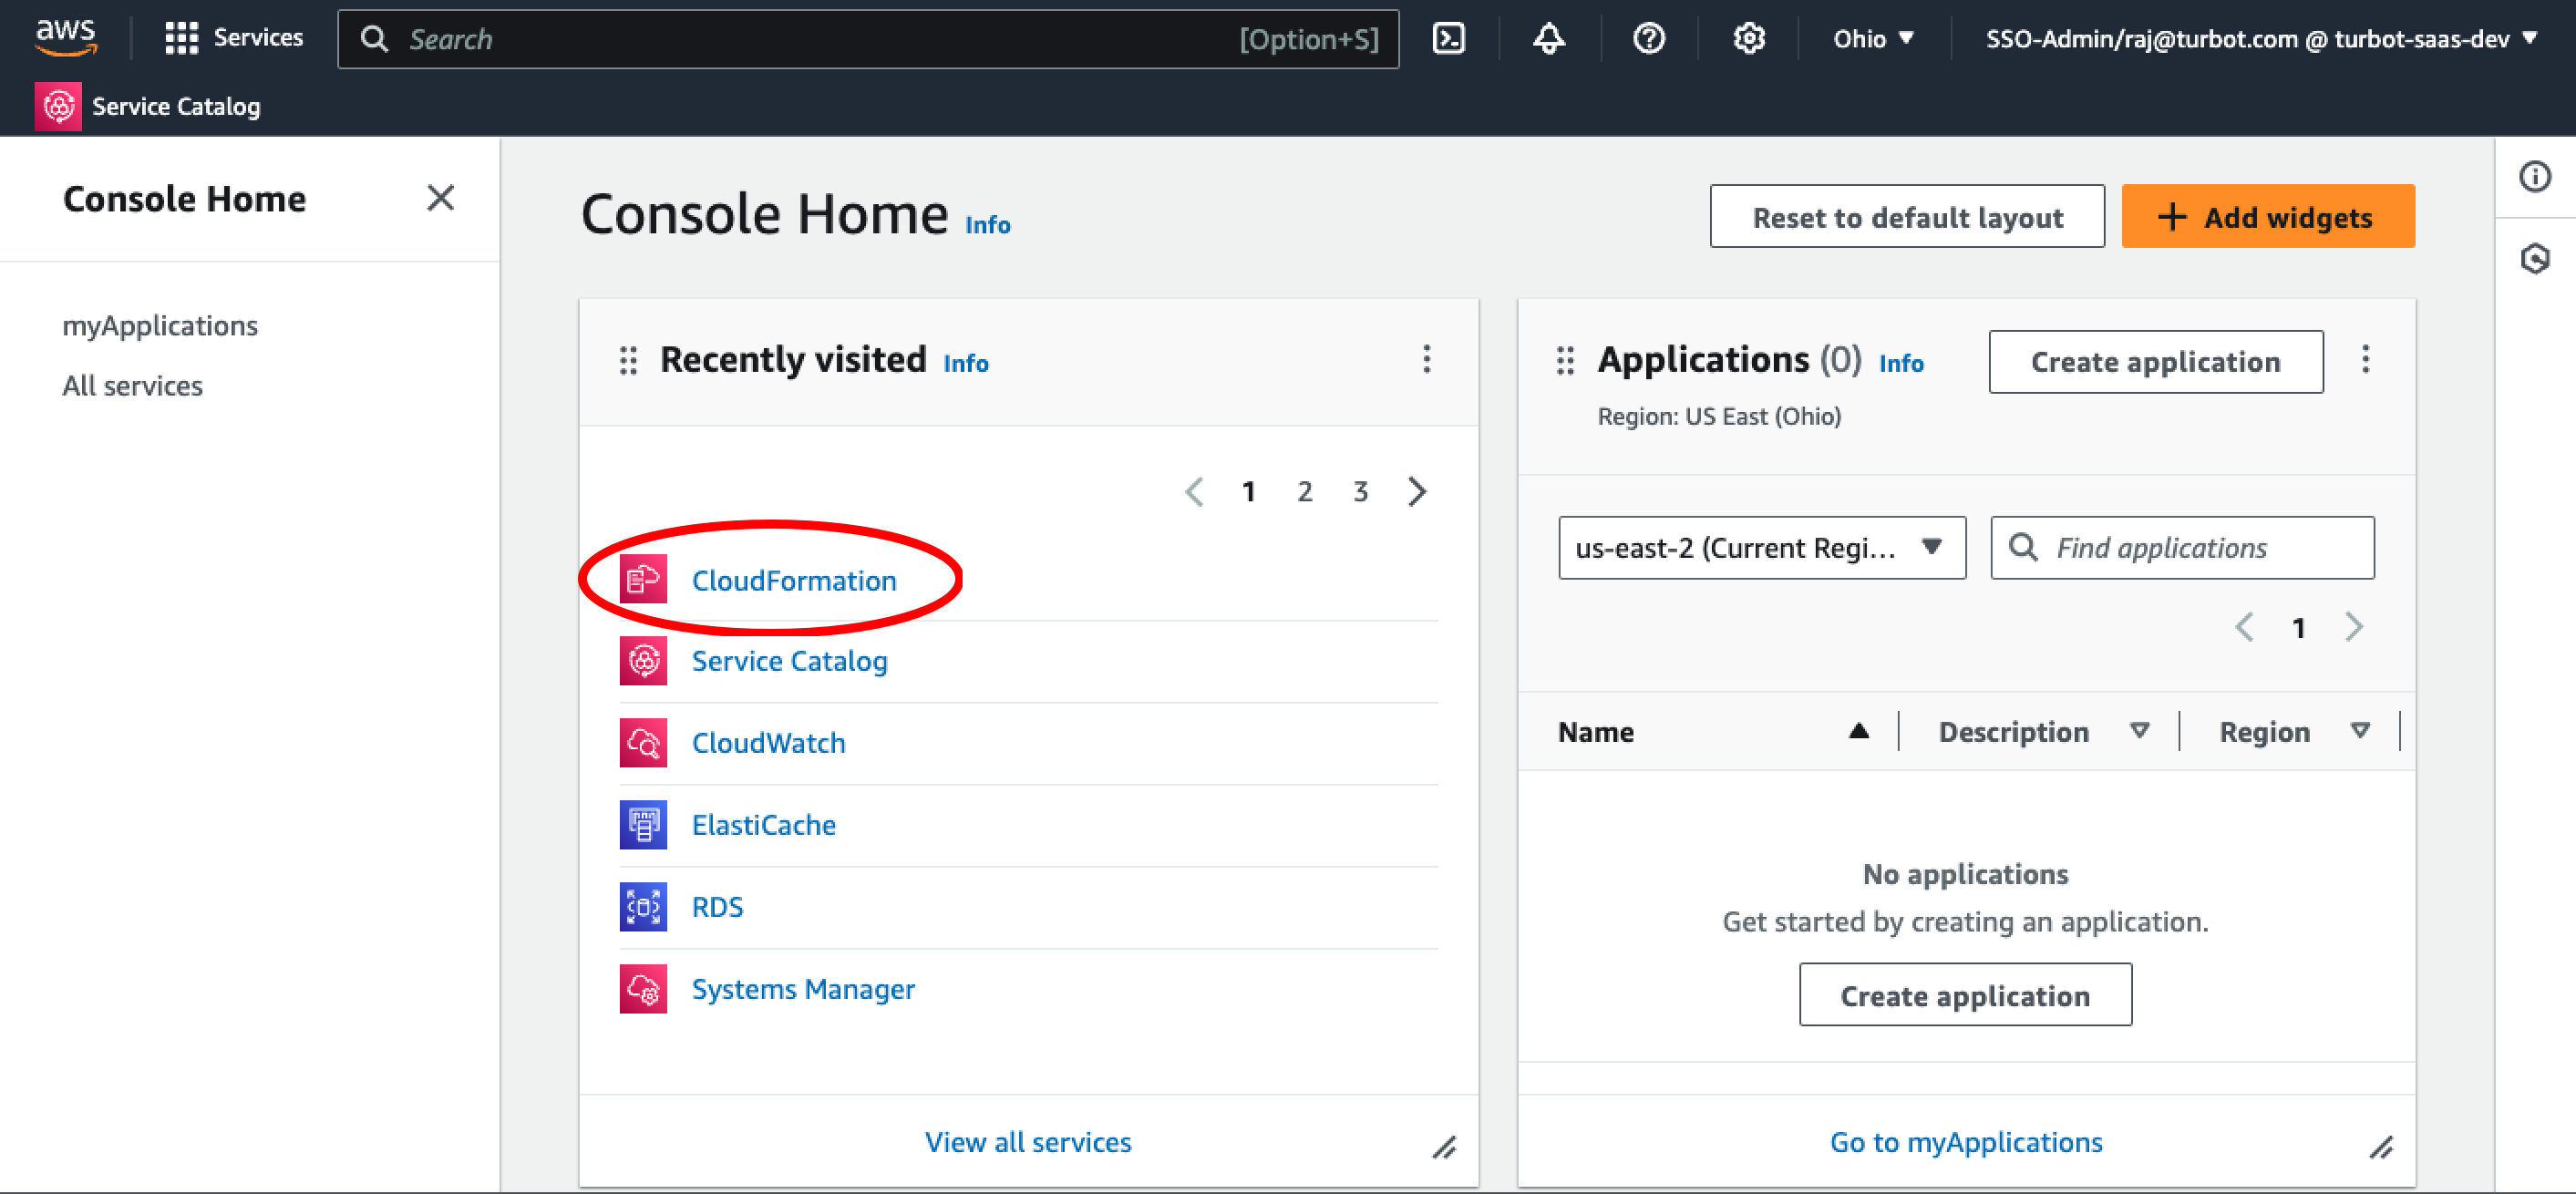
Step 1: Access AWS Console
In the AWS Console, navigate to the CloudFormation service in the alpha region.
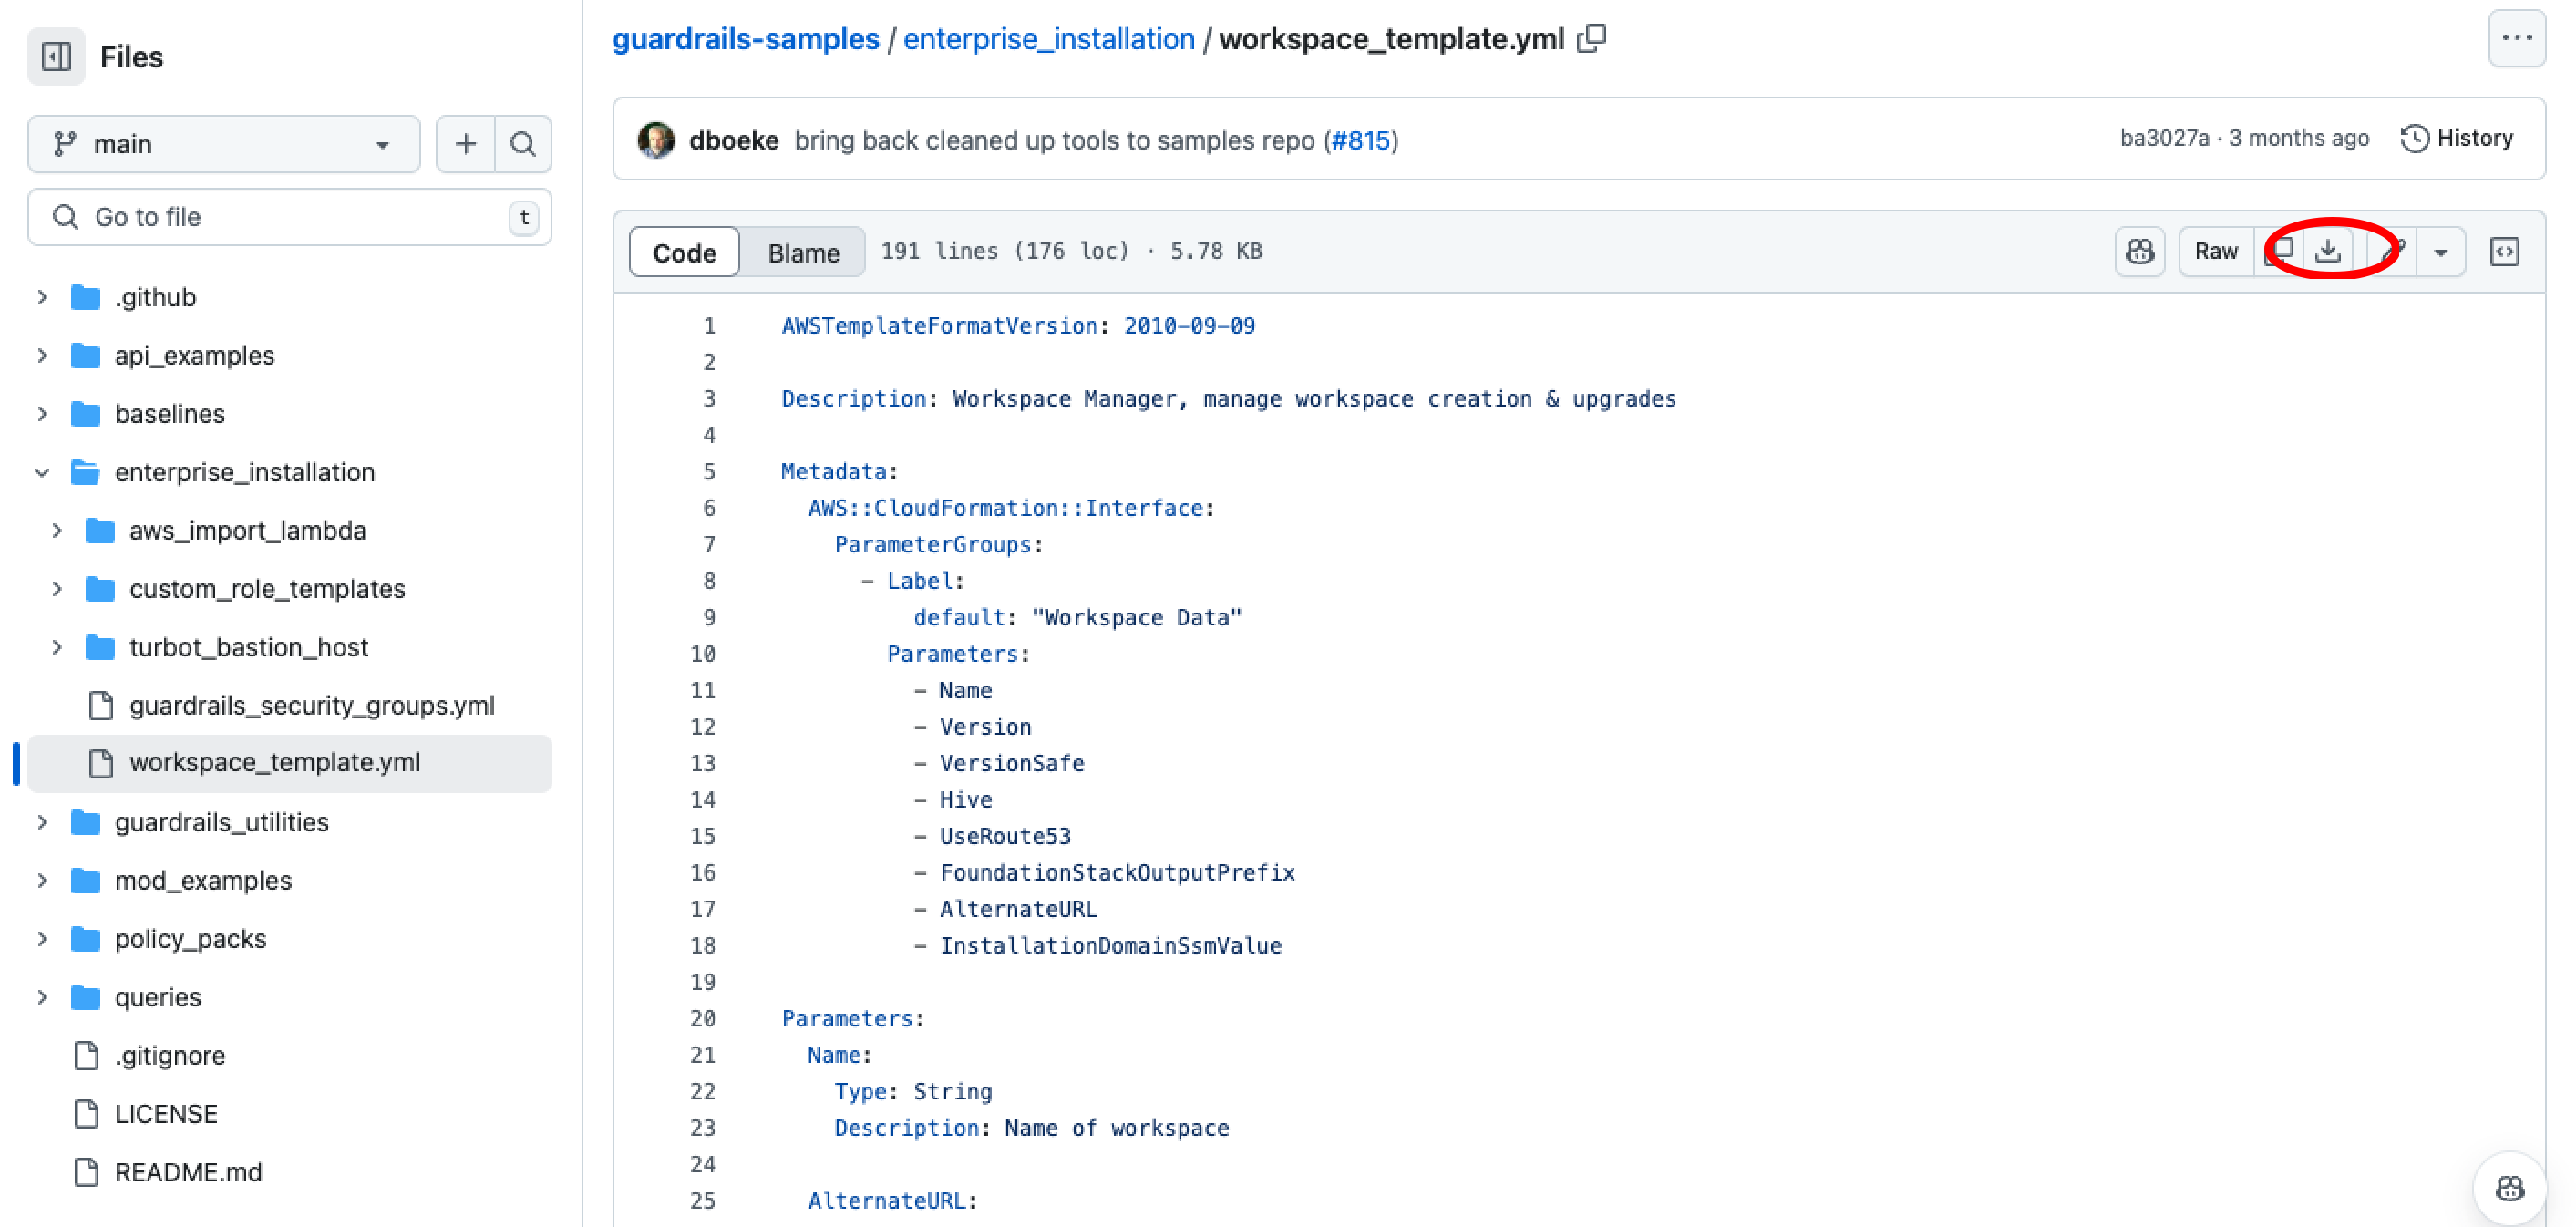
Step 2: Download CloudFormation Template
While the sample template provides a simple, out-of-the box mechanism for deploying a single workspace, it is merely a starting point. You may wish to deploy ALL your workspaces from a single template, so that you can manage versions for all workspaces from a single stack, for instance.
This template is available at Guardrails sample repo. Workspace Manager CloudFormation Template
Download the template.
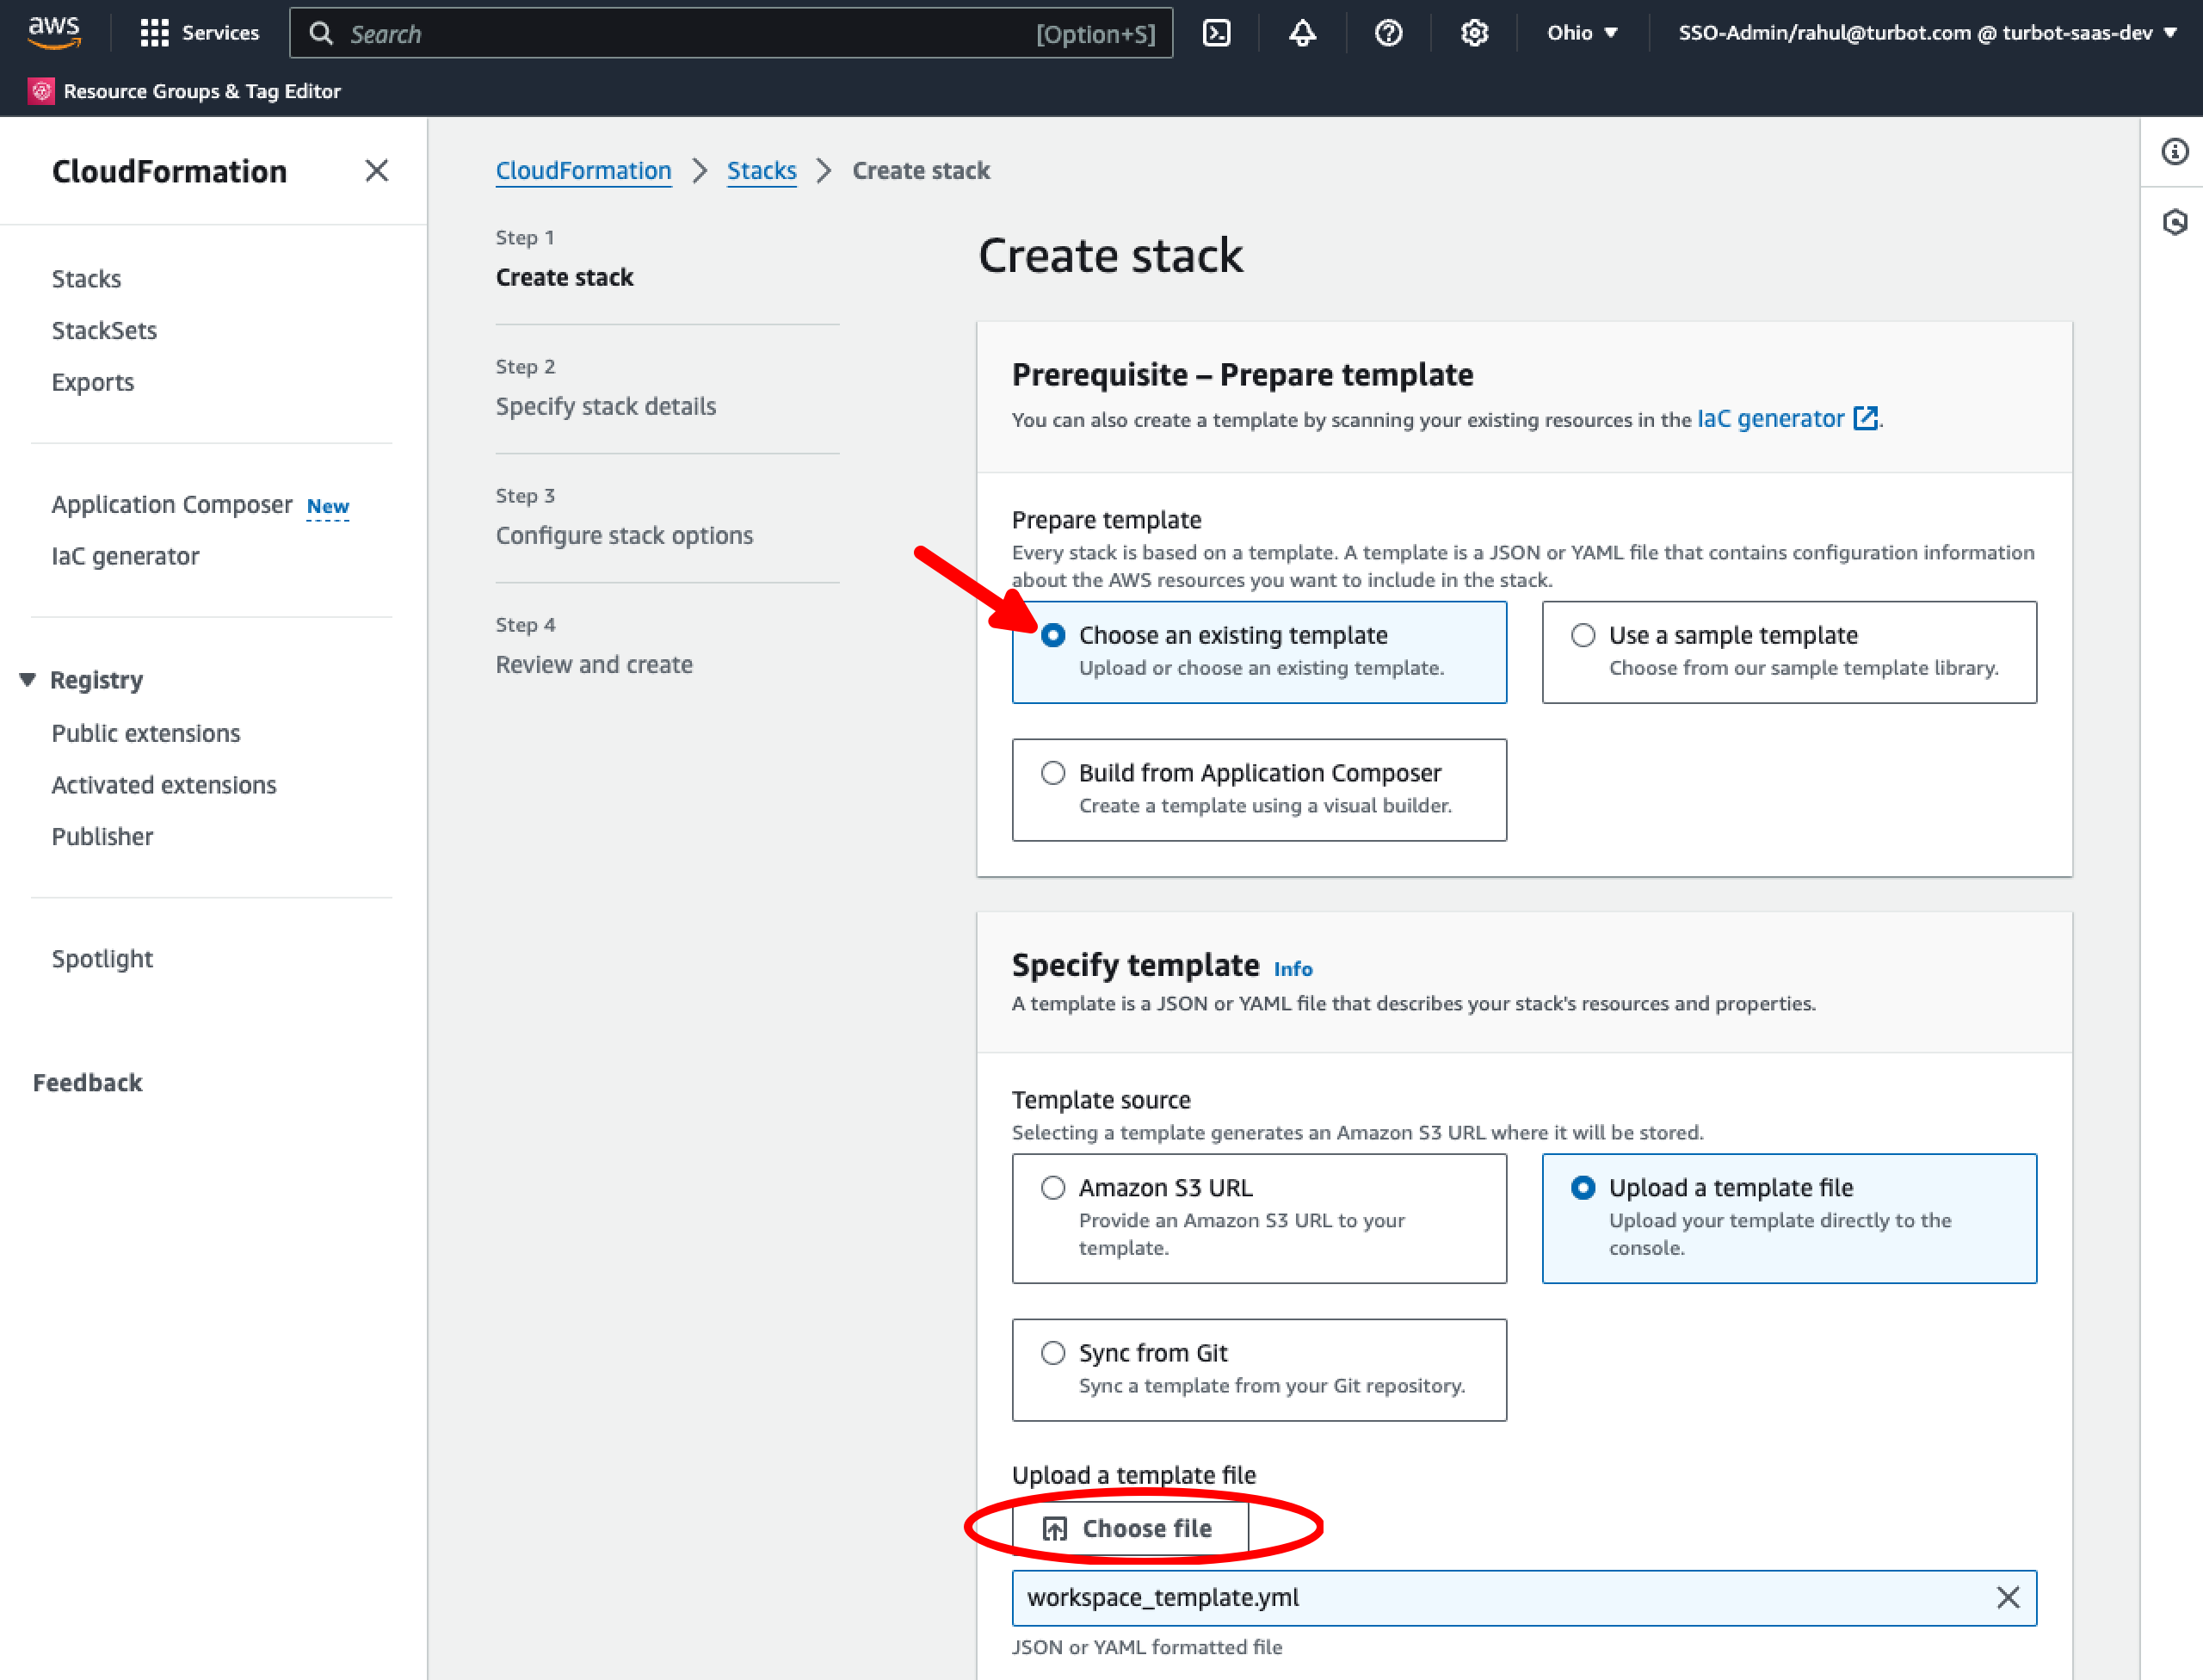
Step 3: Create New Stack
Create a new stack, using the Choose existing template option by uploading the template file in Choose file, provide the Sample Workspace Manager CloudFormation Template previously downloaded.
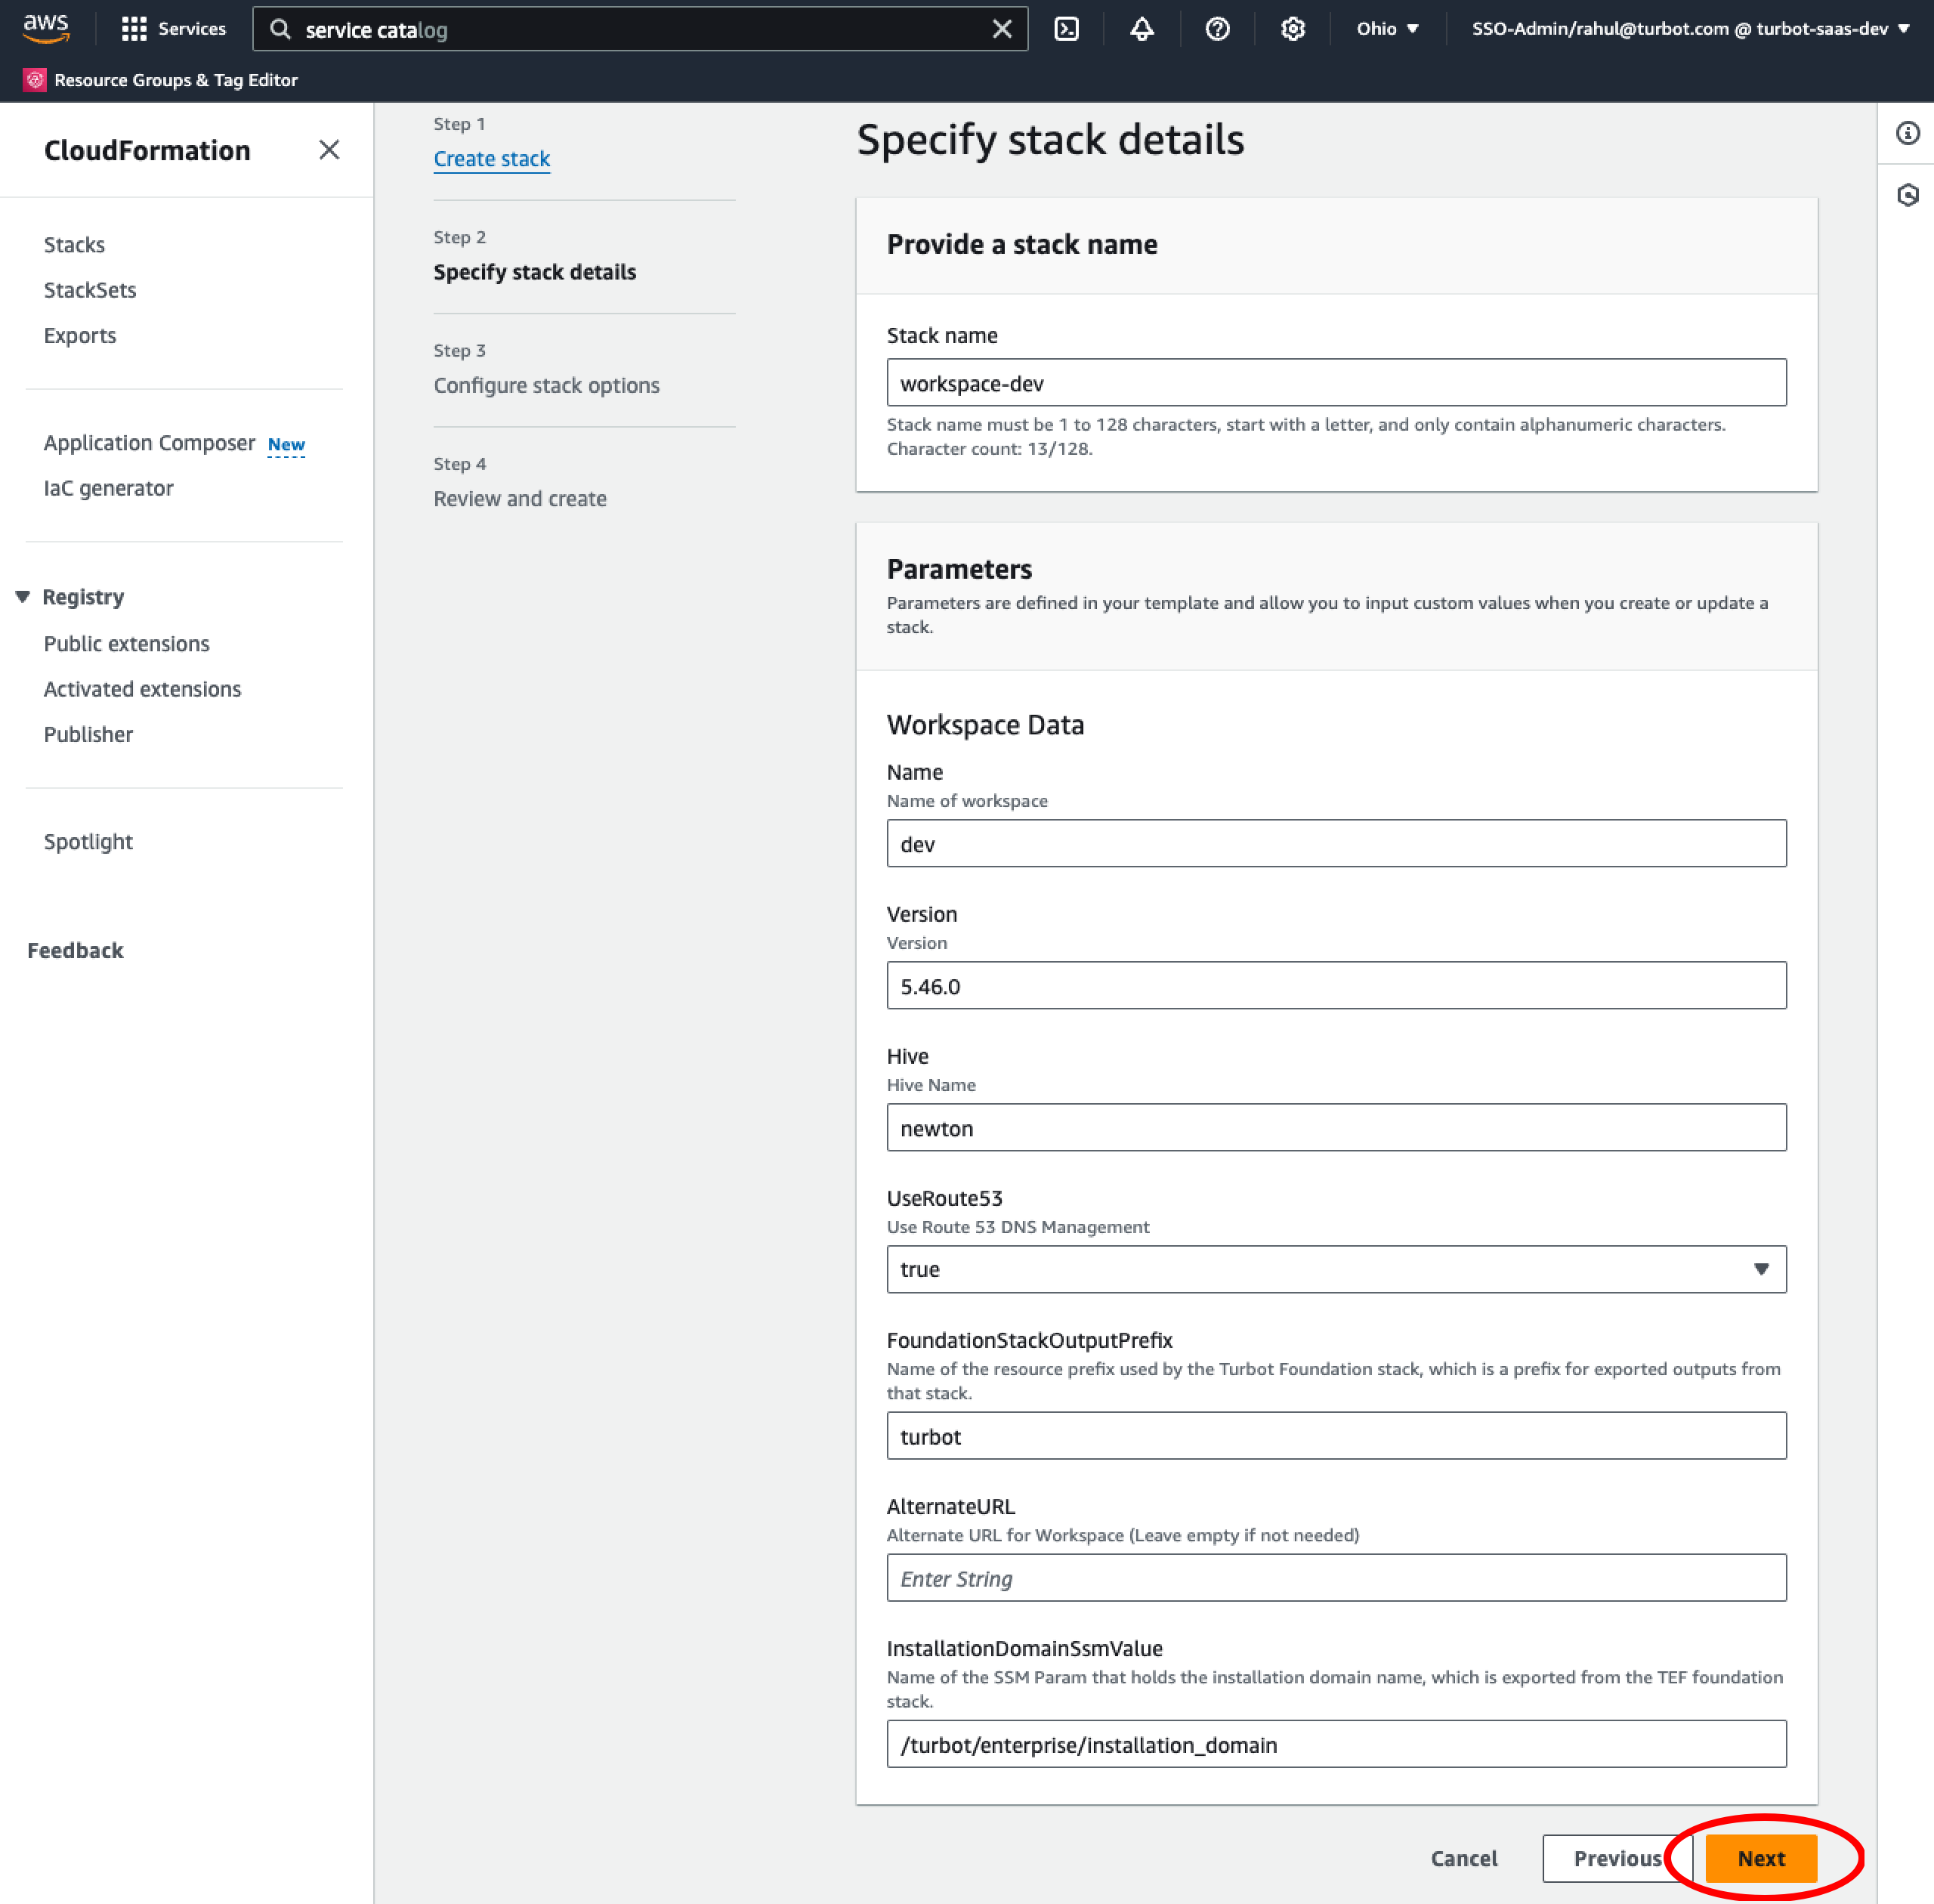
Step 4: Enter Parameters
Enter the appropriate parameters and select Next
| Parameter Name | Value |
|---|---|
| Name | The name of the workspace, which will be used as the first part of the console URL. For instance, if you specify “dev” as the workspace name, and you set up the TEF stack using mycompany.turbot.com as the domain name, the console URL will be dev.mycompany.turbot.com. |
| Version | The version of Turbot Guardrails Enterprise to install in the workspace. This must match an installed (via TE) version exactly. For example: 5.46.0. |
| Hive | The Hive name where the database is hosted. This should be the Hive name that you specified when setting up TED. |
| UseRoute53 | If set to True, the stack will automatically update the DNS alias for the console URL to point to the newly installed version. If you do not use Route53 to manage the DNS, choose "False". You will need to create (or modify) a CNAME record for your workspace to point to the load balancer for the new version (available as LoadBalancerDNS in the stack output variables). |
| FoundationStackOutputPrefix | This must match the resource prefix that you specified in the Turbot Guardrails Enterprise Foundation stack so that this stack can use exported outputs from the TEF stack. |
| Alternate URL | Provide an alternate URL for the workspace, leave blank if not required. |
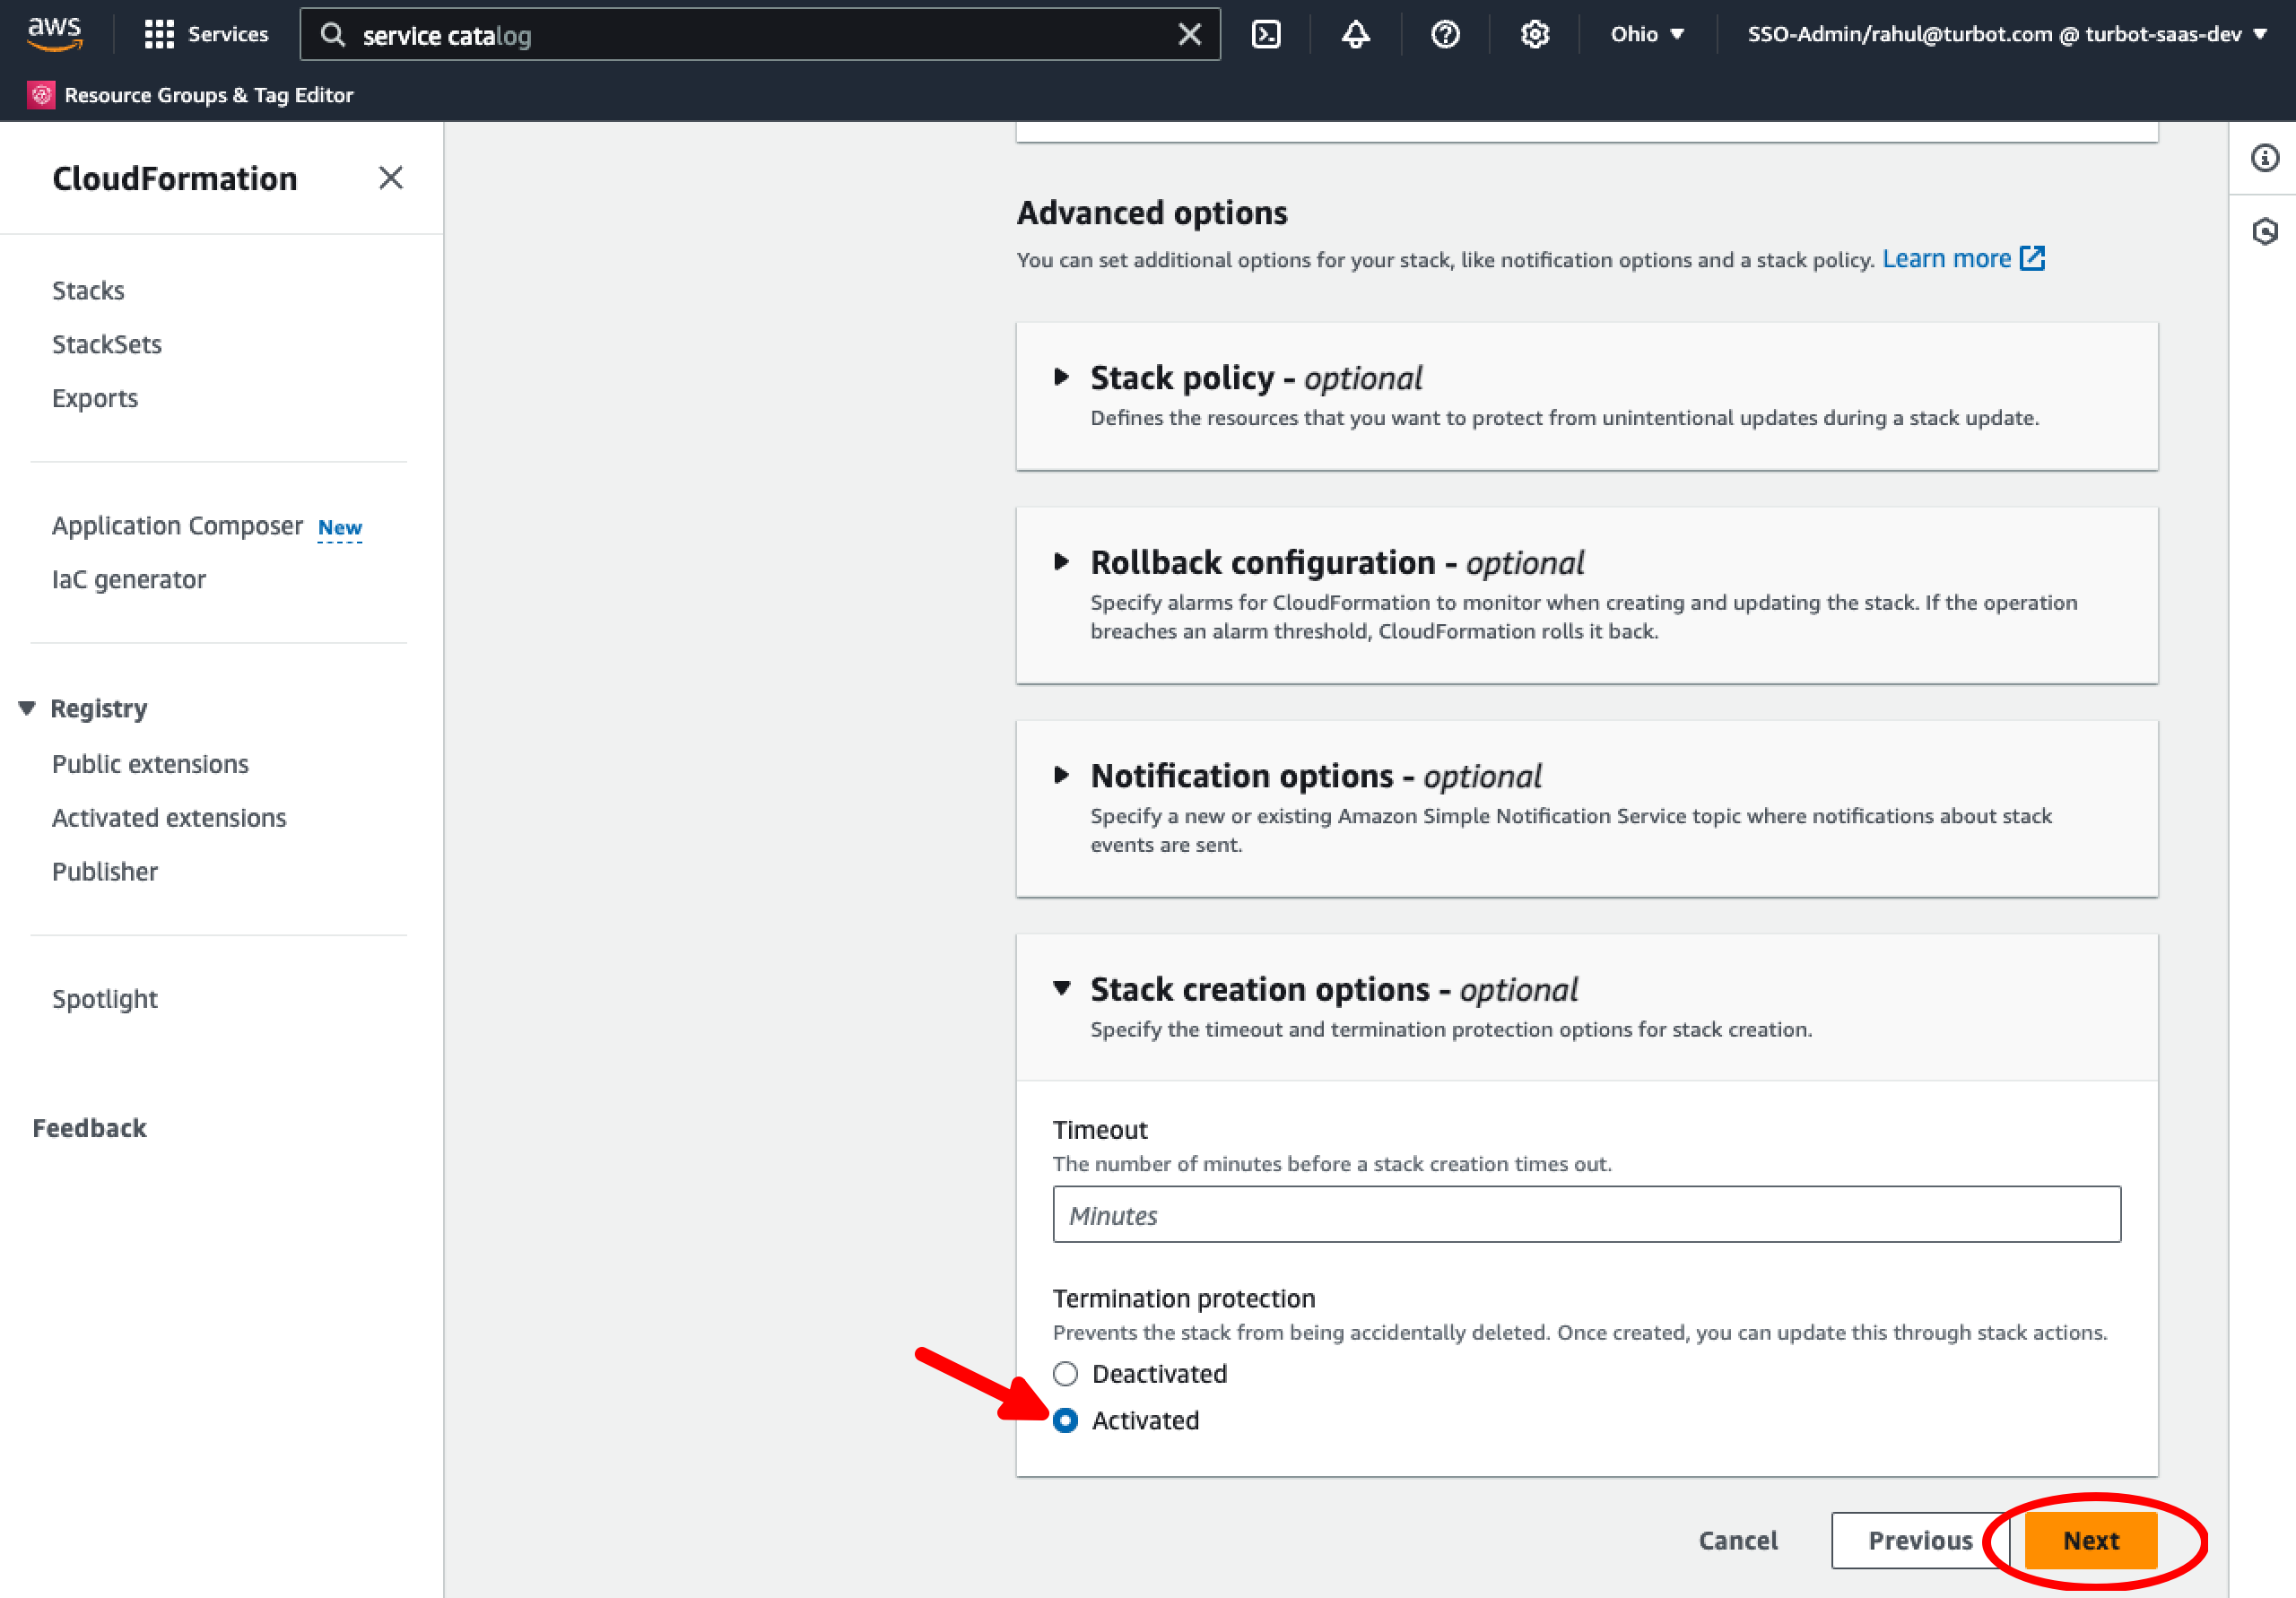
Step 5: Enable Termination Protection
Turbot recommends enabling Termination Protection on the Workspace Manager CloudFormation stack. This can be done at creation by expanding the Stack creation options and enabling Termination Protection. This can also be configured post CloudFormation stack deployment. Select the stack while viewing the CloudFormation service in the AWS console, click Stack actions in the top right, then click Edit termination protection. Set this to Activated and select Save.
Step 6: Complete Stack Creation
Click on Submit and wait for the stack creation to complete.
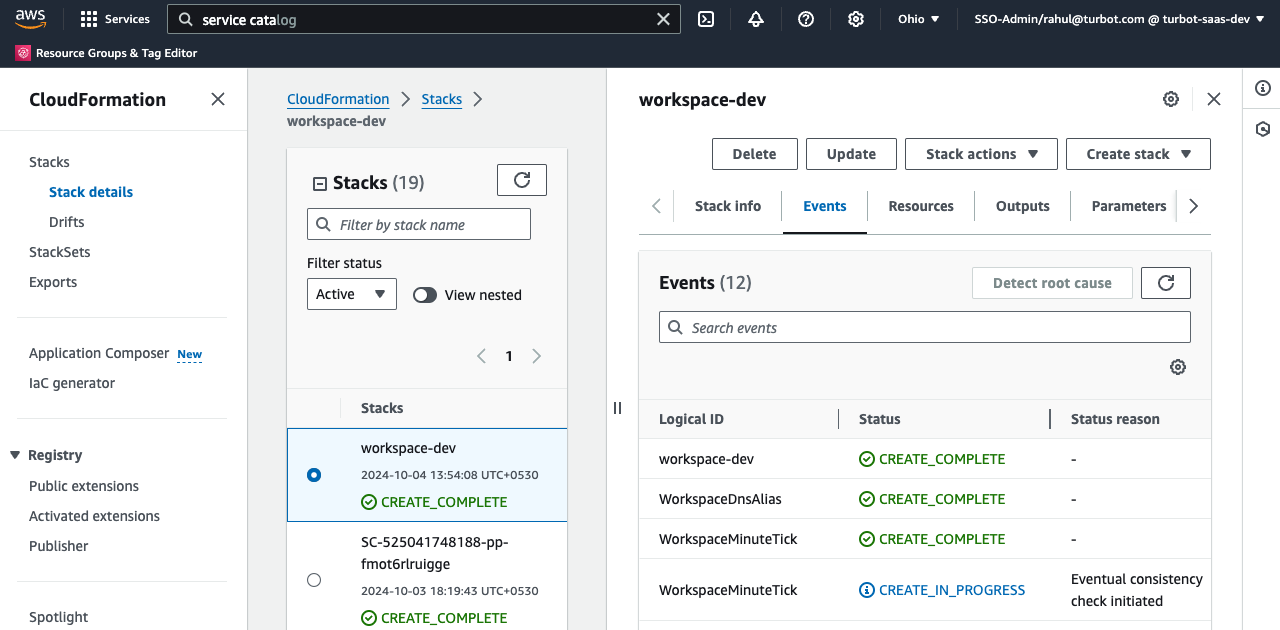
Step 7: Login New Workspace
Now you can login to newly provisioned Workspace and initiate credential rotation.
Next Steps
- Head over to the Post Installation document for further instructions after setting up the workspace.
- Learn more about managing versions and updating workspaces from Turbot Guardrails Enterprise Documentation.
Troubleshooting
| Issue | Description | Guide |
|---|---|---|
| Permission Issues | If the current logged-in user lacks permission to modify, update, or create resources in the stack, or if IAM roles or SCPs have changed, preventing built-in roles from accessing needed configuration settings. | Troubleshoot Permission Issues |
| Further Assistance | If you continue to encounter issues, please open a ticket with us and attach the relevant information to assist you more efficiently. | Open Support Ticket |