Import ServiceNow Instance
Importing a ServiceNow Instance in Guardrails
Prerequisites to import a ServiceNow instance
Turbot Guardrails Workspace Setup
Before you get started, your Turbot Guardrails workspace will require mods to be installed so the features are available to you in the console and API.
Install the ServiceNow Turbot Guardrails Mod
Guardrails requires a number of mods for the ServiceNow integration to work. Install these mods:
- ServiceNow Mod: Install the
turbot/servicenowmod. This mod is required by all other ServiceNow mods. Theturbot/servicenowmod is required to import ServiceNow instances into a Guardrails workspace. It must be installed before a ServiceNow instance import can start. Ensure it is installed and the Mod installed control is in the greenokstate. - Cloud Platform ServiceNow Mods: Install the platform specific ServiceNow mods relevant to your organization:
- AWS:
turbot/servicenow-aws - Azure:
turbot/servicenow-azure - GCP:
turbot/servicenow-gcp
- AWS:
- Cloud Service ServiceNow Mods: Install cloud service specific ServiceNow mods:
- Install the
turbot/servicenow-{platform}-{service}mod(s) for the platform services that your organization wants to sync to ServiceNow.
- Install the
Note: The installation of other turbot/servicenow* mods such as turbot/servicenow-aws, turbot/servicenow-ec2, etc are specific to the syncing cloud resources from AWS, Azure or GCP with Turbot Guardrails to ServiceNow. These are only required if you are enabling those features.
Once the turbot/servicenow mod is installed, you should be able to see a new option in your https://{turbot-workspace-url}/apollo/accounts/import
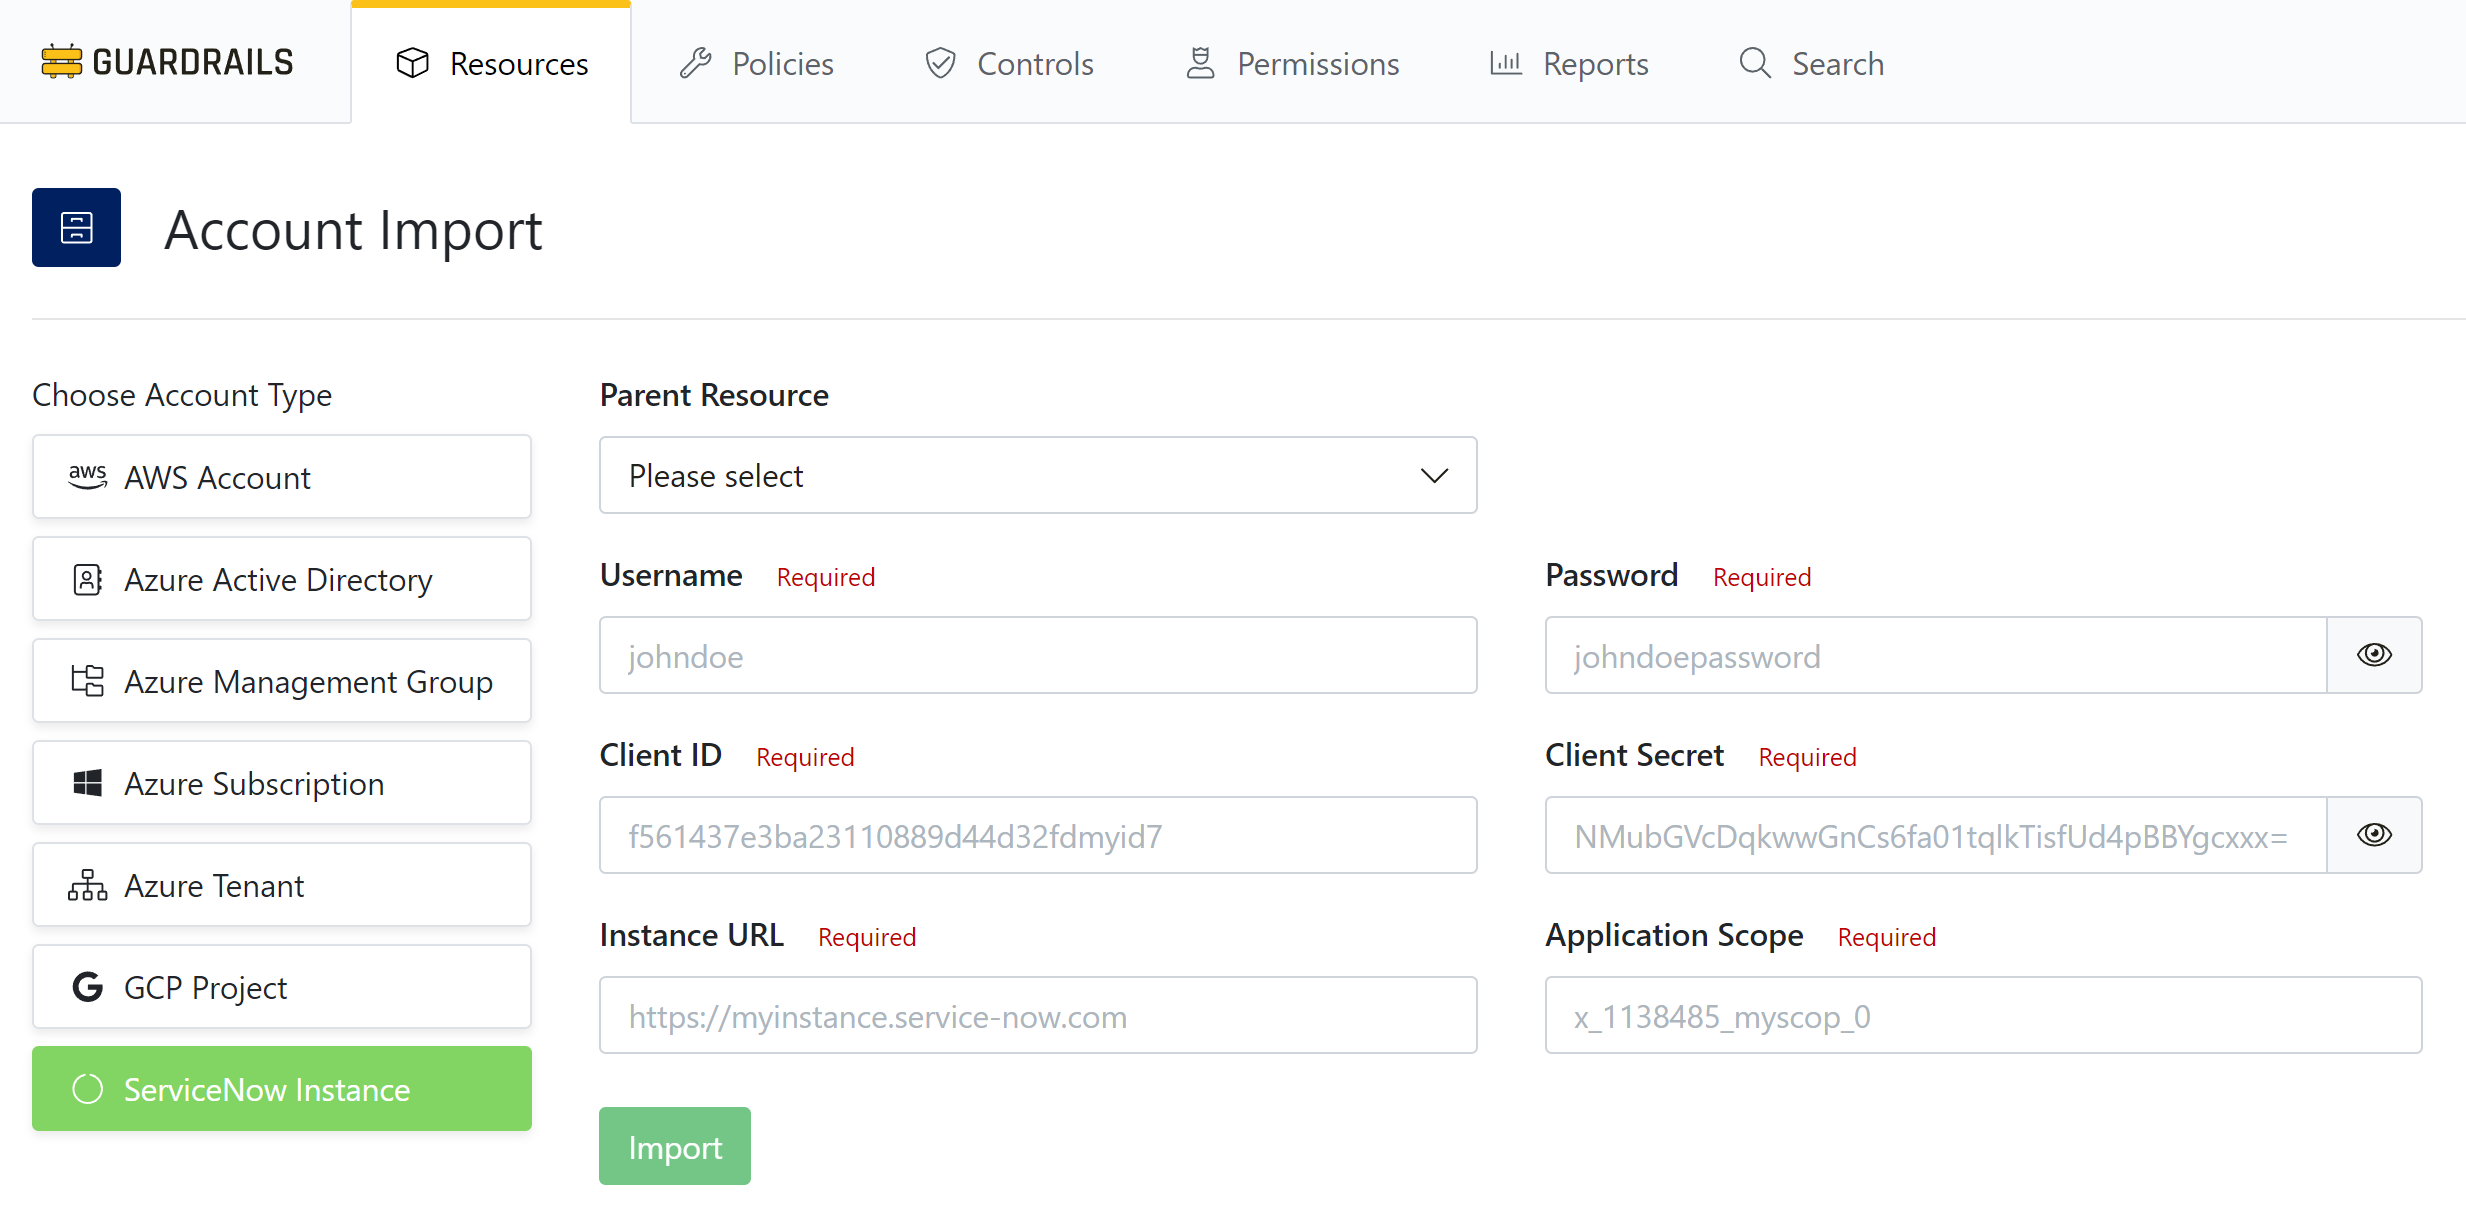
The following section will cover how to obtain the details from ServiceNow to fill in the Account Import screen.
ServiceNow Instance Setup
Your ServiceNow environment will require some configuration before you import it into Guardrails:
- ServiceNow Instance URL: Note the URL of your ServiceNow instance (e.g. https://myinstance.service-now.com)
- Application scope is the identifier of your application setup for Turbot Guardrails.
- System Account for a username & password.
- OAuth Application for a client ID & client secret
Create a ServiceNow Application
You can leverage an existing ServiceNow Application or create a new one. Turbot recommends creating a new application specifically for Turbot Guardrails to scope all Guardrails related work within a specific scope.
There are a few ways to create an application in ServiceNow, example for creating an app through App Studio in the Vancouver release. Depending on which ServiceNow release version you have installed, and which method you choose to add an application may differ. Below is a common approach to creating an application for reference:
To create a new Application:
- Login to your ServiceNow instance via admin (or an equivalent) user.
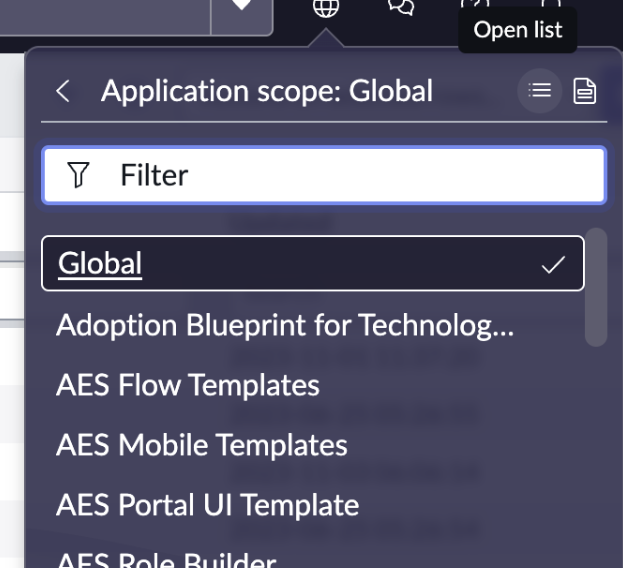
- Click on the globe icon in the top-right corner to view the current Application Scope.

- Click on the
Application scope: <App Name>and clickOpen list. This will take you to the list of applications that you currently have in your instance.
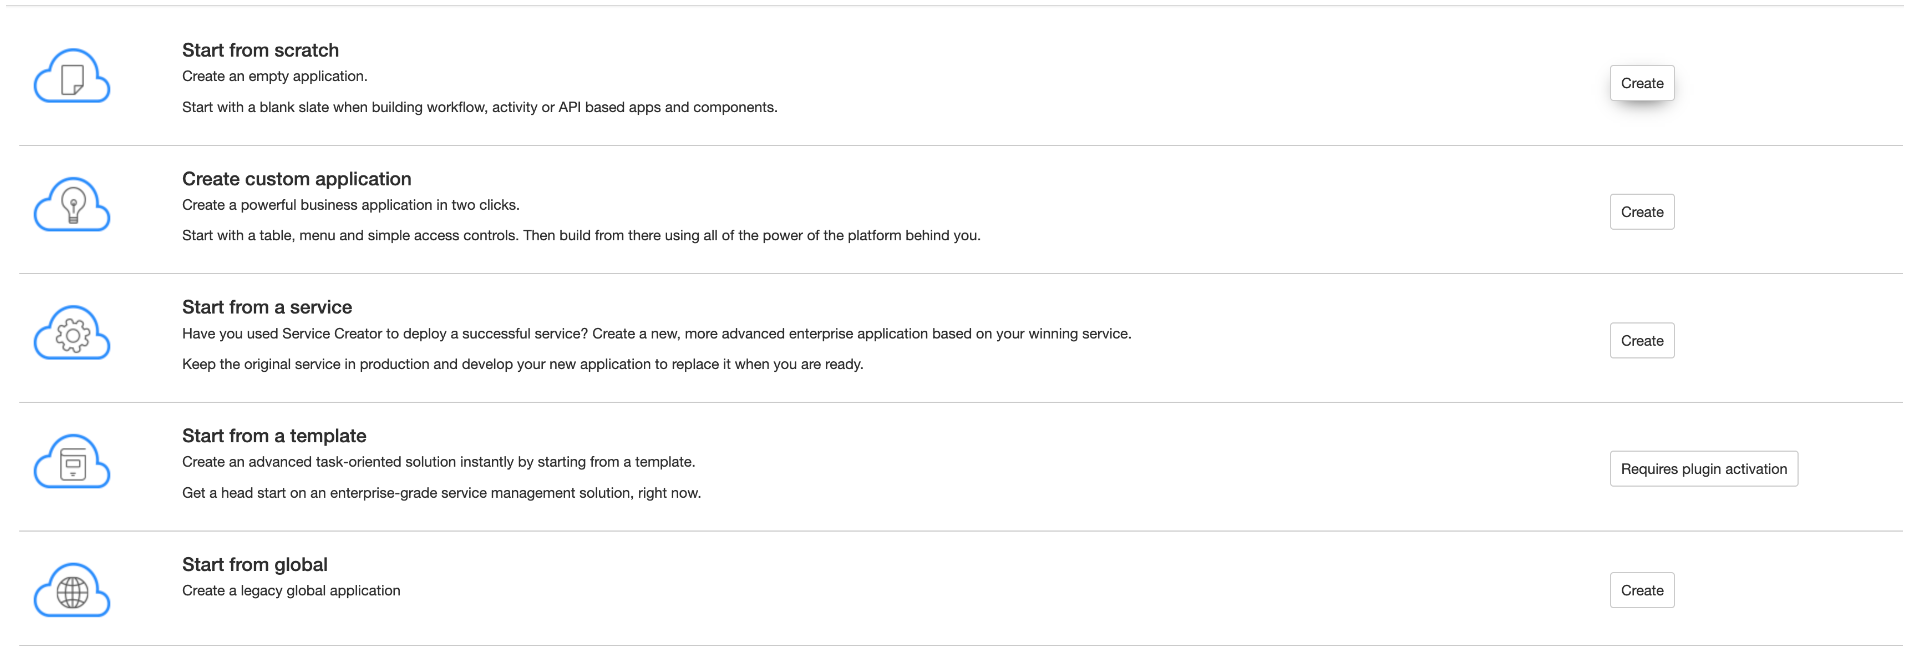
- Click on
Newto create a new application thenStart from scratch.
- Give a relevant name for the application (e.g. Guardrails Application), do not update/remove the Scope, and click
Create.
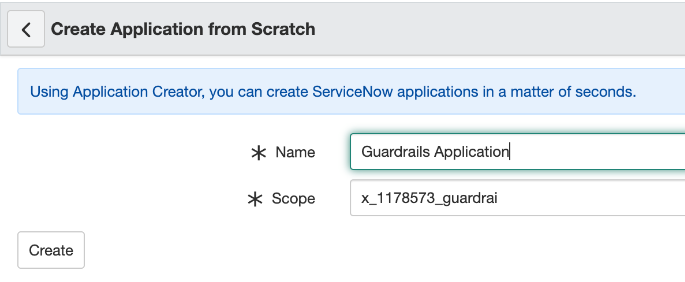
- Once the application is created, save the application scope (e.g.
x_1178573_guardrai) off to the side to be used later while importing a ServiceNow instance into a Guardrails workspace.
Create a ServiceNow Service Account
A ServiceNow service account will allow Guardrails authorization to ServiceNow and make relevant API calls to manage resources.
To create a new Service Account:
- In the
Alldropdown menu, search forUser Administration, scroll down and selectUsersunderUser Administration.

- Click on
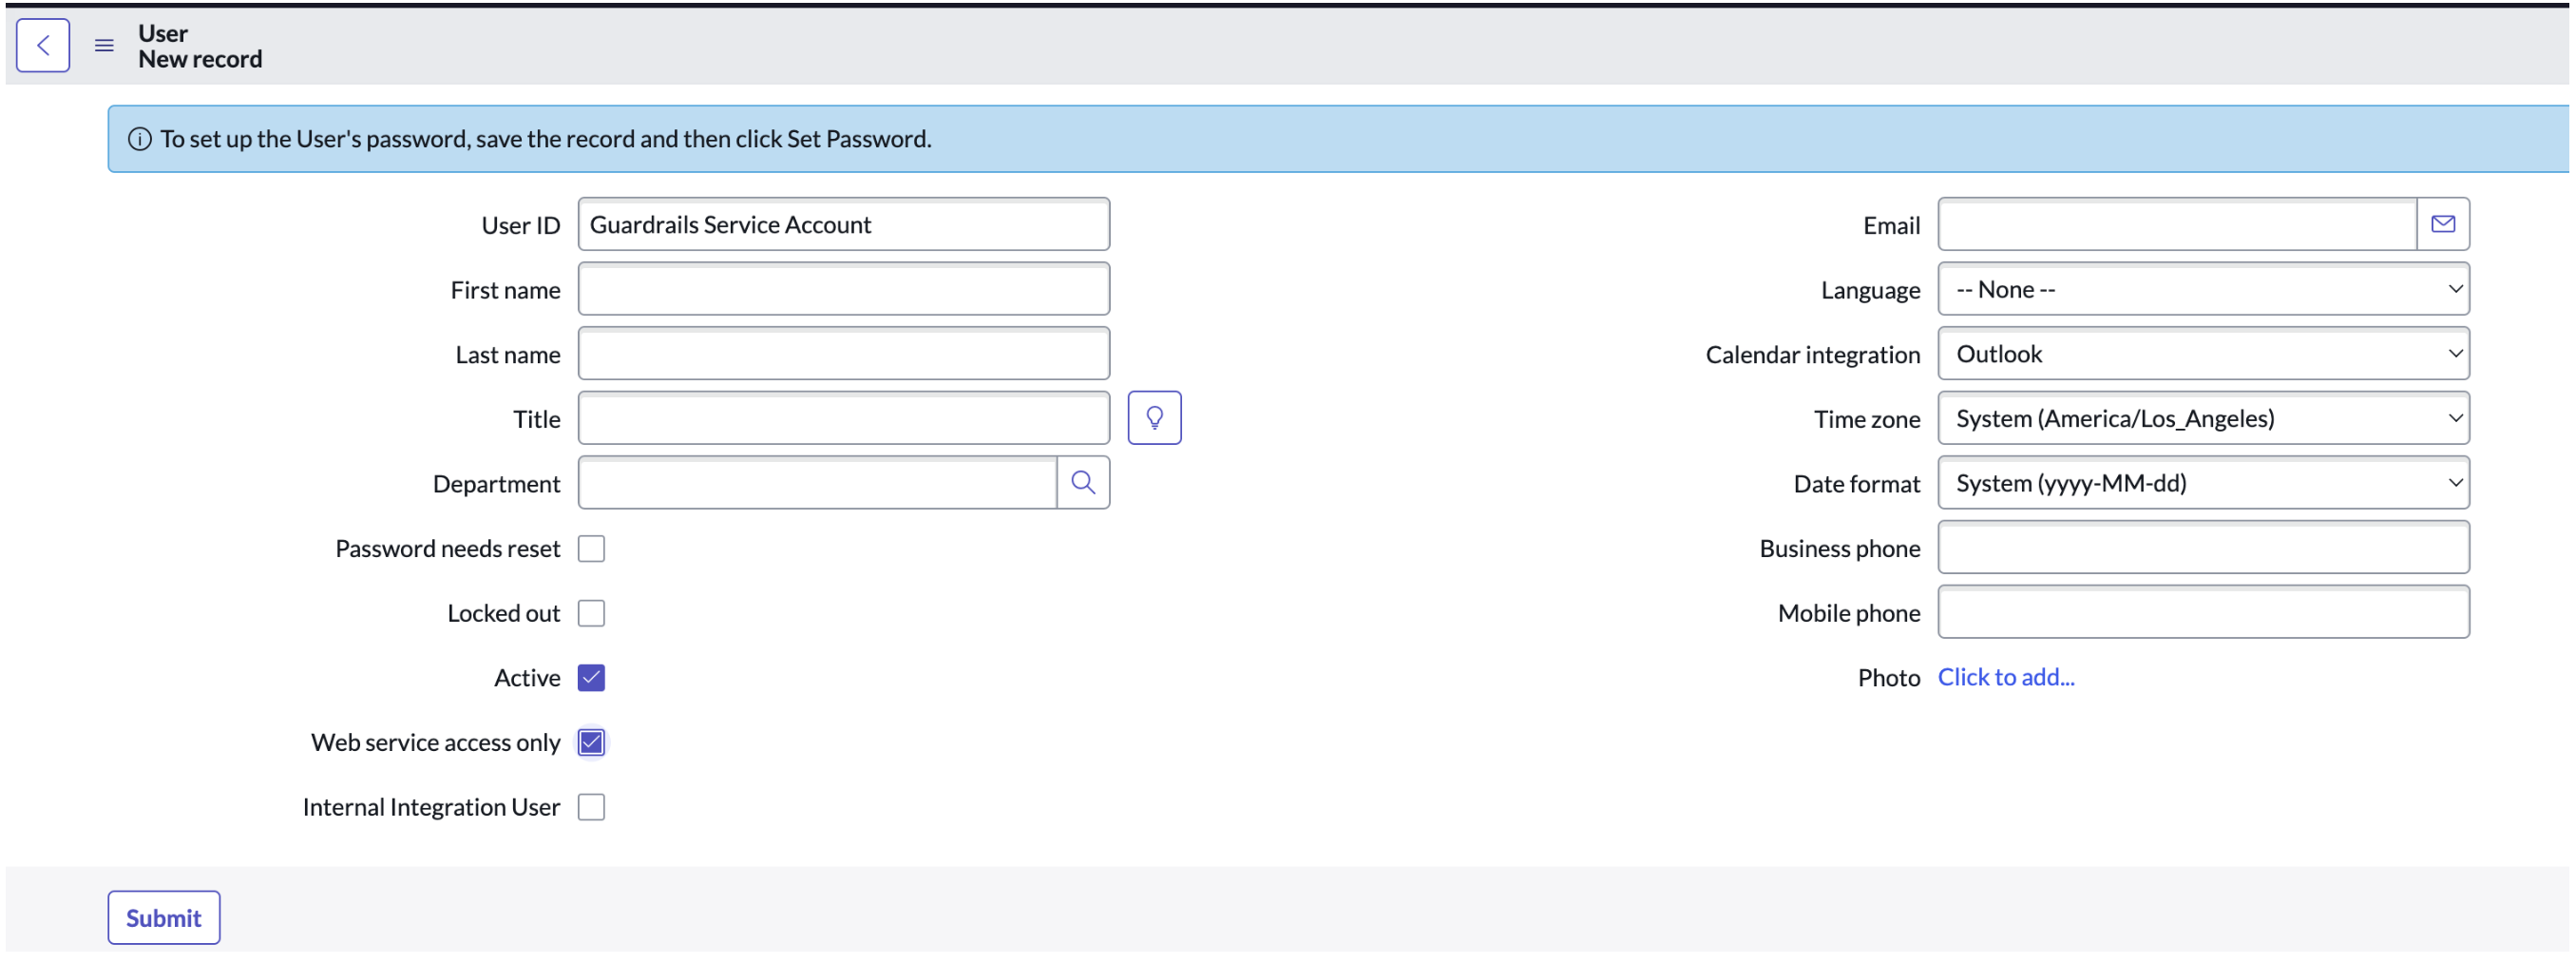
Newon the top right to create a new Service Account. - Enter an appropriate User ID (e.g.
Guardrails Service Account) along with other relevant details optional to define. - Check the check-box for
Web service access only. - Ensure
ActiveandWeb service access onlyare both checked. - Click
Submitto create a new Service Account.
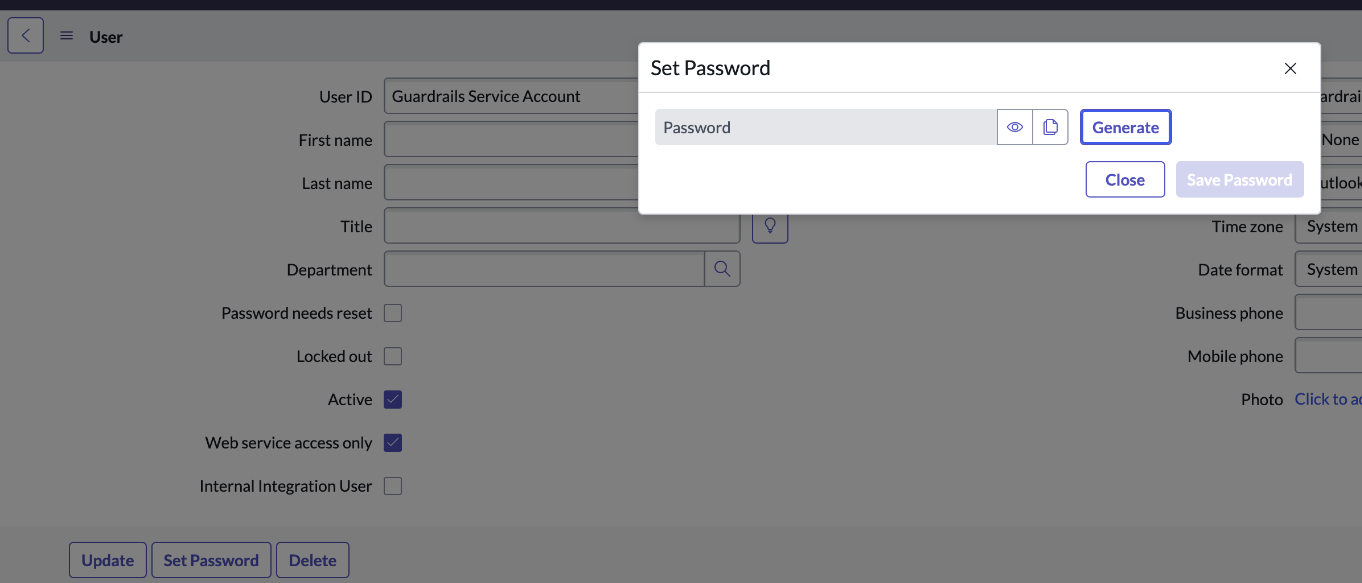
- To create/generate a password for the Service Account, open the Service Account you created above from Users page and click on
Set Password. Save the password off to the side to be used later while importing a ServiceNow instance into a Guardrails workspace.
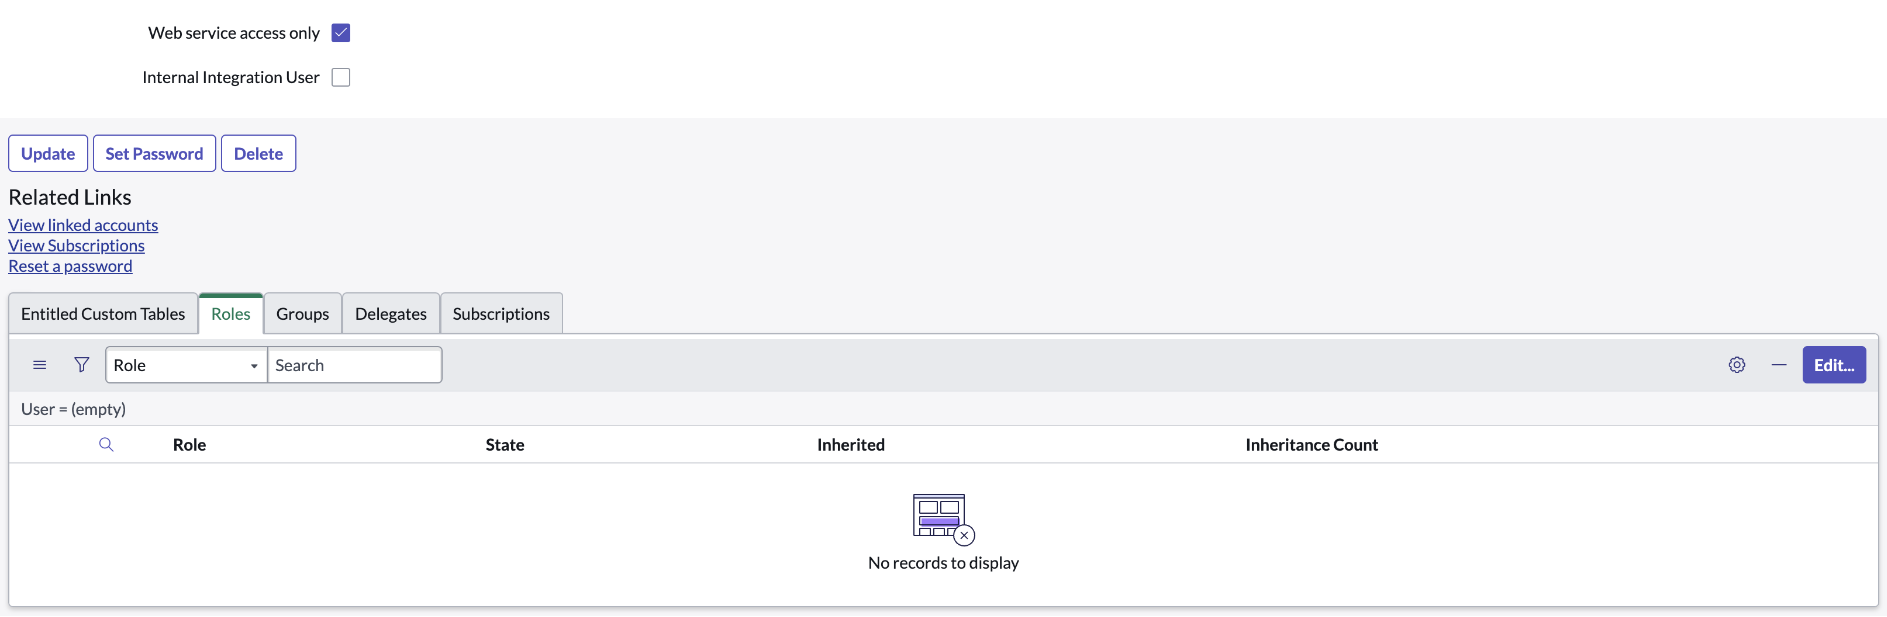
- You'd want to add the
adminrole to the Service Account which will allow Guardrails to manage and sync records correctly in ServiceNow. To add theadminrole, click on theRolestab for the Service Account and click onEdit.
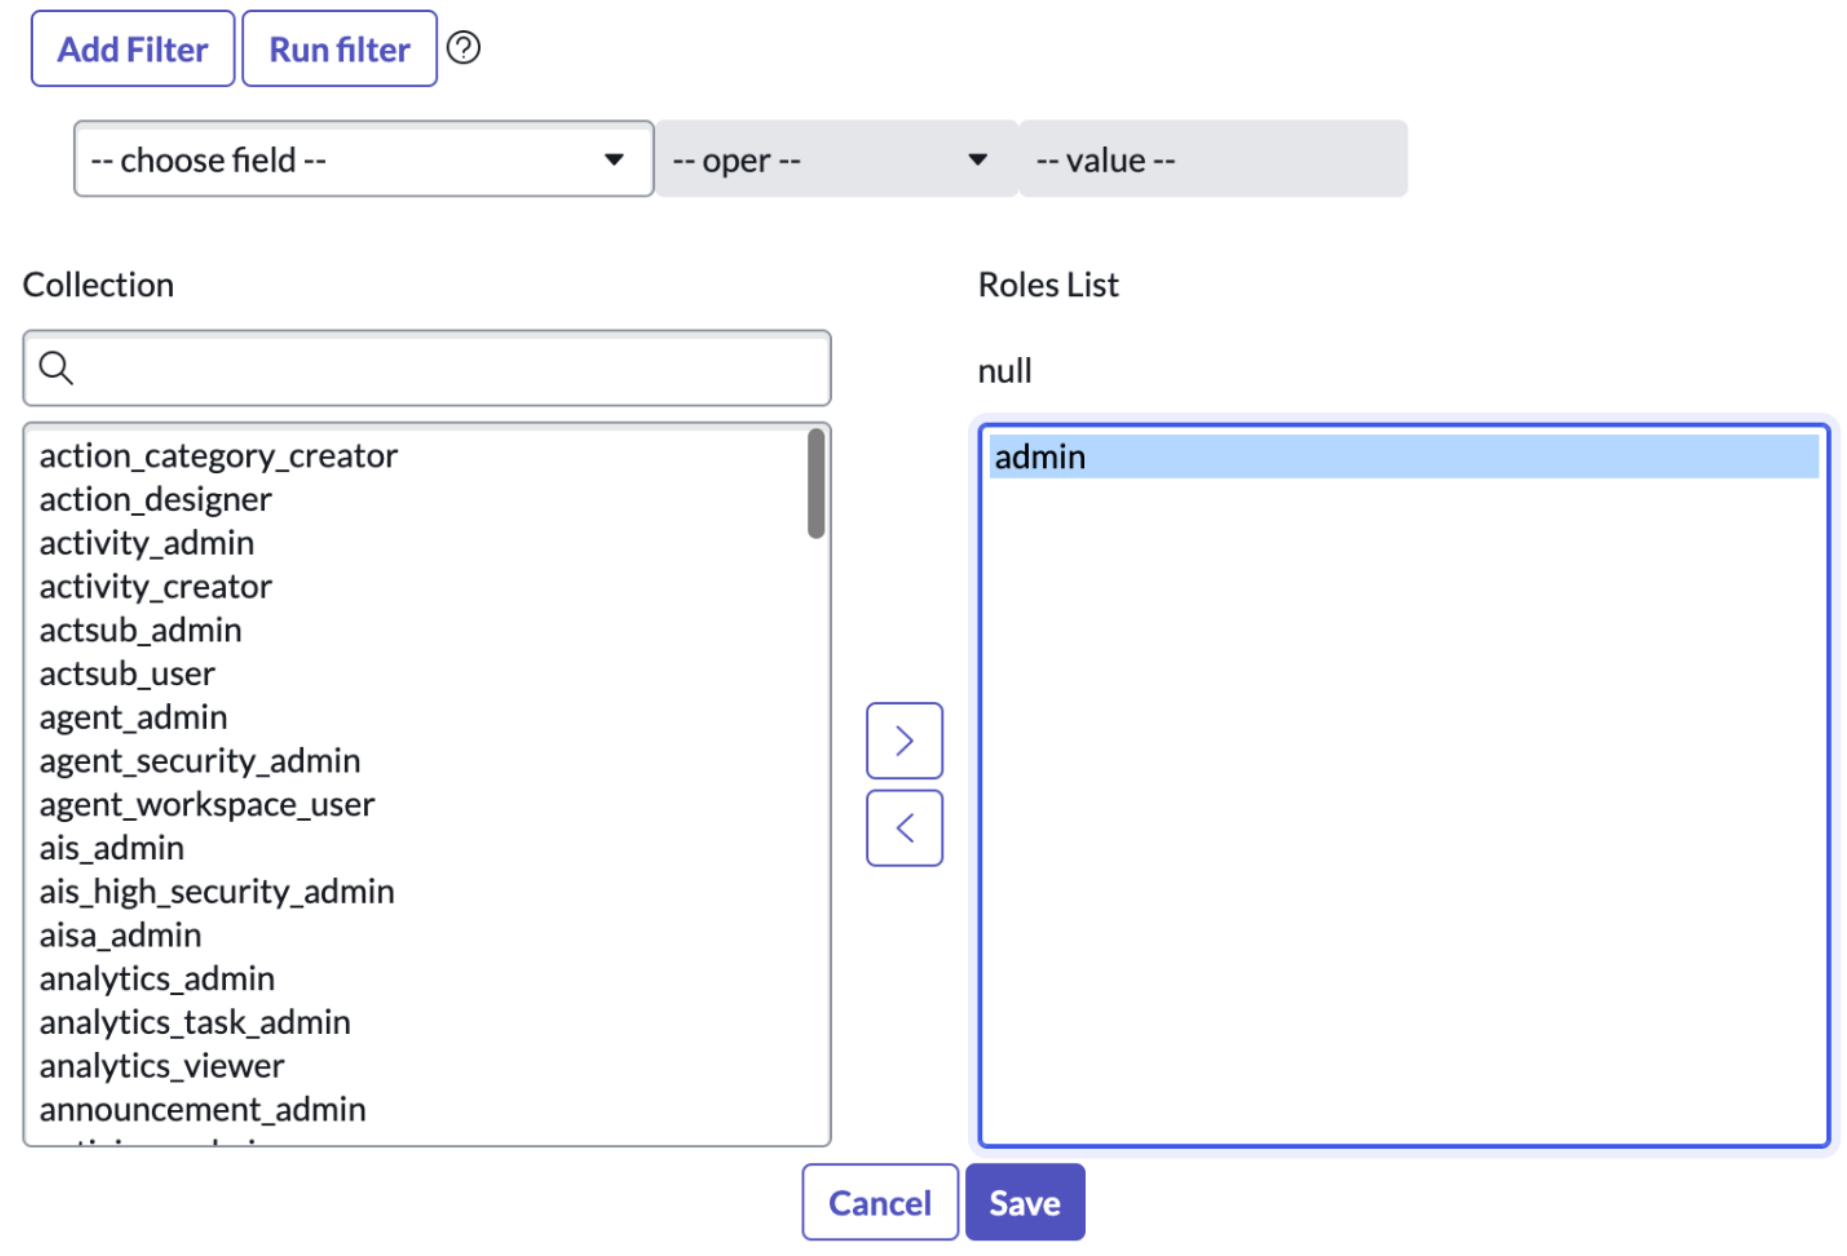
- Add the
adminrole andSave.
[!NOTE] We recommend the admin role for getting started to avoid access constraints as you are getting started. However your team can evaluate role & permissions options to narrow the scope of the role as appropriate.
Create a ServiceNow OAuth Application
An OAuth application will allow Guardrails to generate a Bearer Token to make API calls to ServiceNow using the service account you created in the above steps.
To create an OAuth application:
- Search for
Application Registryin theAlldropdown menu and selectApplication RegistryunderSystem OAuth.

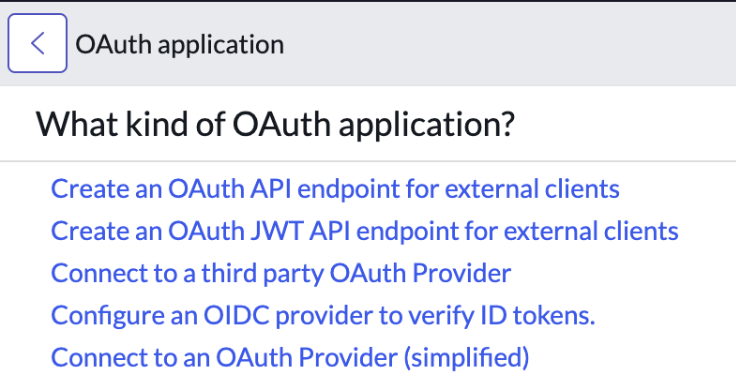
- Click on
Newand selectCreate an OAuth API endpoint for external clients.
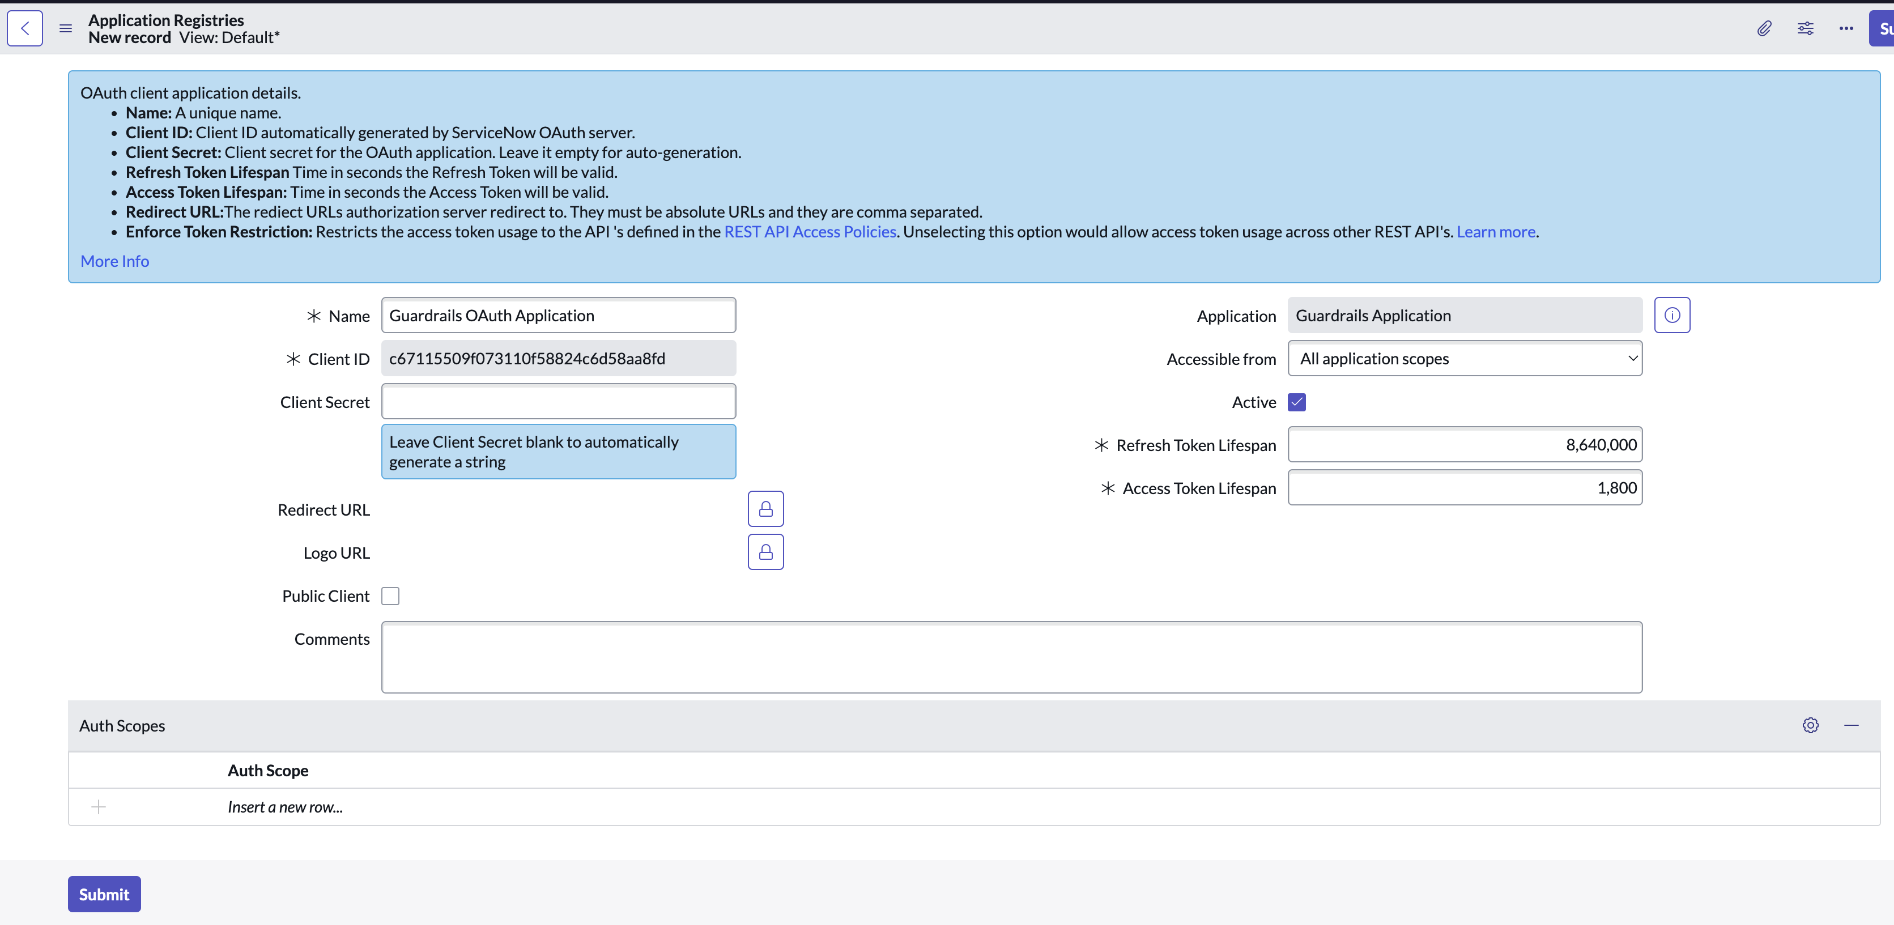
- Give a relevant name (e.g Guardrails OAuth Application).
- Set the
Accessible fromtoAll application scopes. - You can update the Refresh Token Lifespan and Access Token Lifespan per your preference.
- Click on Submit to create the OAuth application.
- Save the Client ID and Client Secret off to the side to be used later while importing a ServiceNow instance into a Guardrails workspace.
Create a row in the User Preference table
Guardrails requires a row in the User Preferences table for the Service Account created previously. This can be done one of two ways:
- Log into the ServiceNow instance as the service account. ServiceNow will automatically create a row in the User Preferences table.
- Or, manually create a row in the
User Preferencestable.
To manually create a row in User Preferences for the Guardrails user, do the following:
- In the "All" menu in the top left corner, search for "User Preferences".
- In the User Preferences table, click "New" in the top right corner.
- Put "apps.current_app" into the "Name" field.
- Lookup the name of the Guardrails Service User in the "User" field and select it.
- Ignore the "Value" field. If ServiceNow requires a value, any random string will do. Guardrails will automatically update this value later.
- Verify that a new row exists with a Name of "apps.current_app" and a User that matches the name of the Guardrails Service User. If the row exists, proceed with the rest of configuration.
Import a ServiceNow instance
Now that you have the ServiceNow Turbot Guardrails mod (@turbot/servicenow) installed in Guardrails, and you have your ServiceNow configurations from the prior steps above; e.g. URL, Application Scope, Service Account Username & Password, and your OAuth application Client IDandClient Secret`, you should be ready to import your ServiceNow instance.
Import a ServiceNow instance via Guardrails UI
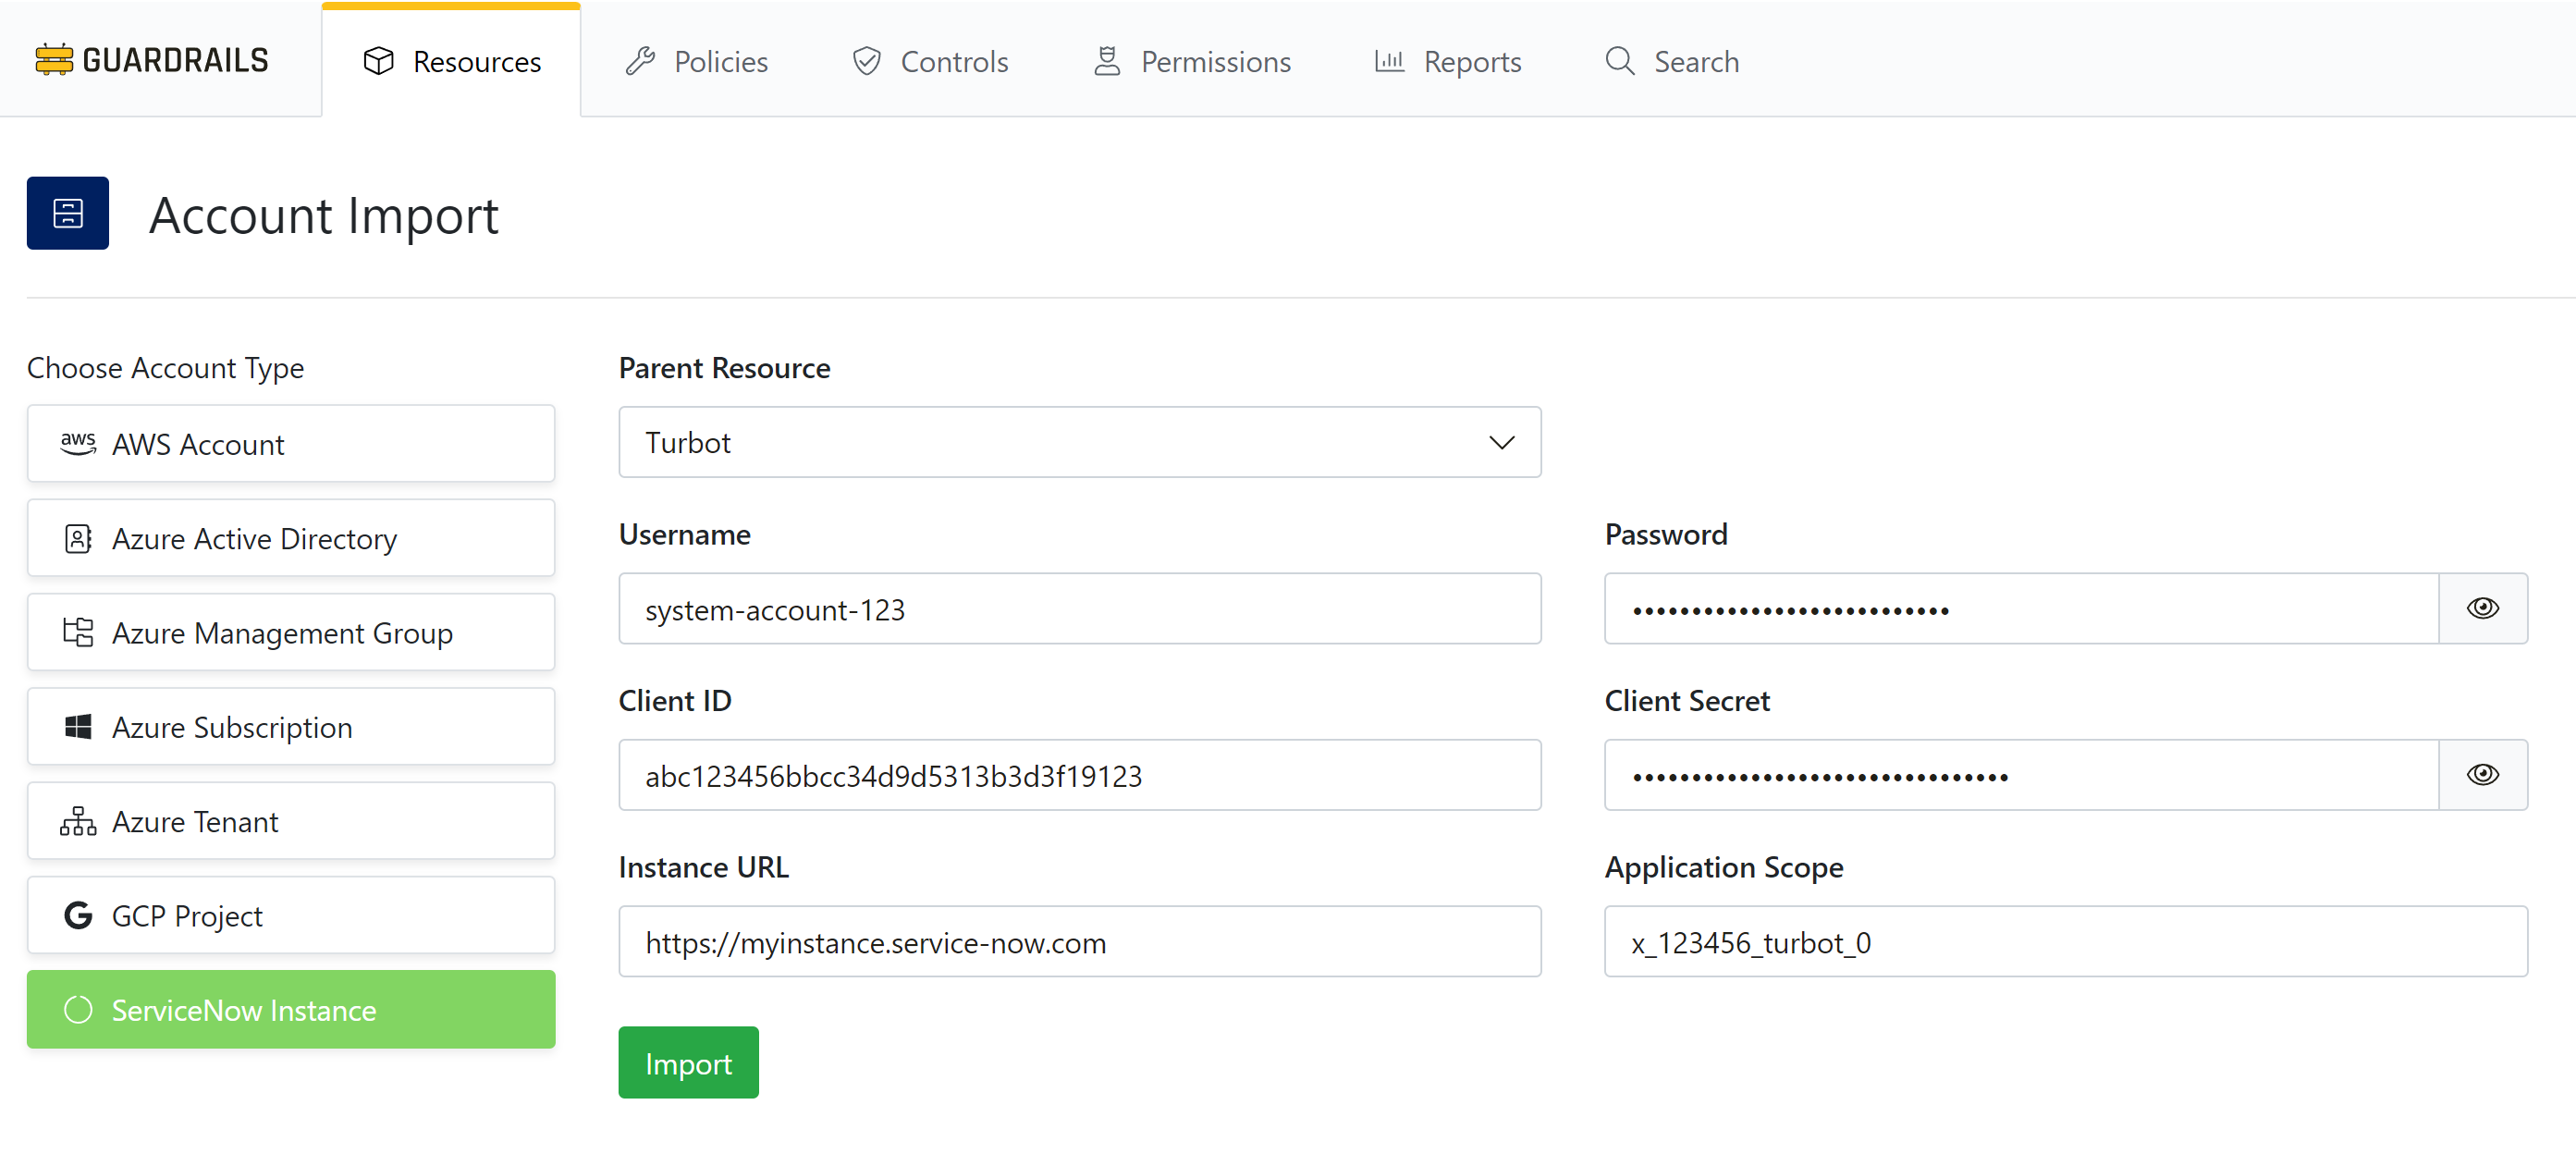
To import a ServiceNow Instance in a Guardrails workspace from the console / UI:
- From your Guardrails homepage, select the purple
IMPORTcard. - On the
Account Importpage, selectServiceNow Instance. - Fill in the Parent Resource where you'd want your instance; typically this would be done at the
Turbotroot level of your hierarchy, however it can reside in a Folder instead. - Fill in the rest,
URL,Application Scope, Service AccountUsername &Password, and your OAuth applicationClient IDandClient Secret`. - Click
Importto associate your ServiceNow instance to your Turbot Guardrails workspace.
You will then have your instance associated, under the main navigation Policies tab, the ServiceNow > Config > * policies are now set.
Next Steps:
- Setup the sync from ServiceNow resources to Turbot Guardrails and or
- Setup the sync from cloud resources with Turbot Guardrails to ServiceNow
We want to hear from you! Join our Slack Community #guardrails channel to ask questions and share feedback.