Apply a Quick Action
Apply a Quick Action
In this guide we’ll show how you can enable Guardrails to perform Quick Actions that fix misconfigurations. A Quick Action empowers an administrator to quickly fix misconfigurations by applying a change directly to an underlying Azure resource. In order to use this feature, the role used by Guardrails will need additional permissions to perform those actions. This guide will instruct you how to change the permissions specific to storage accounts, other types of quick actions will require different permission grants.
This is the ninth guide in the Getting started with Azure series.
Prerequisites
- Completion of the previous guides in this series.
- Access to the Guardrails console with administrative privileges.
- Access to the Azure portal with administrative privileges to add permissions to the Guardrails role.
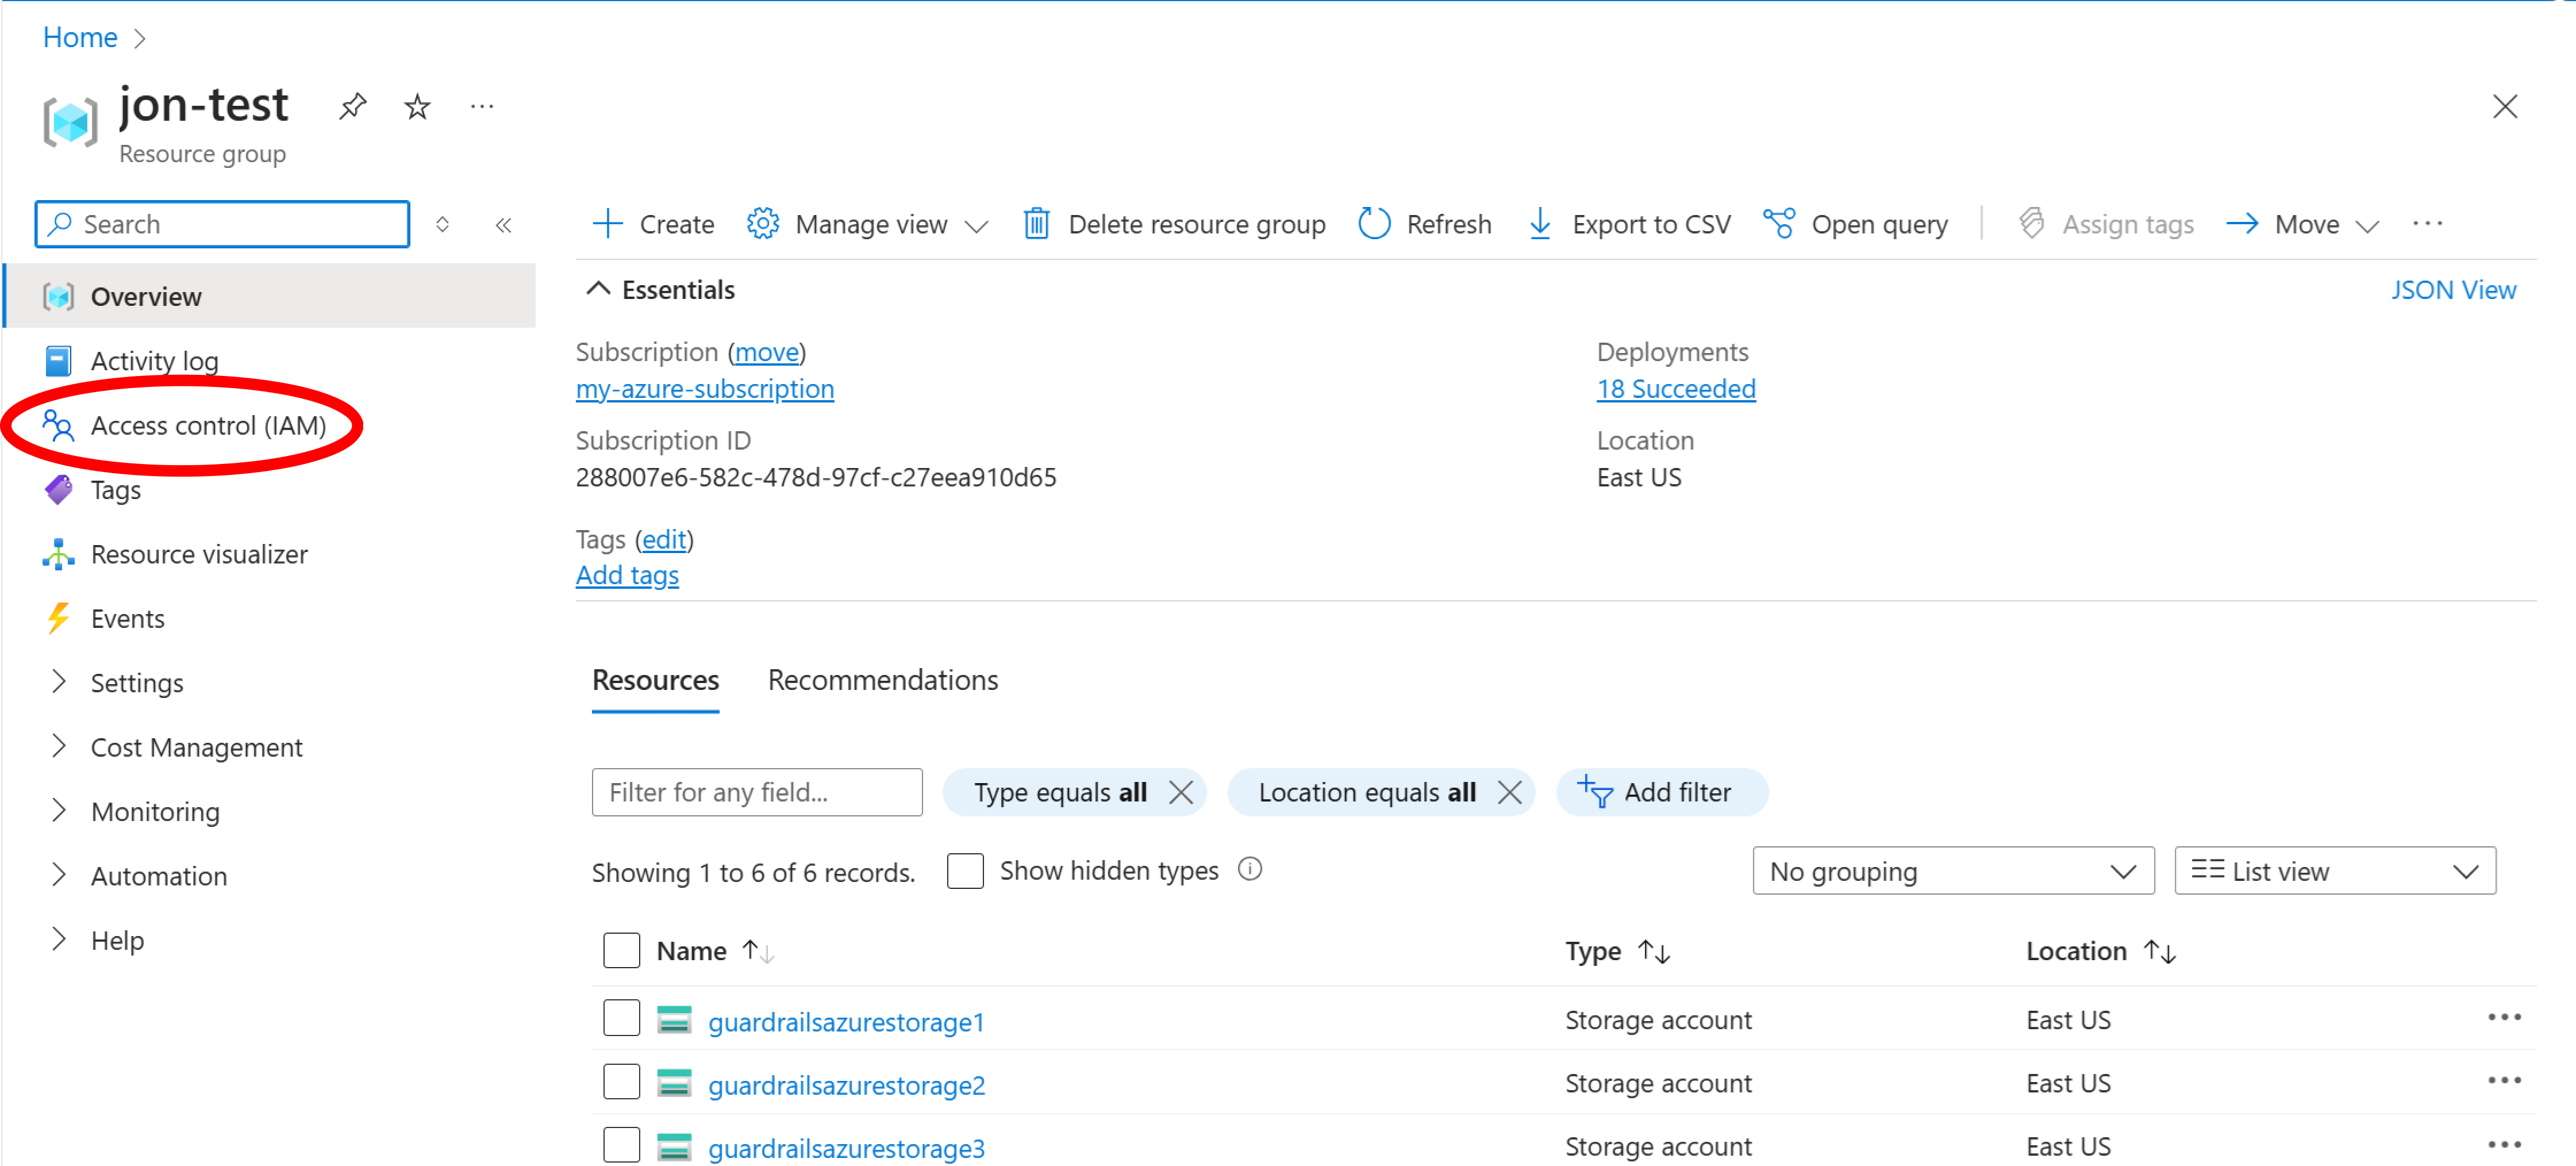
Step 1: Locate the resource group
In the Azure portal, navigate to Resource Groups and select the storage accounts you’re using in this series.

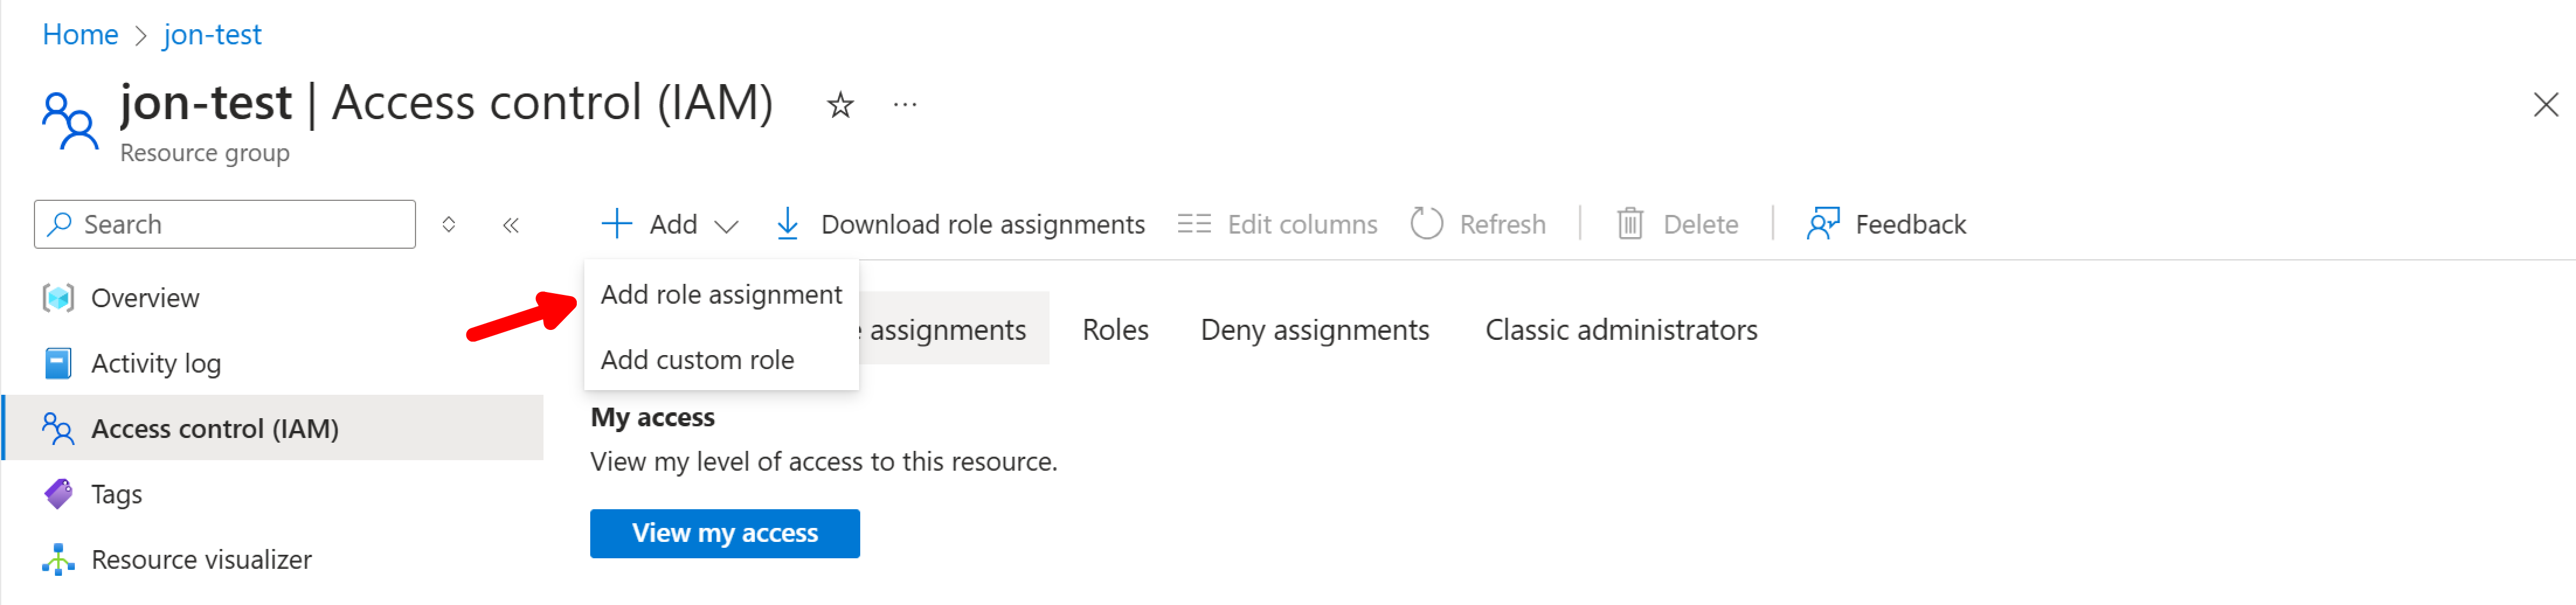
Step 2: Open Access Control (IAM)
Step 3: Begin role assignment
Expand the Add dropdown and choose Add role assignment.
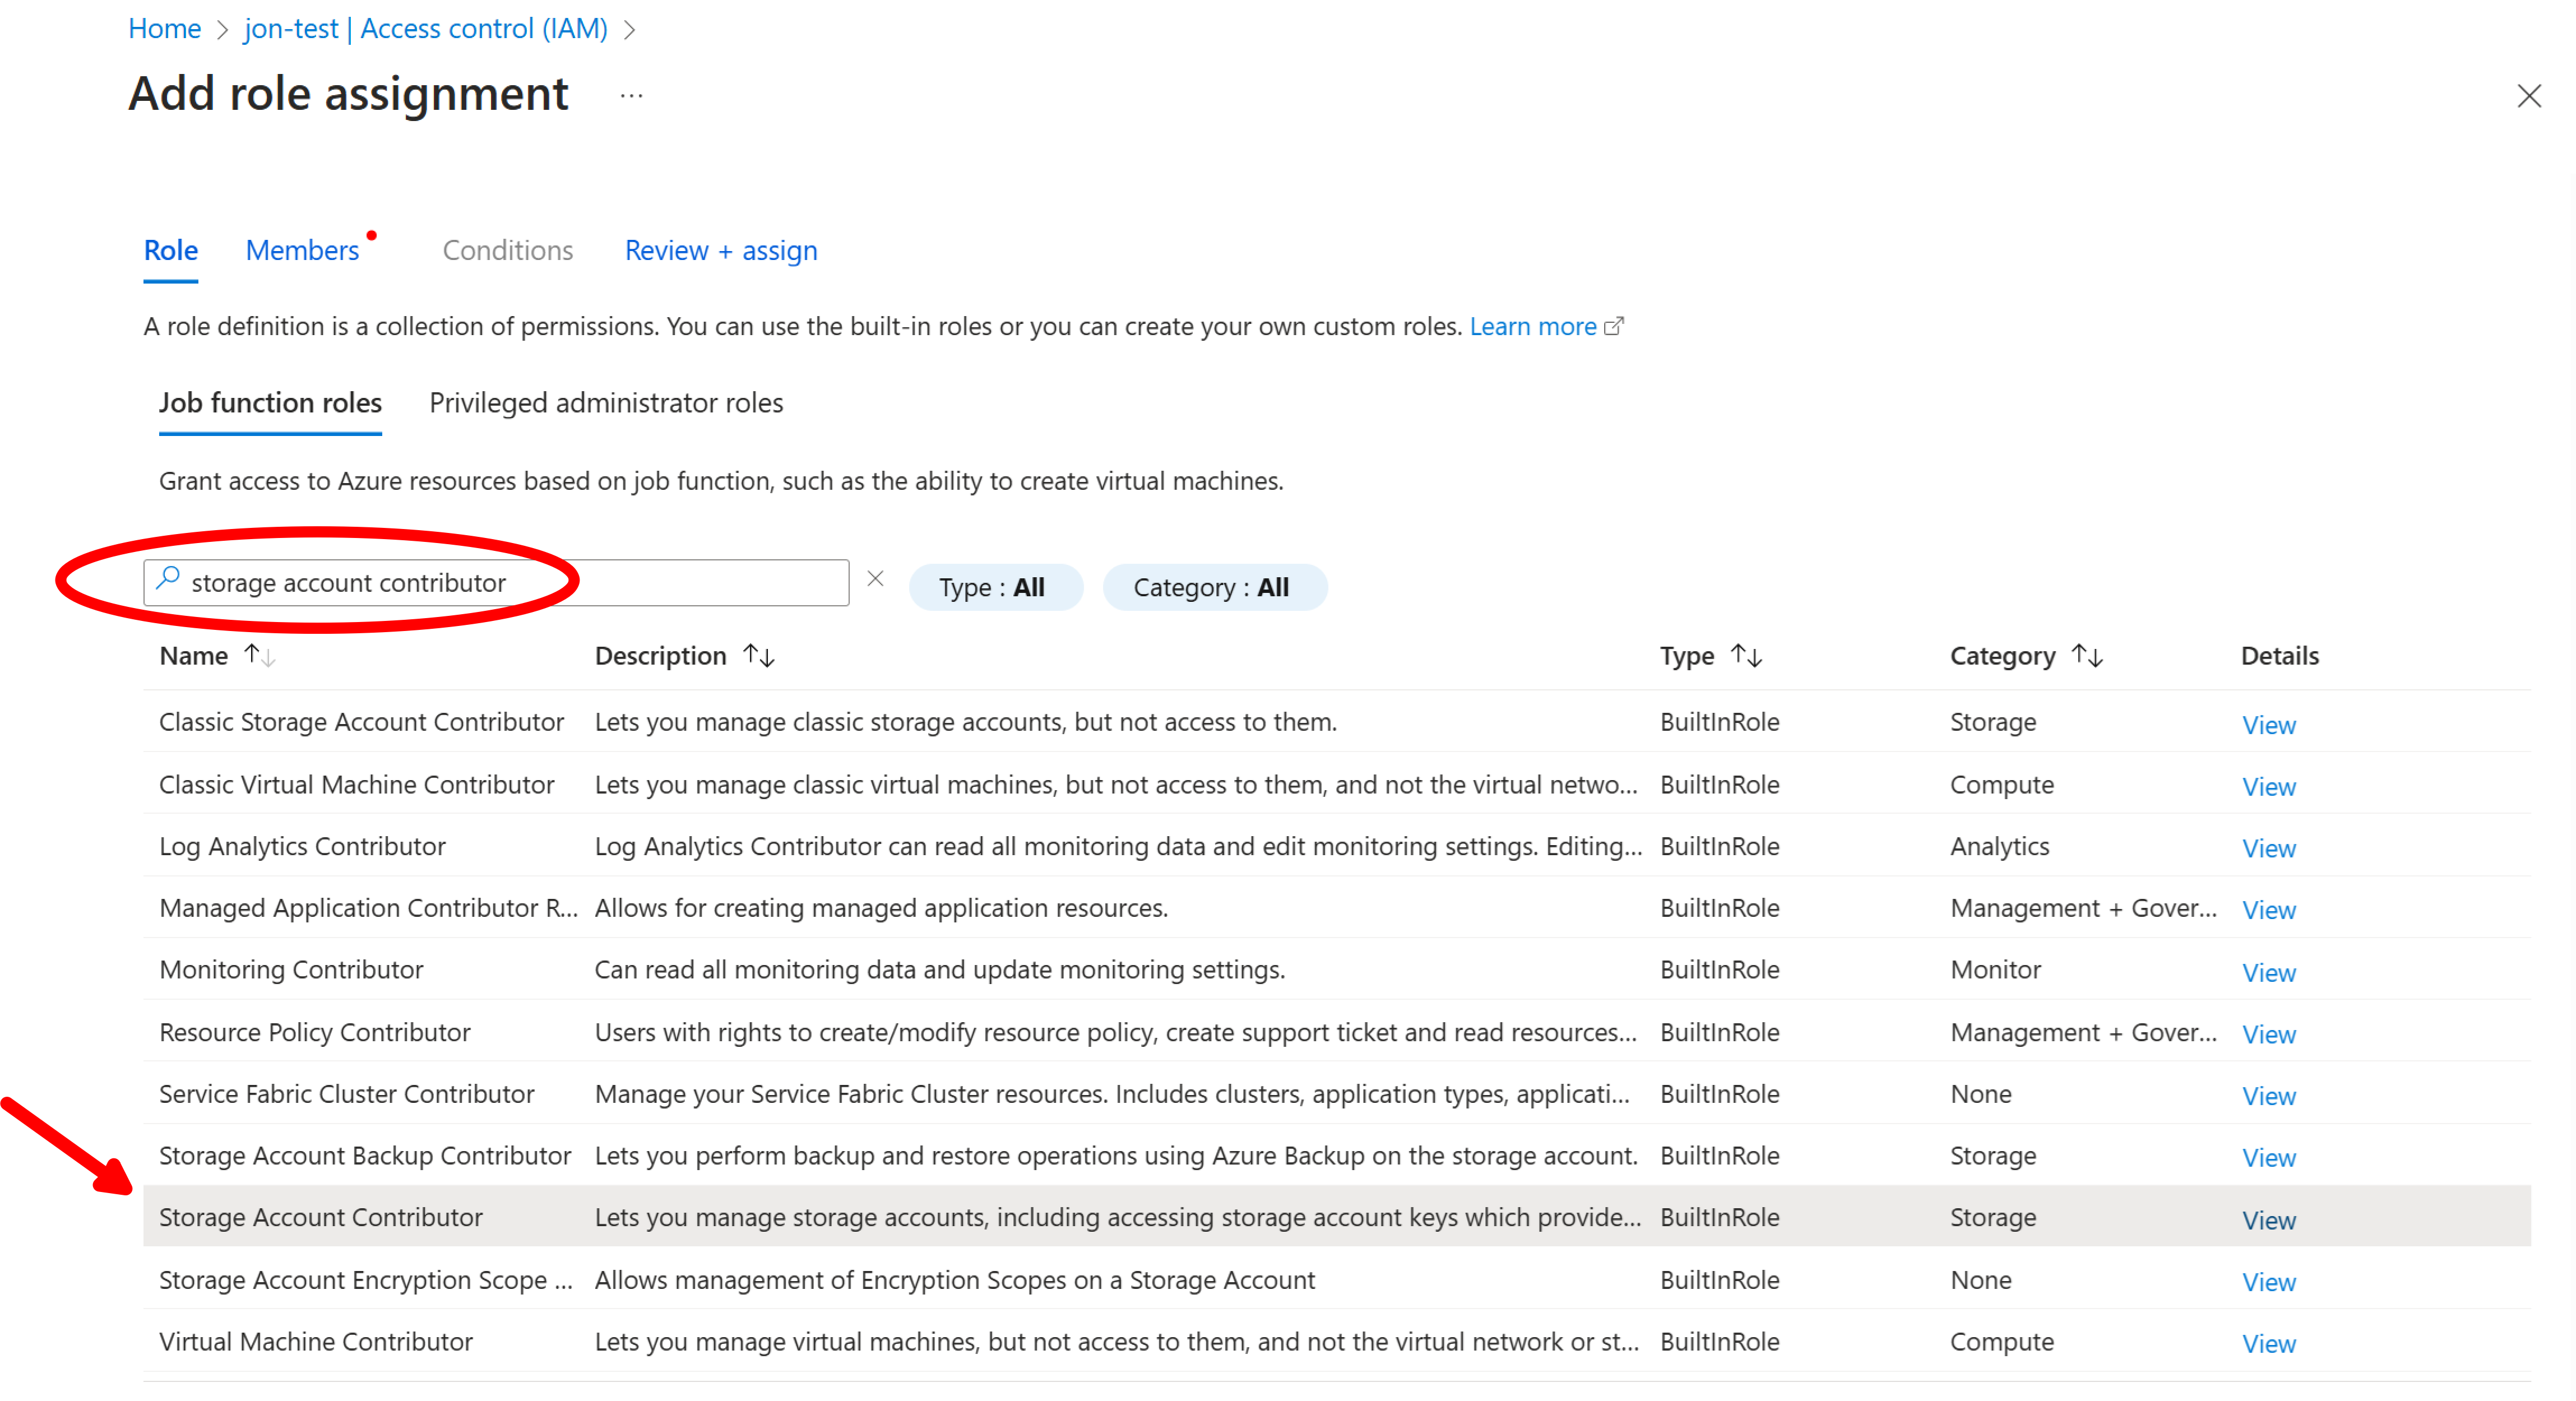
Step 4: Search for the role
Seach for storage account contributor, select it, and select Next.
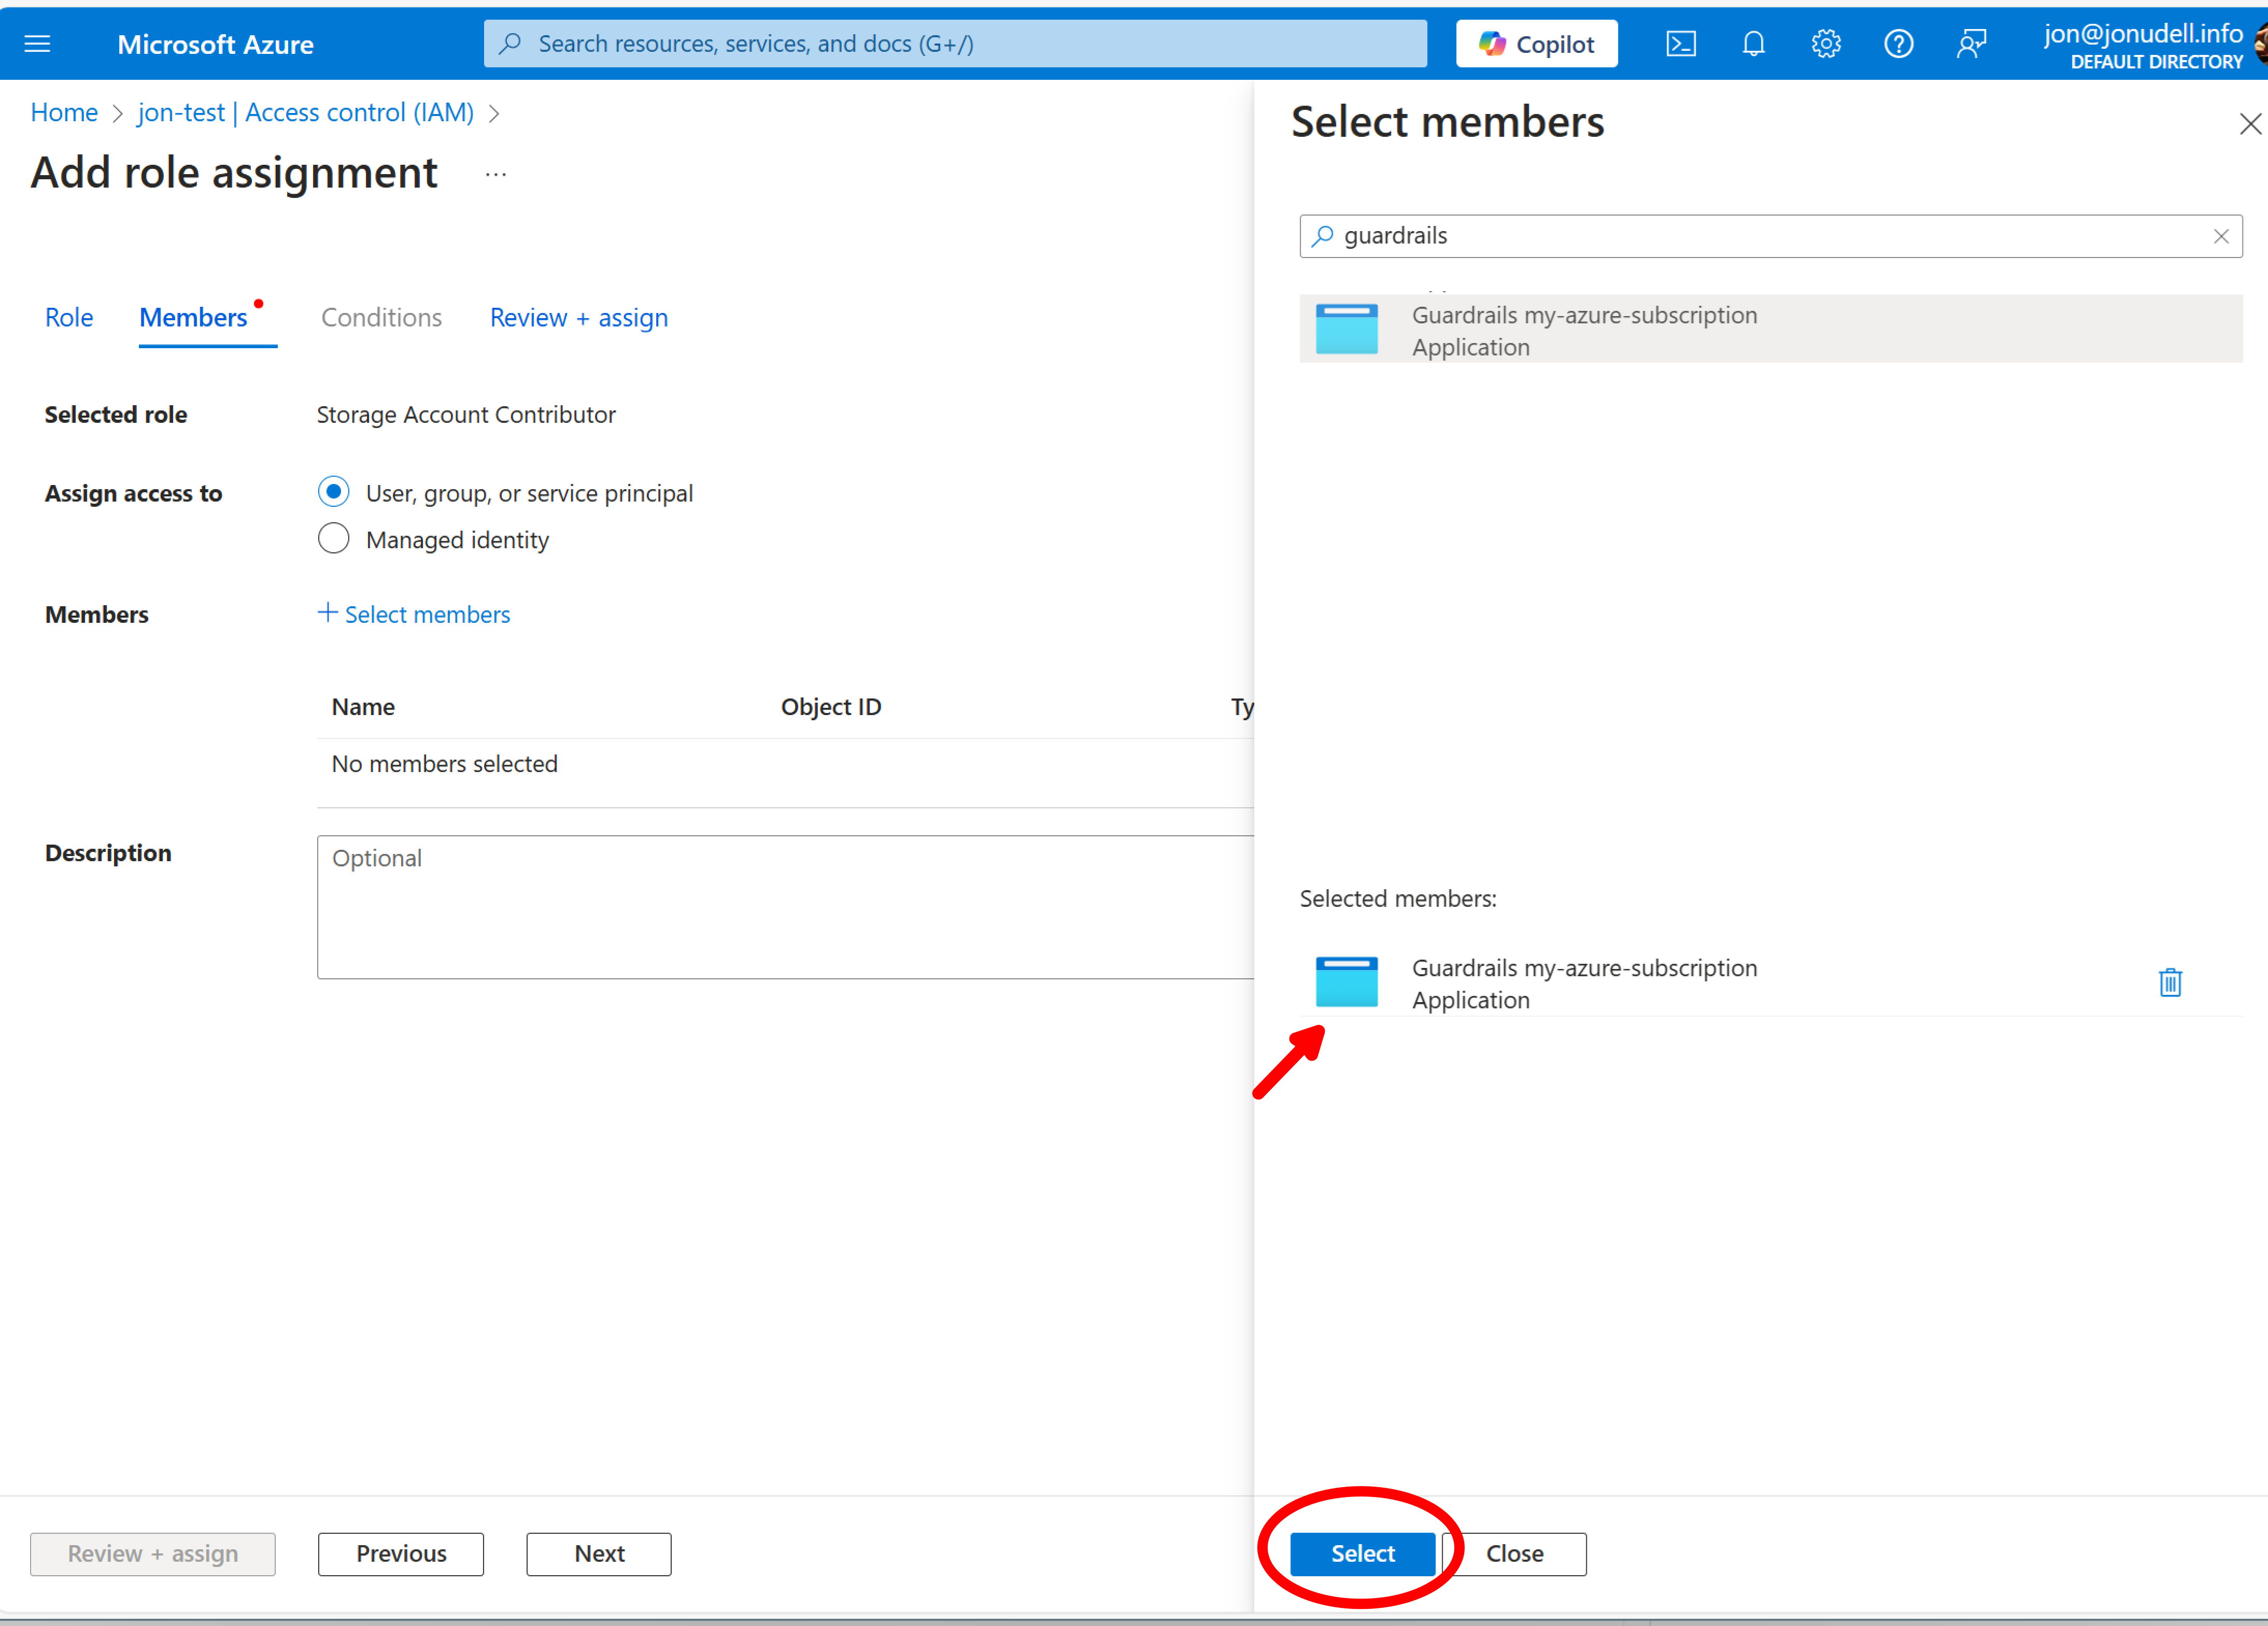
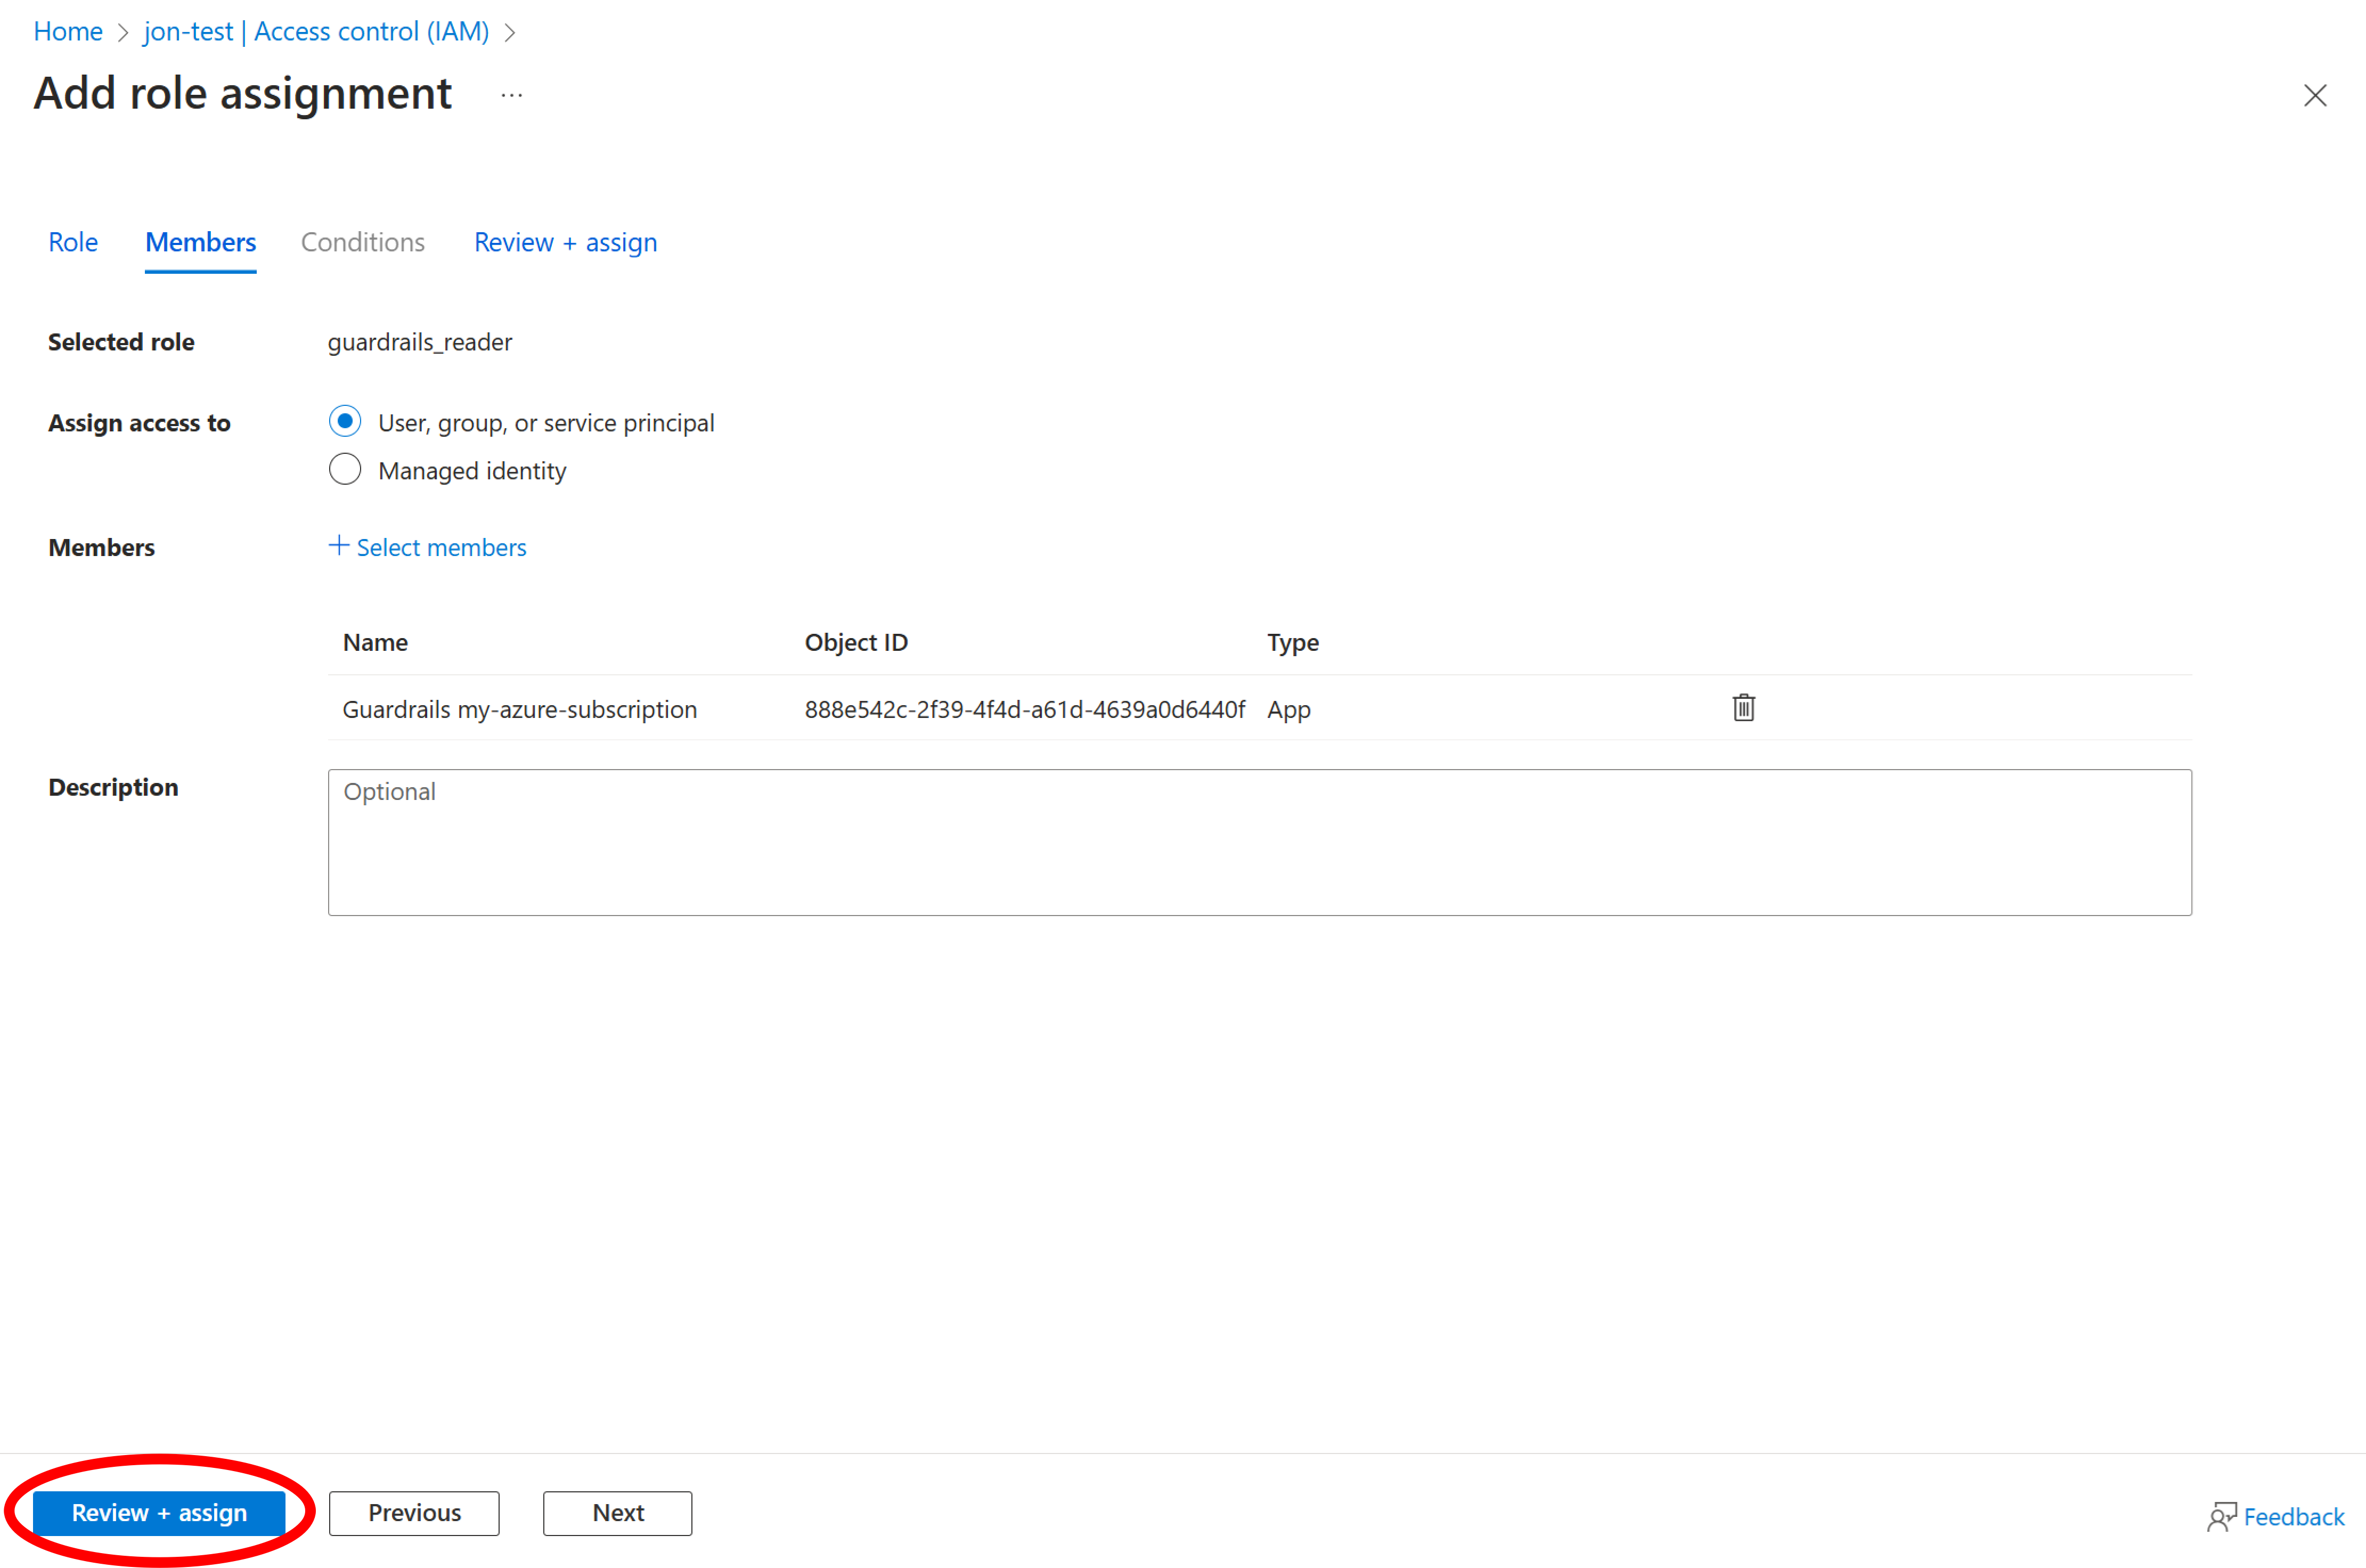
Step 5: Search for registered app
Select Select members, search for the name of your registered app, and Select it.
Step 6: Review and assign
Step 7: Find Quick Actions
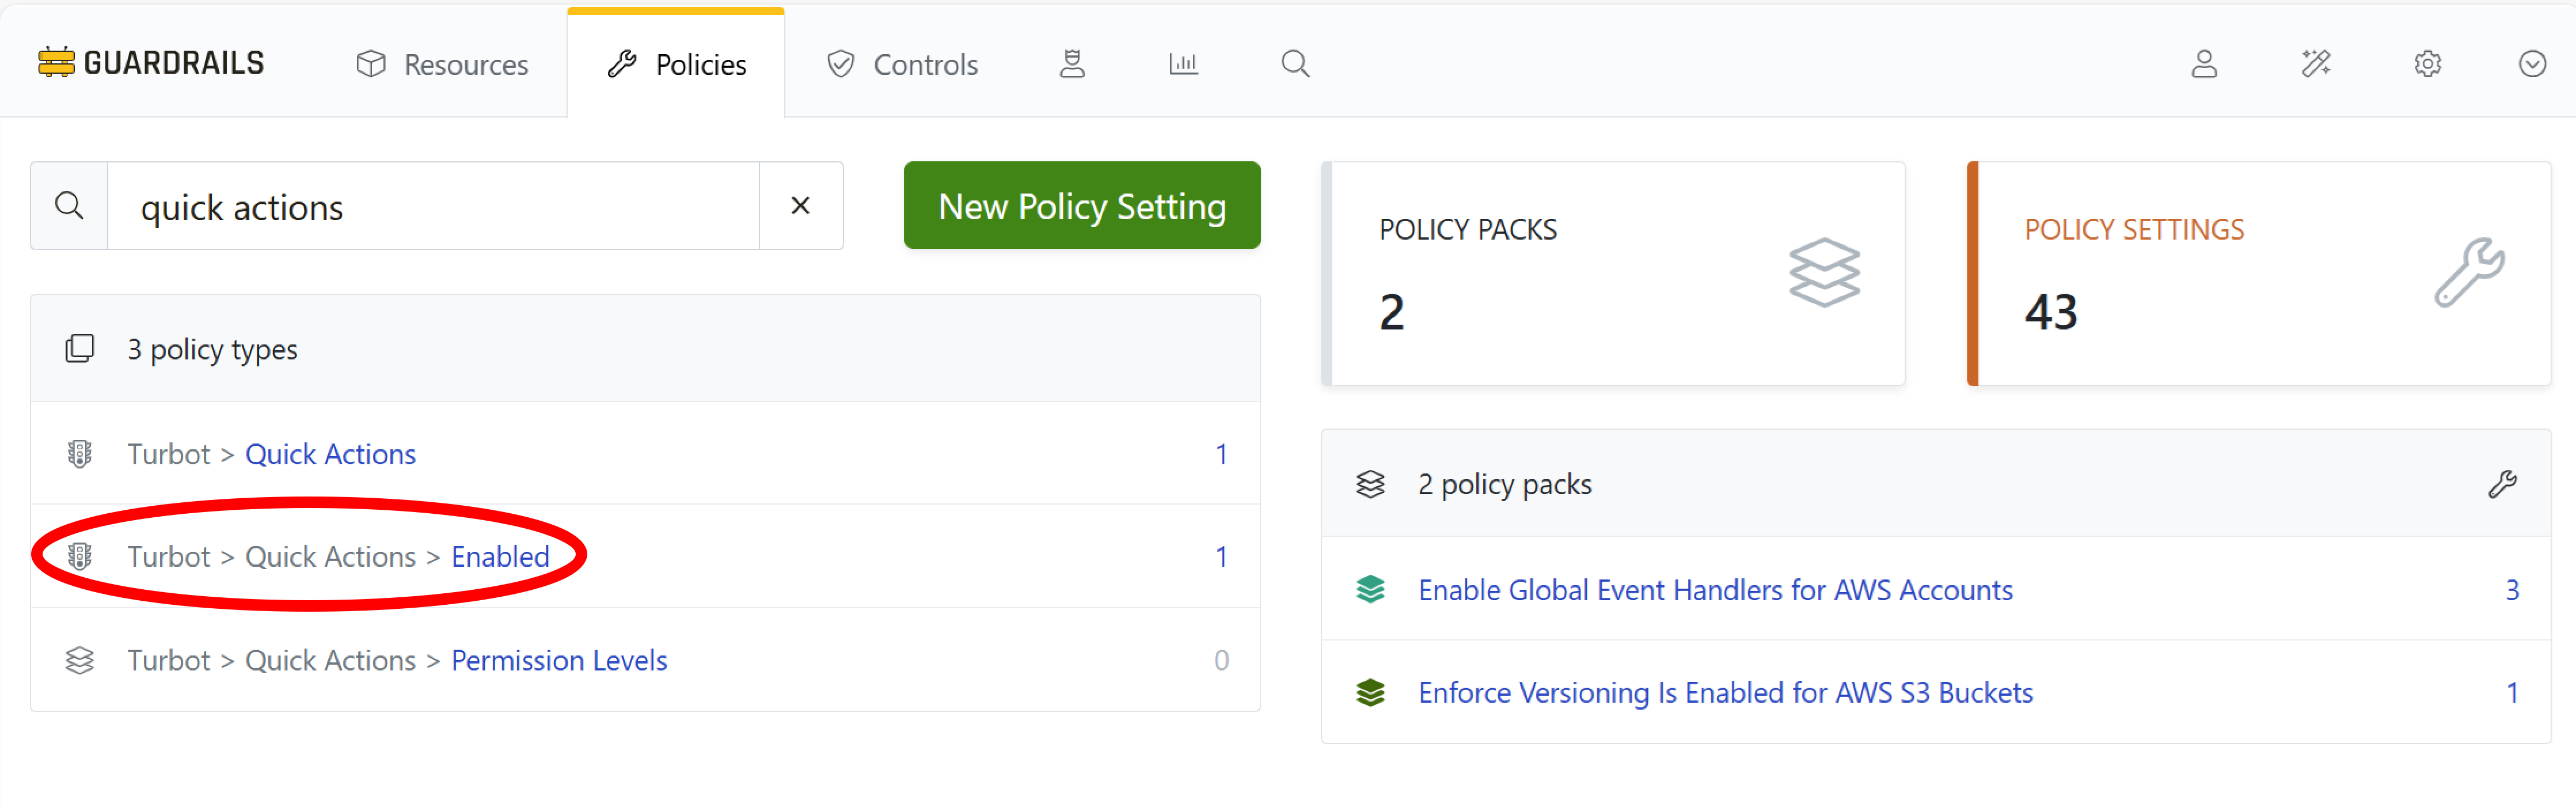
Select Policies from the top-level navigation. In the search box, type quick actions, then select the Turbot > Quick Actions > Enabled policy type.
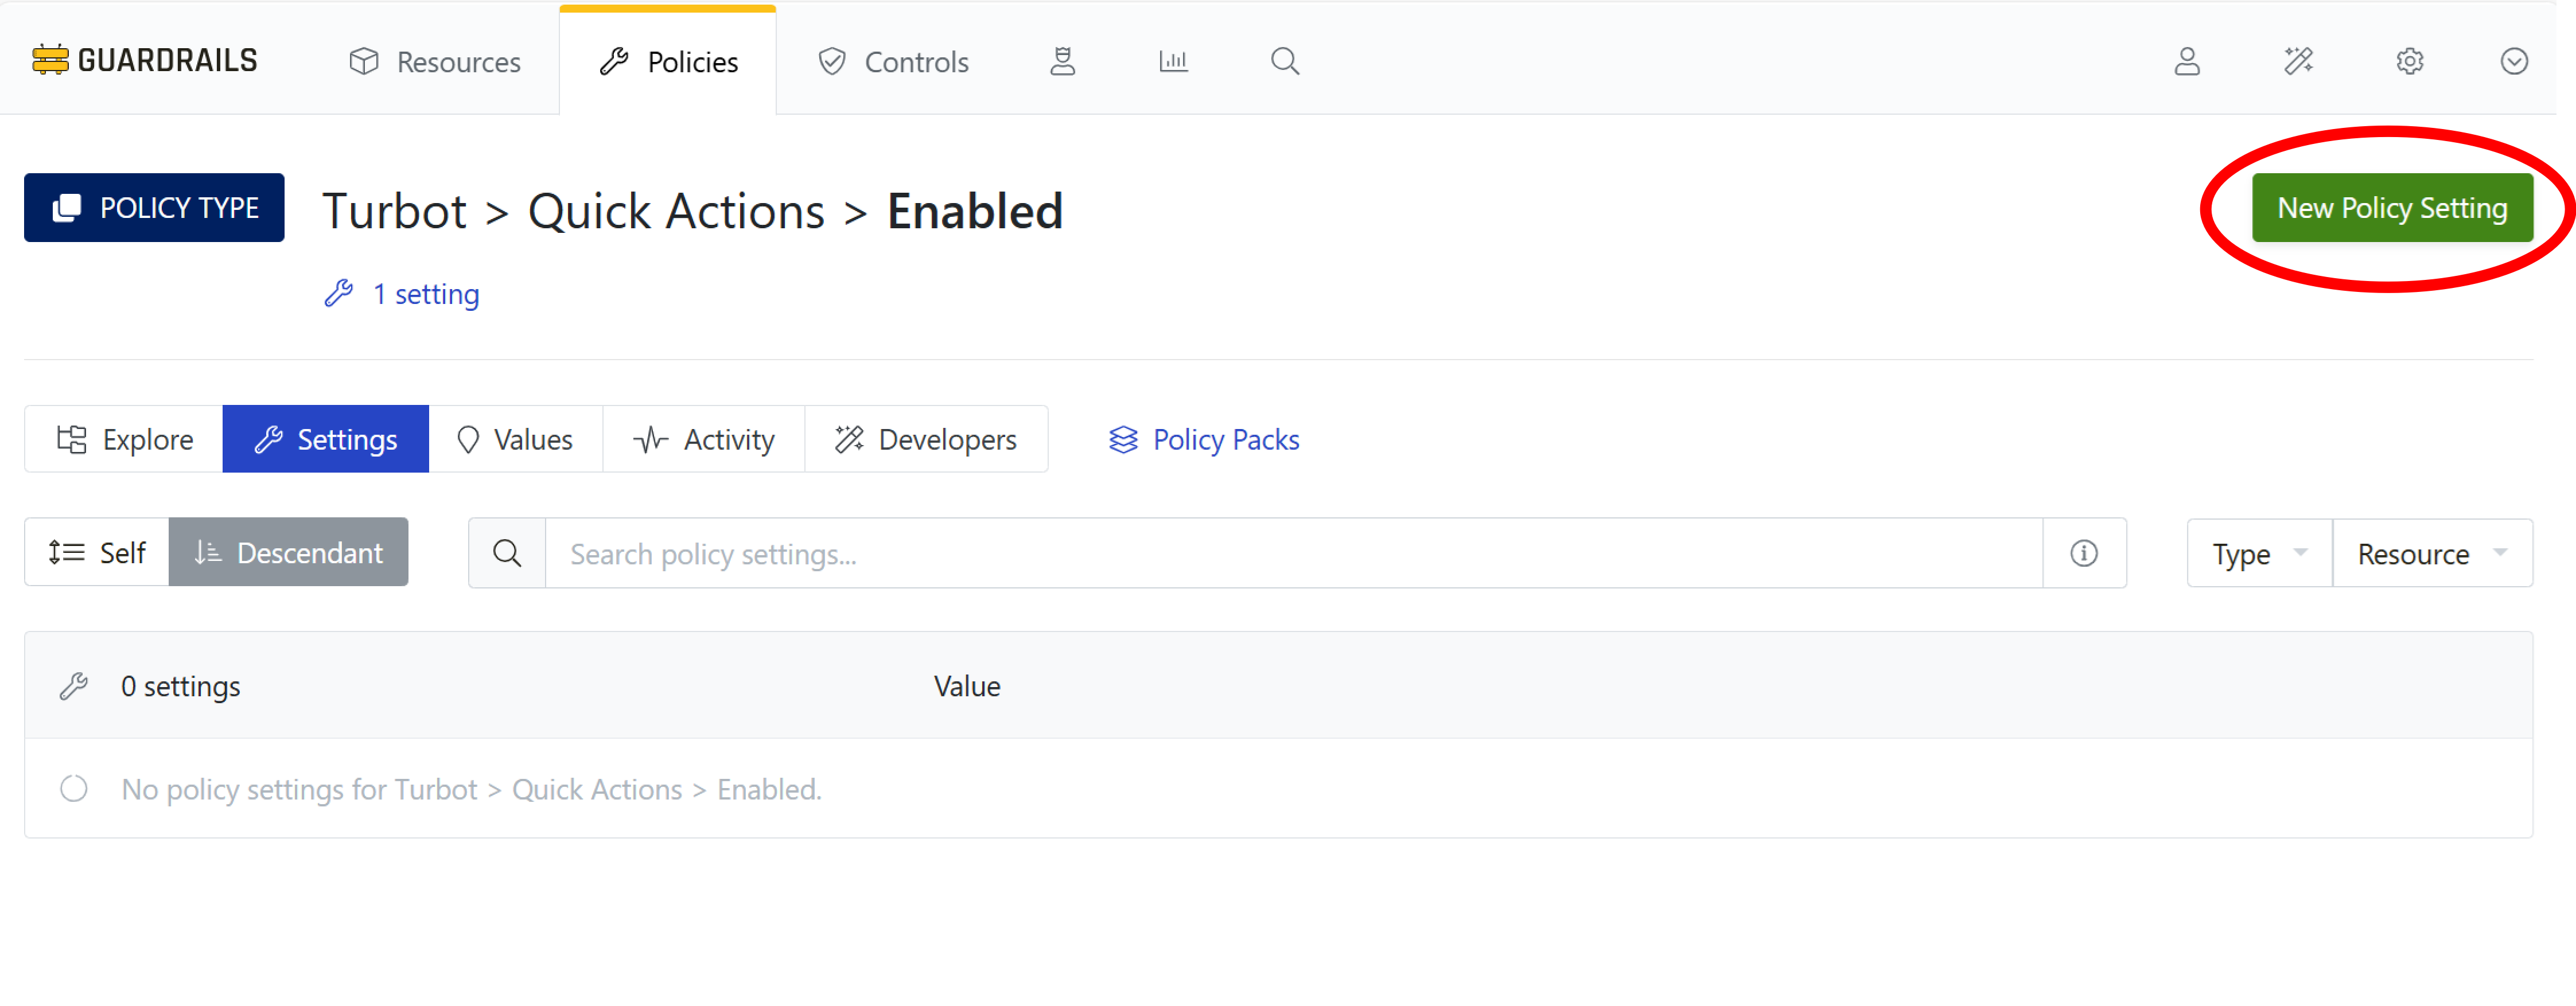
Select the green New Policy Setting button.
Step 8: Enable Quick Actions
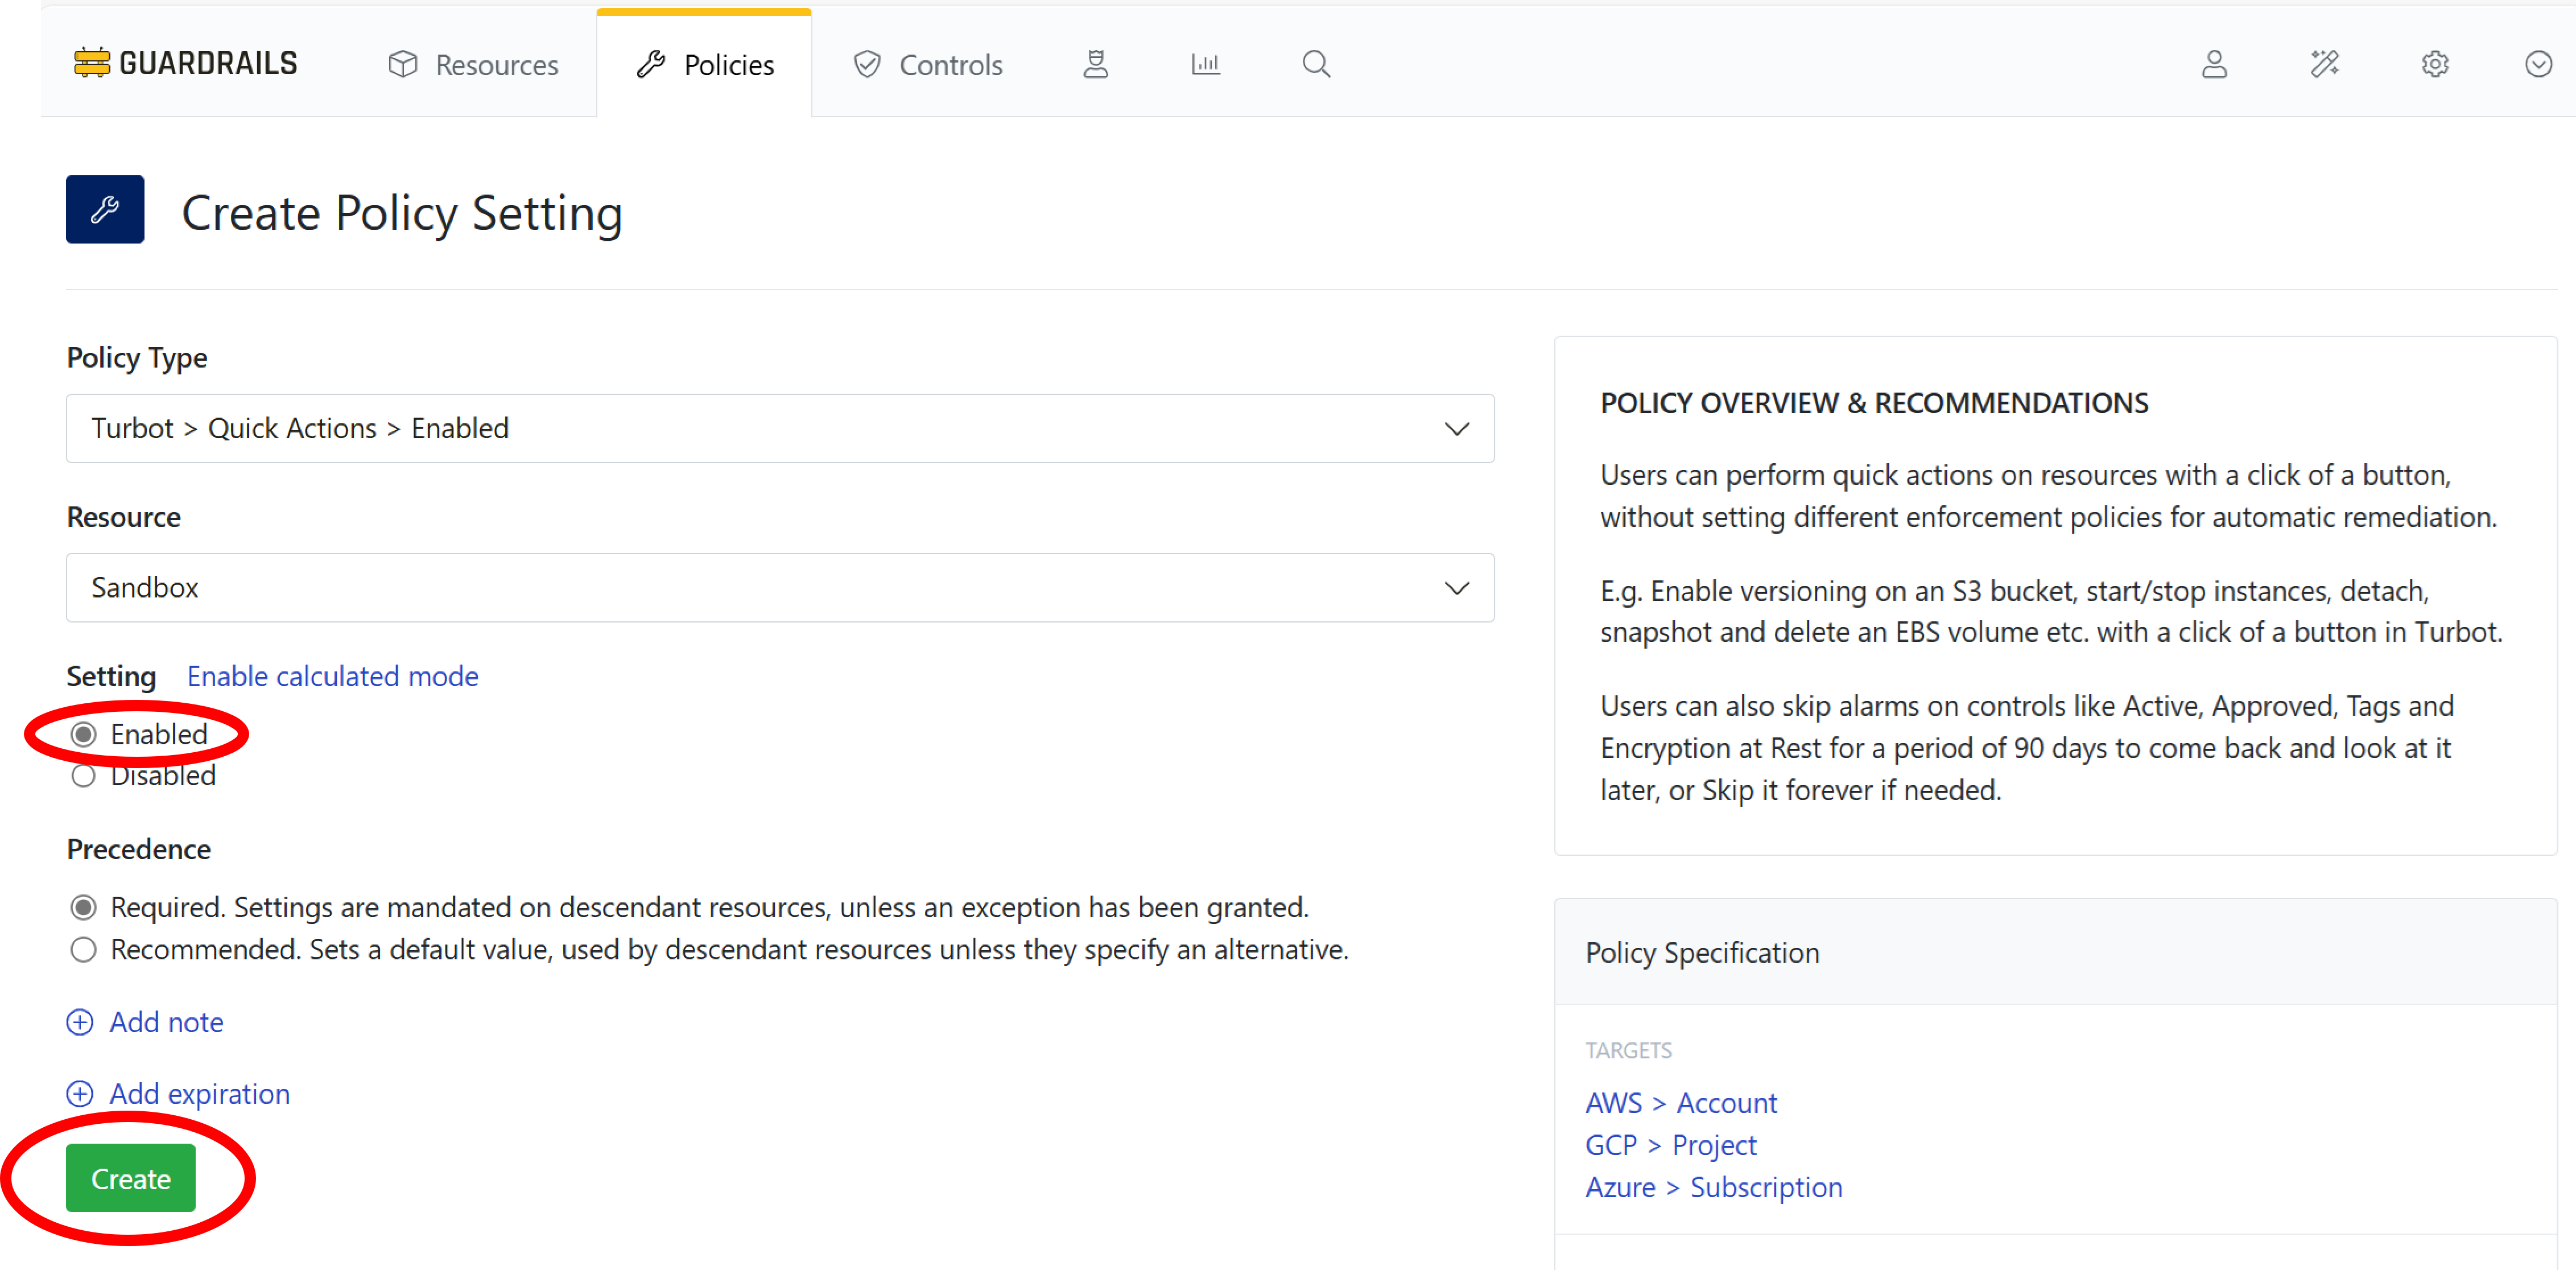
Choose Sandbox as the Resource, and then select Enabled, and select the green Create button.
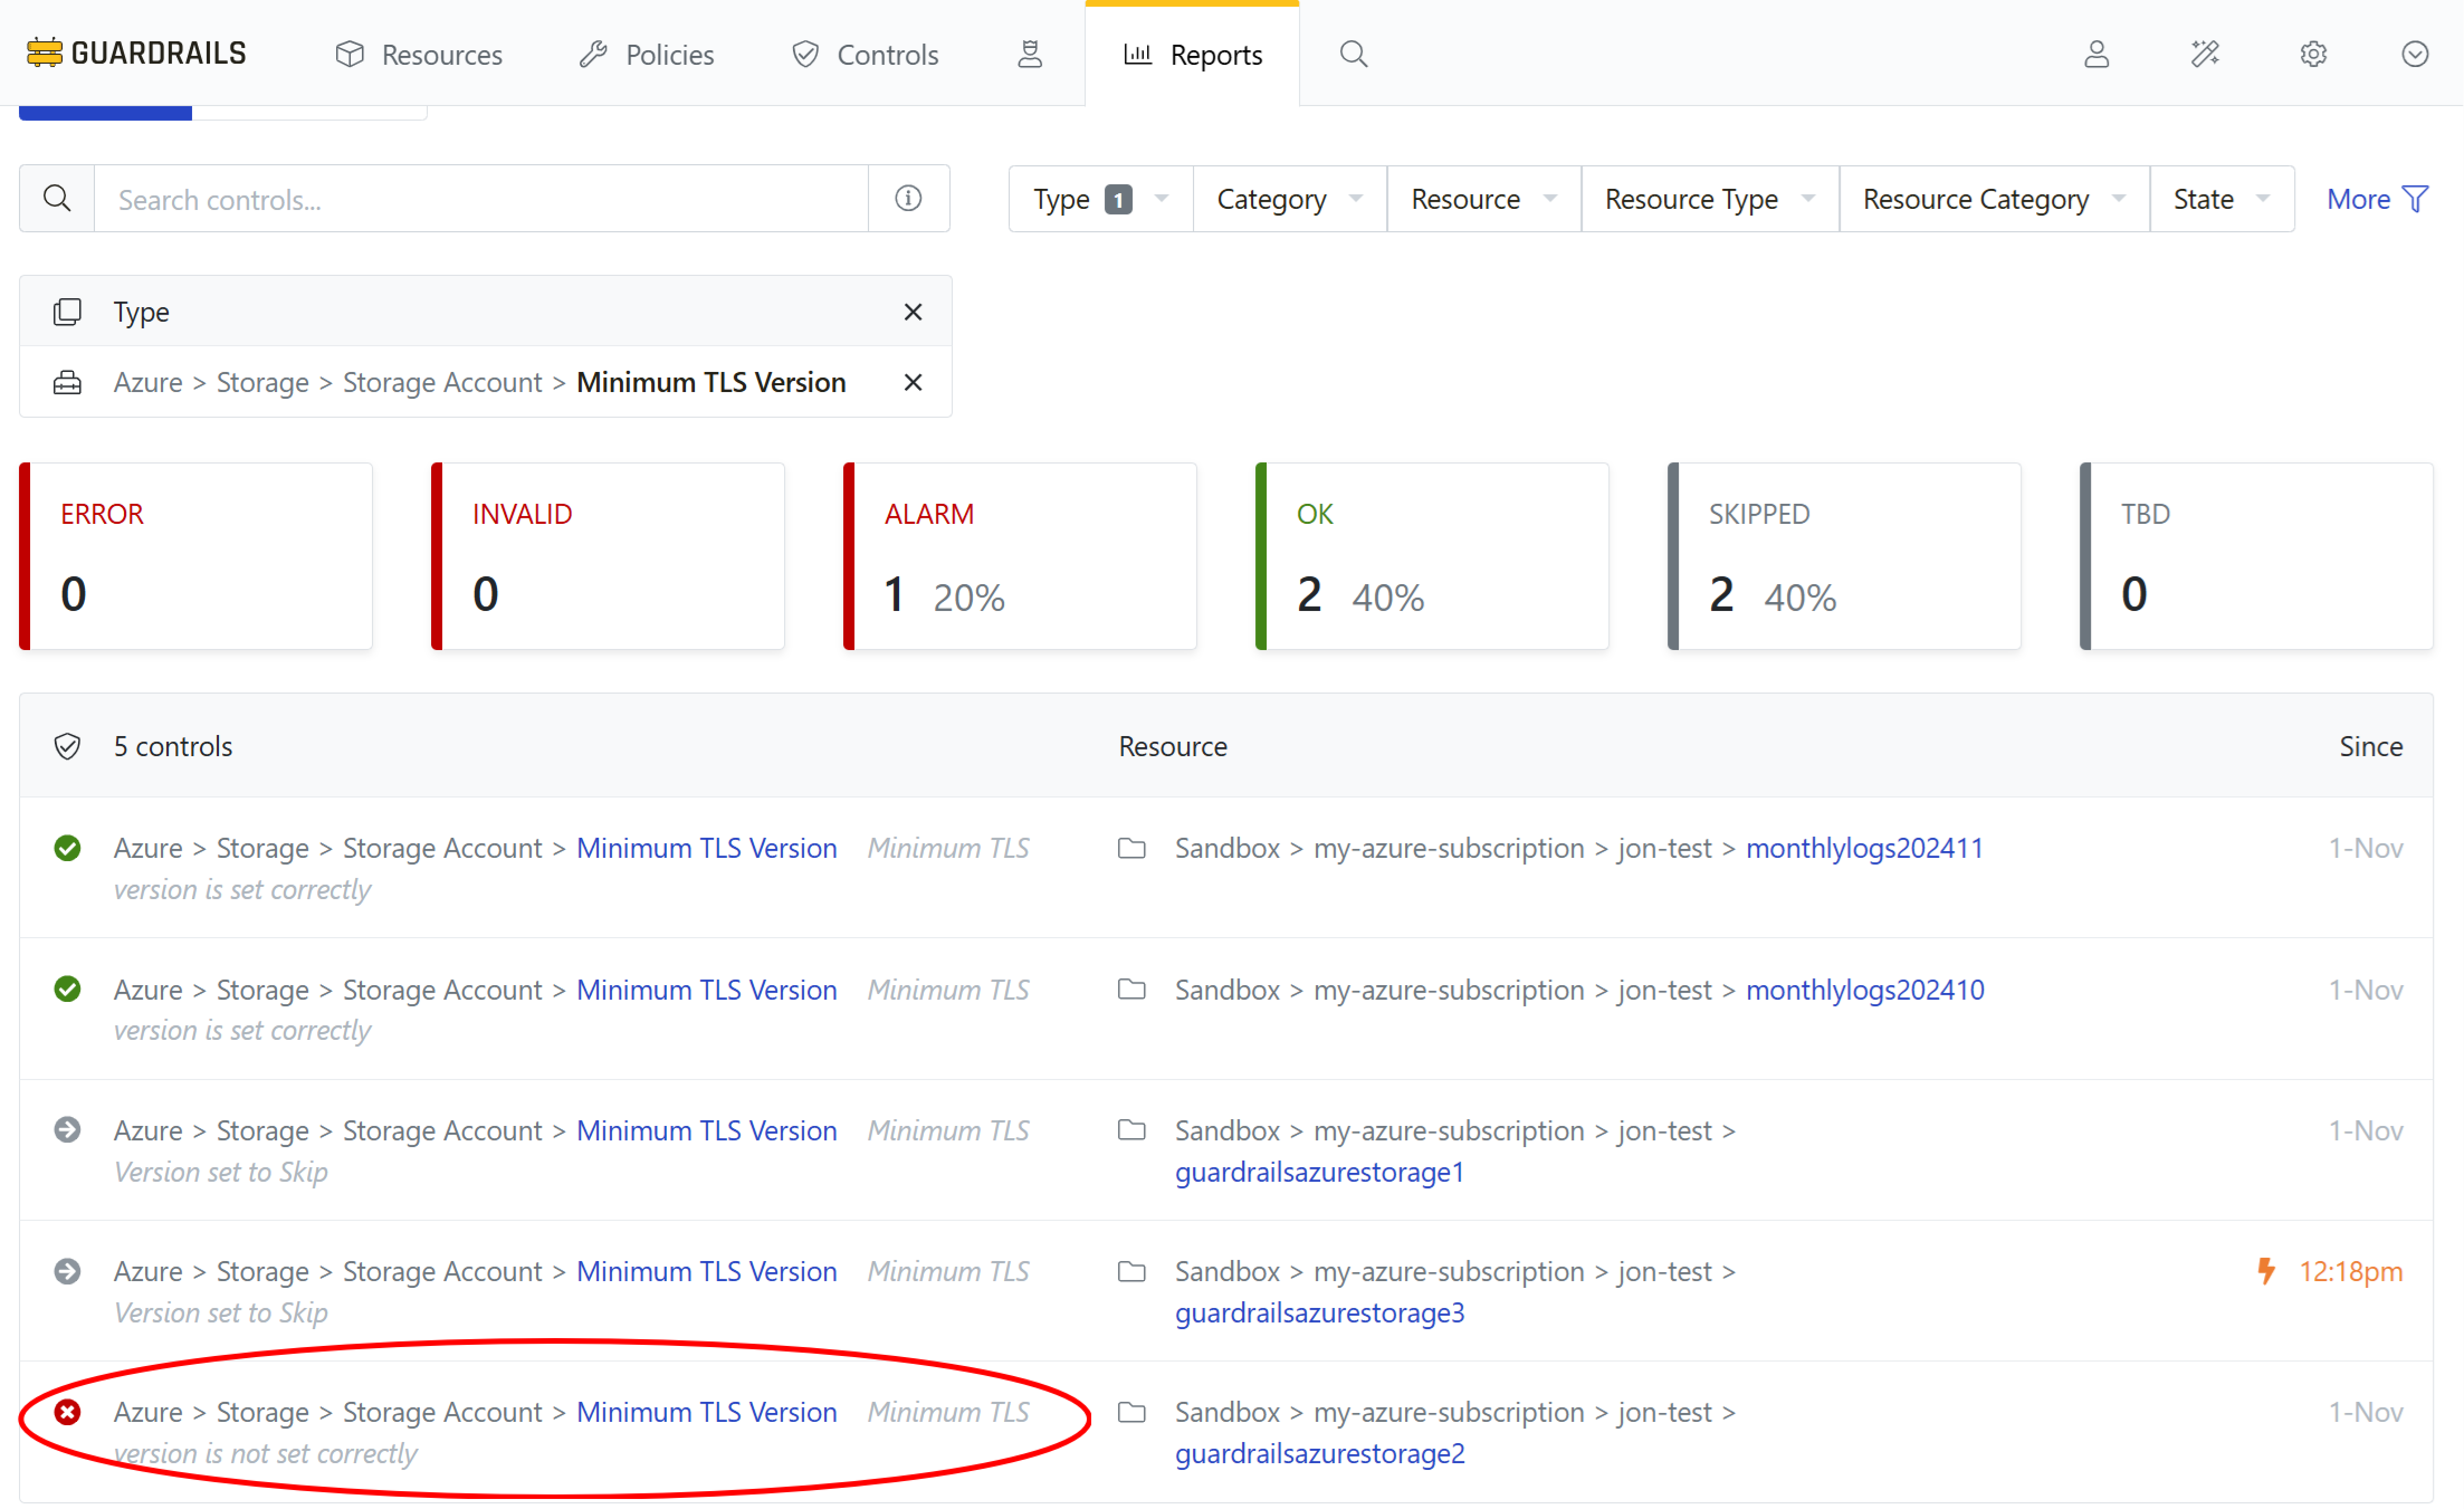
Step 9: Find a storage account in Alarm
Use your bookmark to navigate back to the Controls by State report and filter on Azure > Storage > Storage Account > Minimum TLS Version.
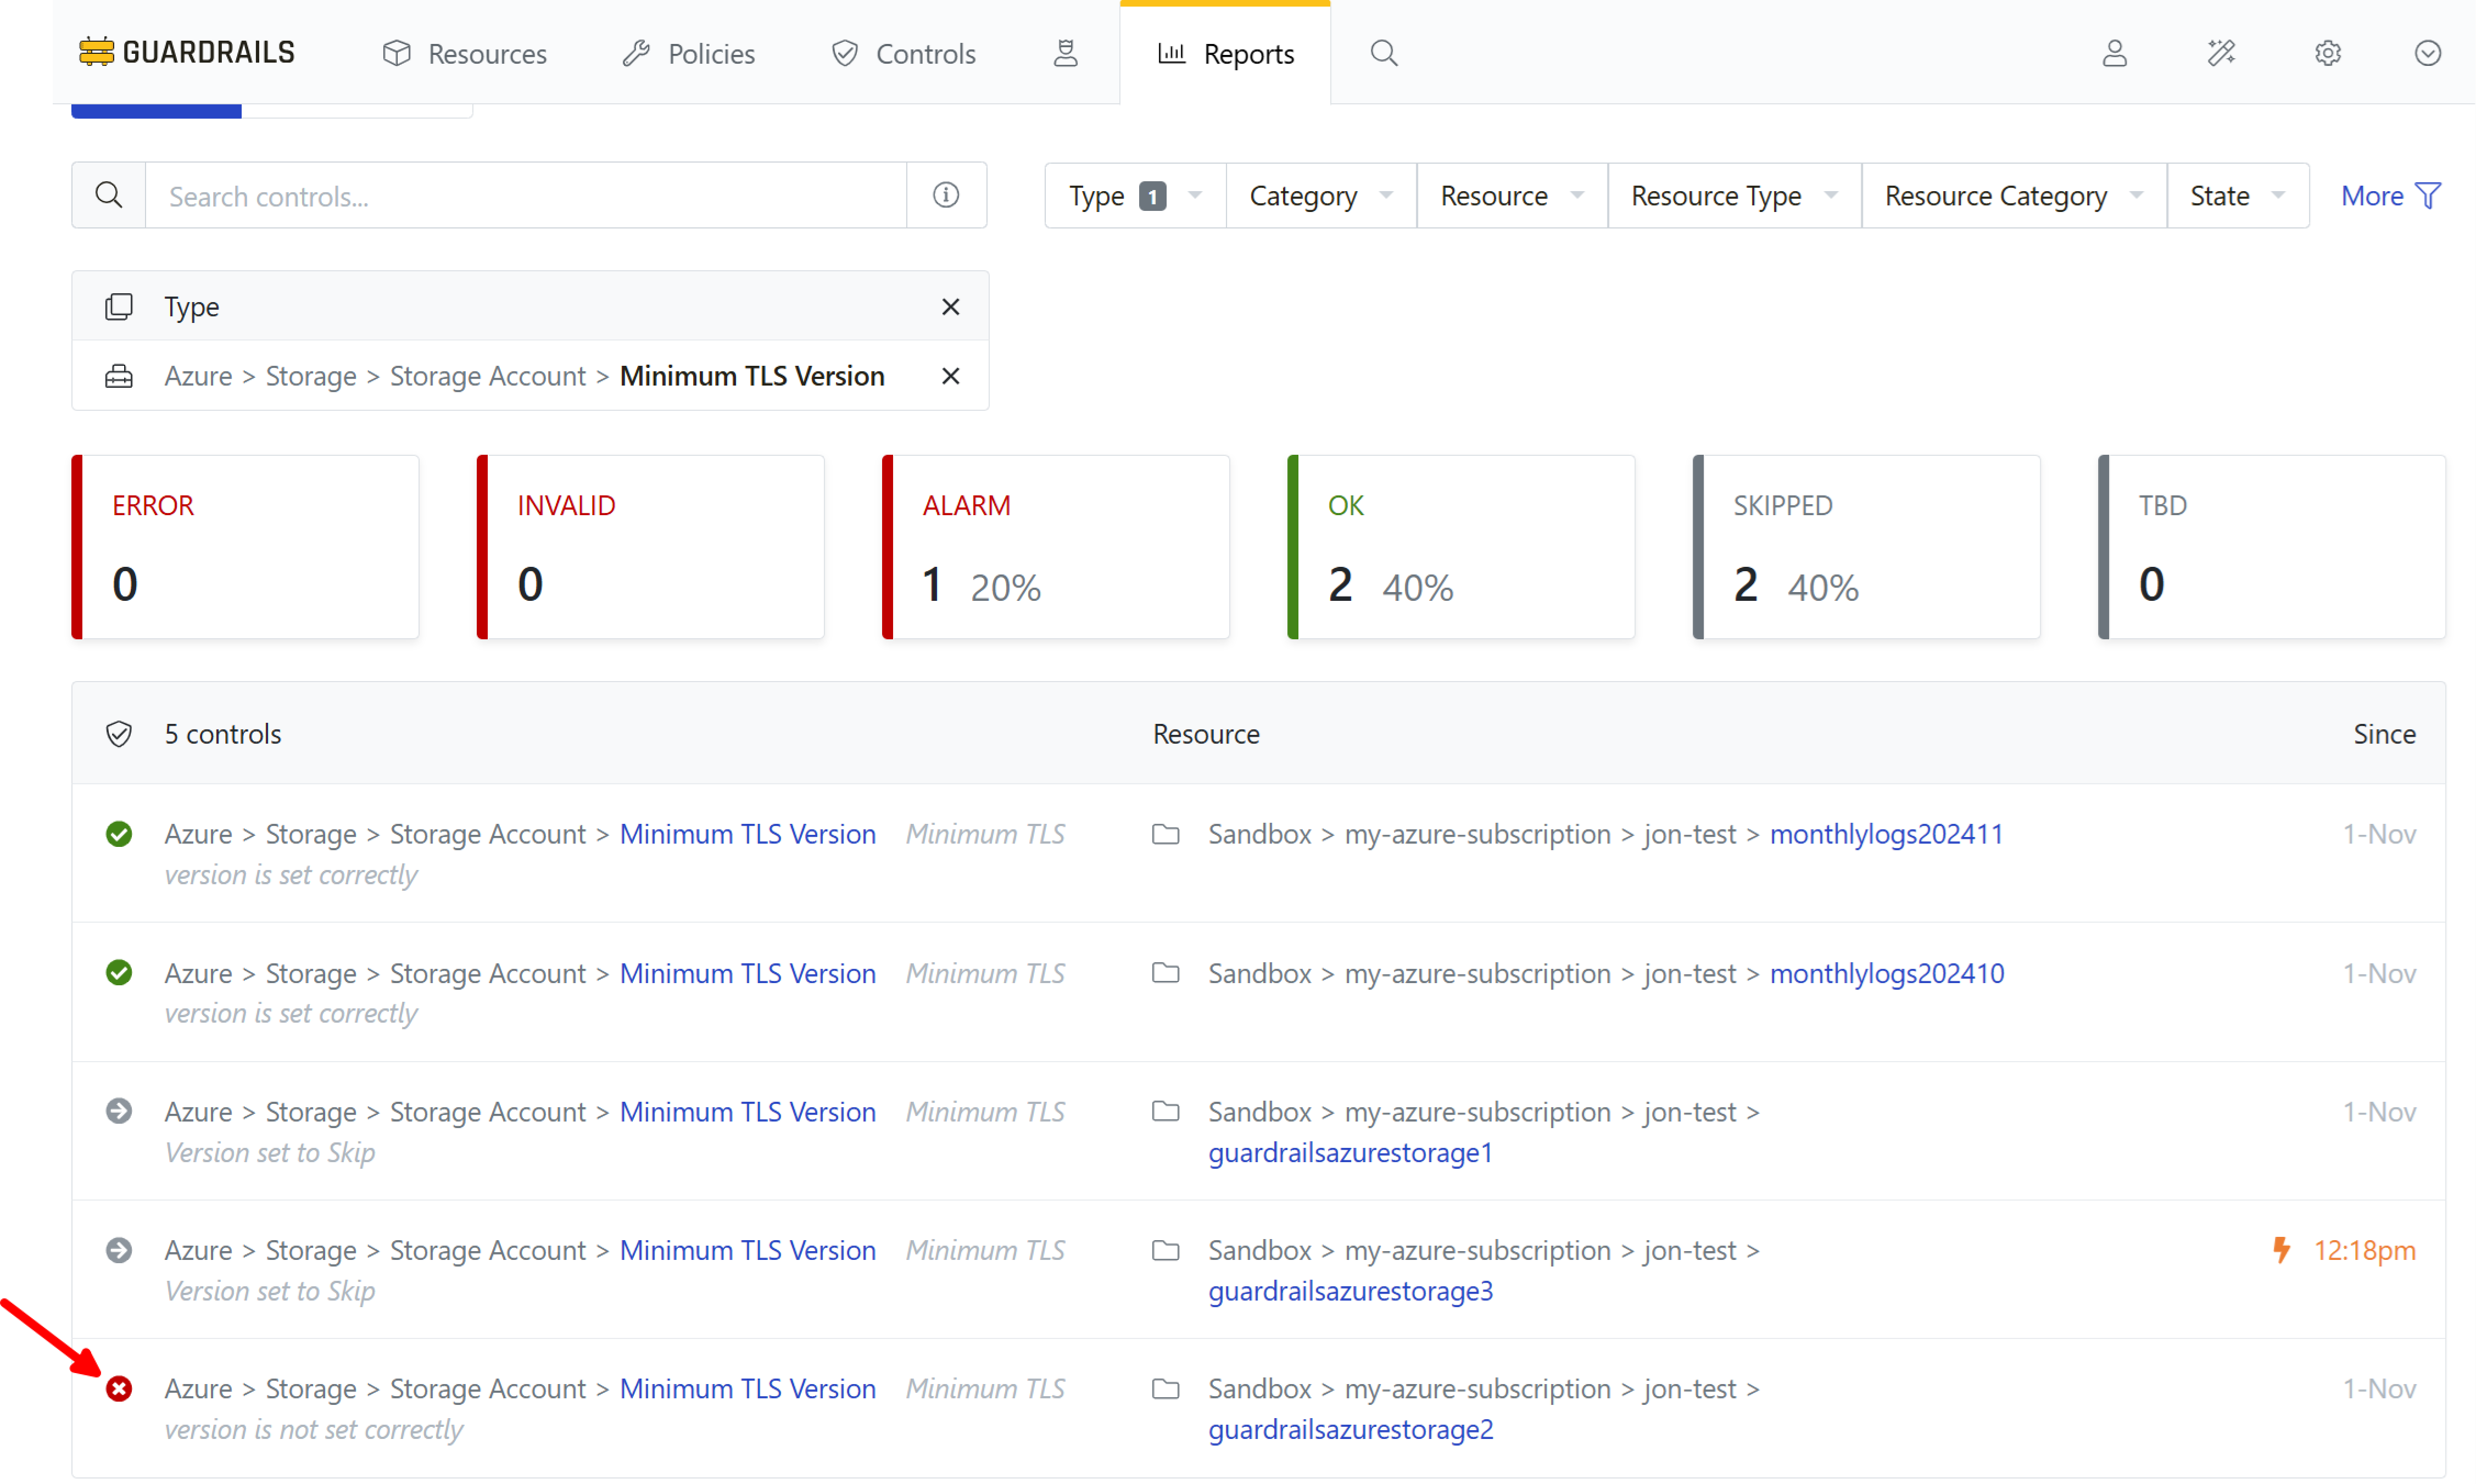
Step 10: Select a storage account in Alarm
Select a storage account in Alarm state from the list of storage accounts.
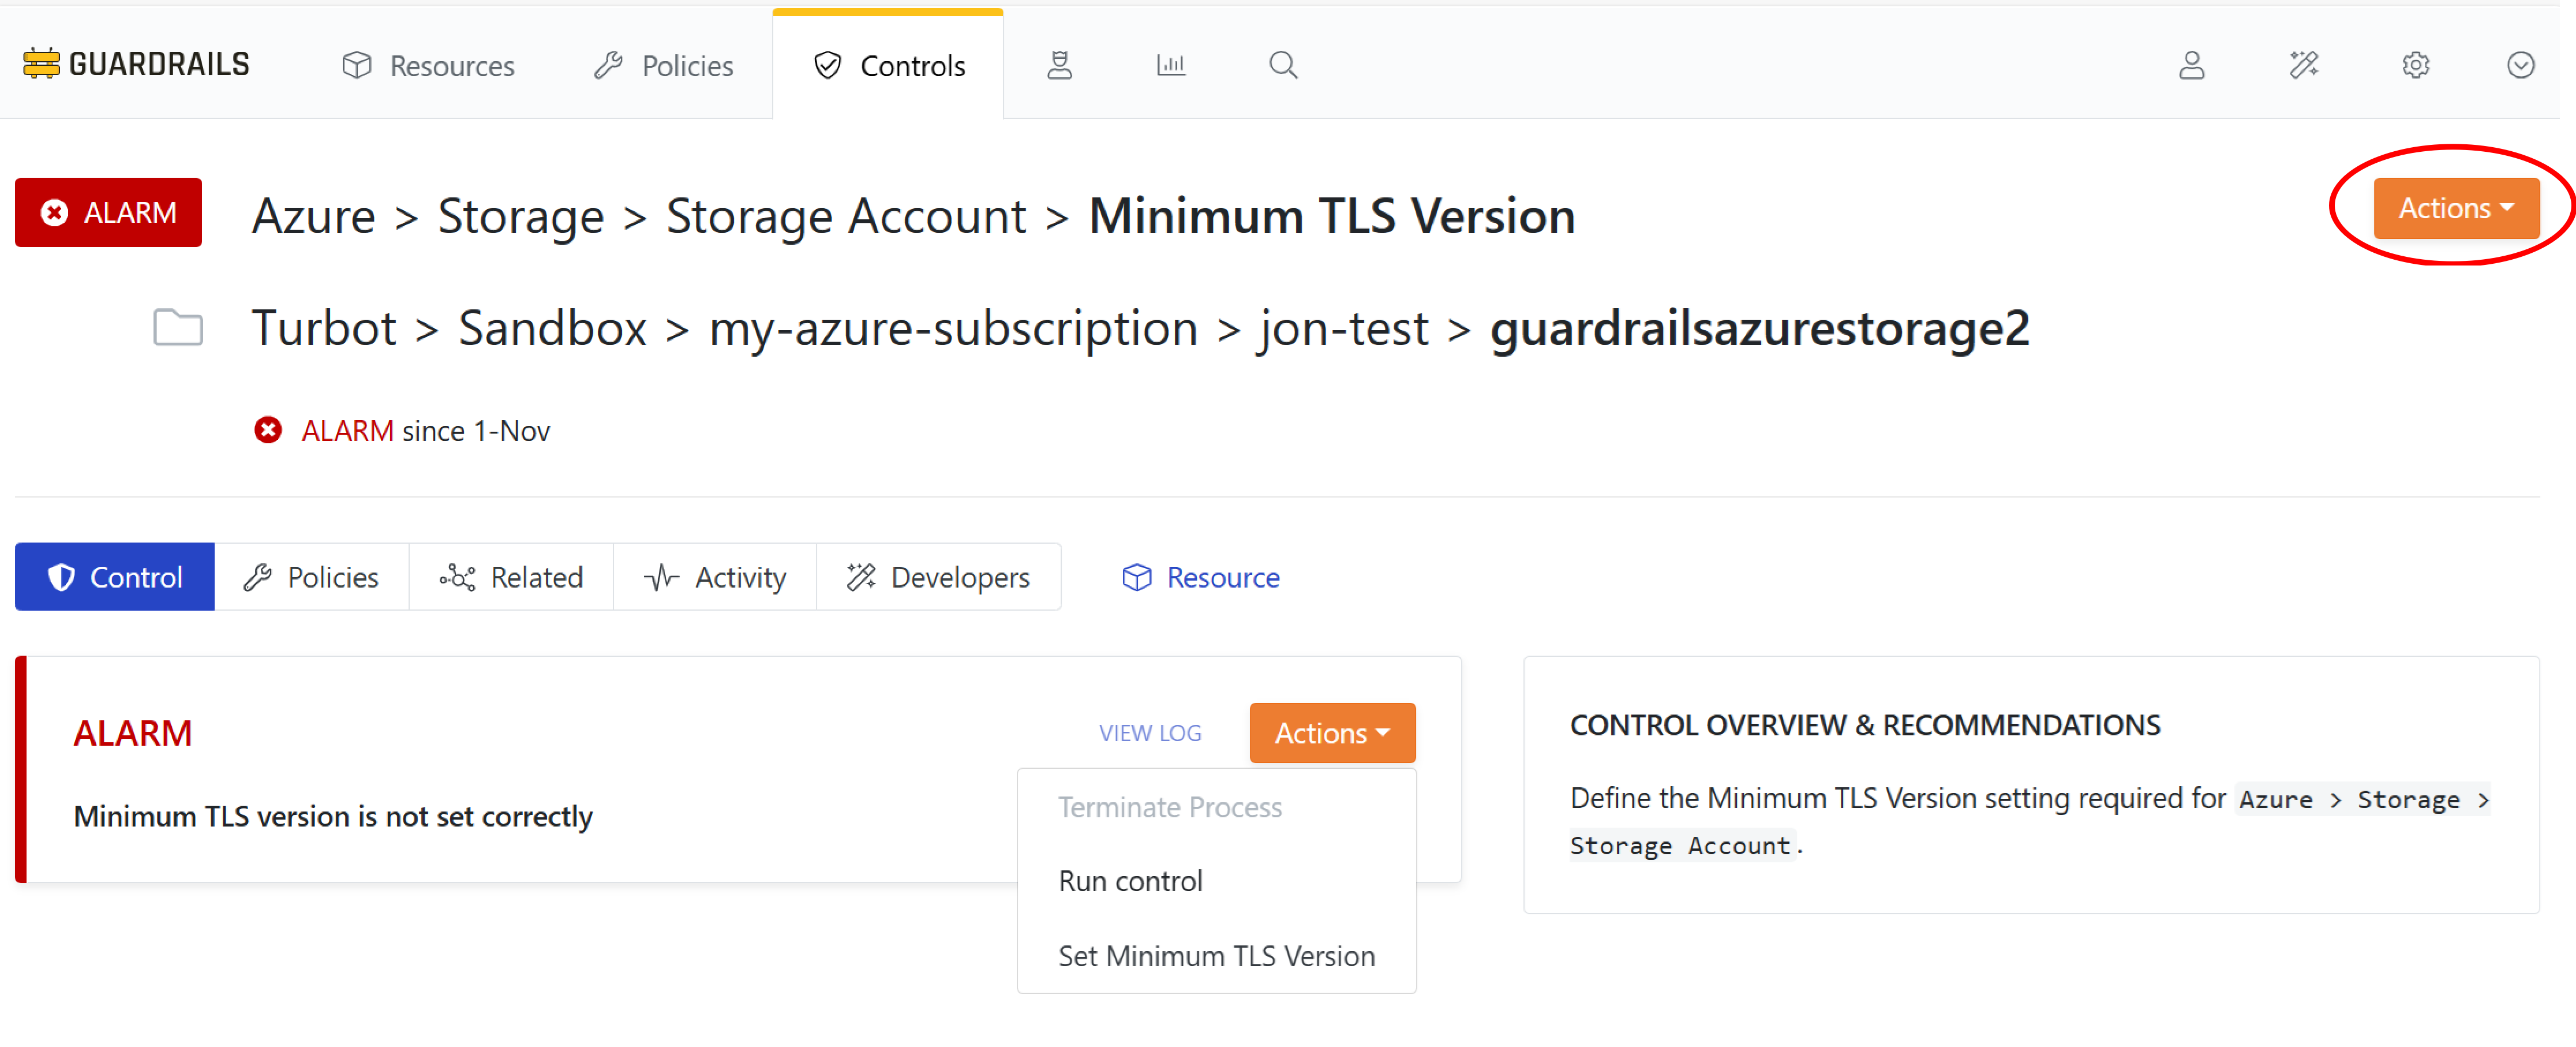
Step 11: Use a Quick Action
Select the Actions dropdown, and choose Set Minimum TLS Version.
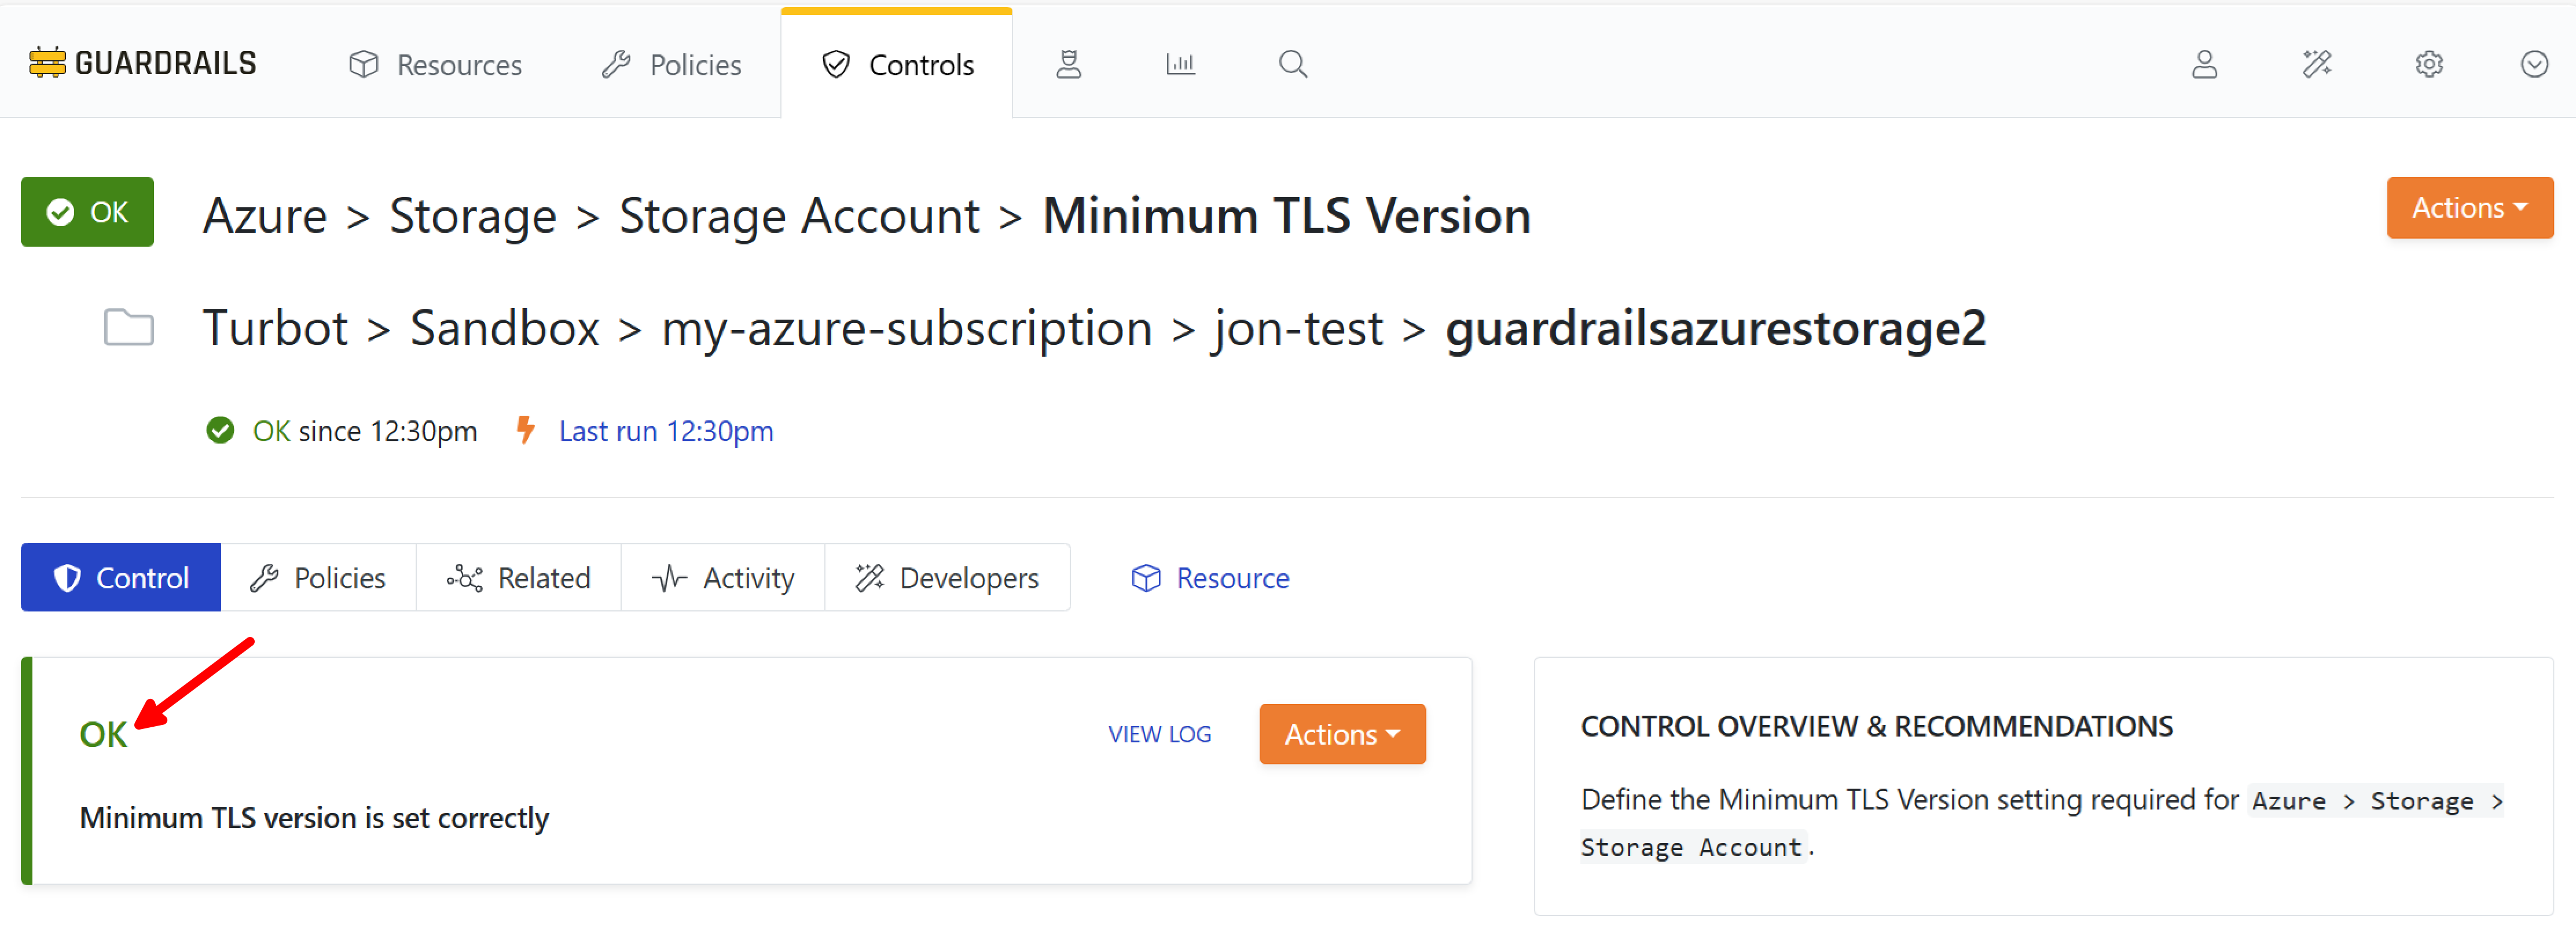
Step 12: Observe the change
Guardrails reports that the action was successful, and the control goes to the OK state.
Step 13: Check if it worked
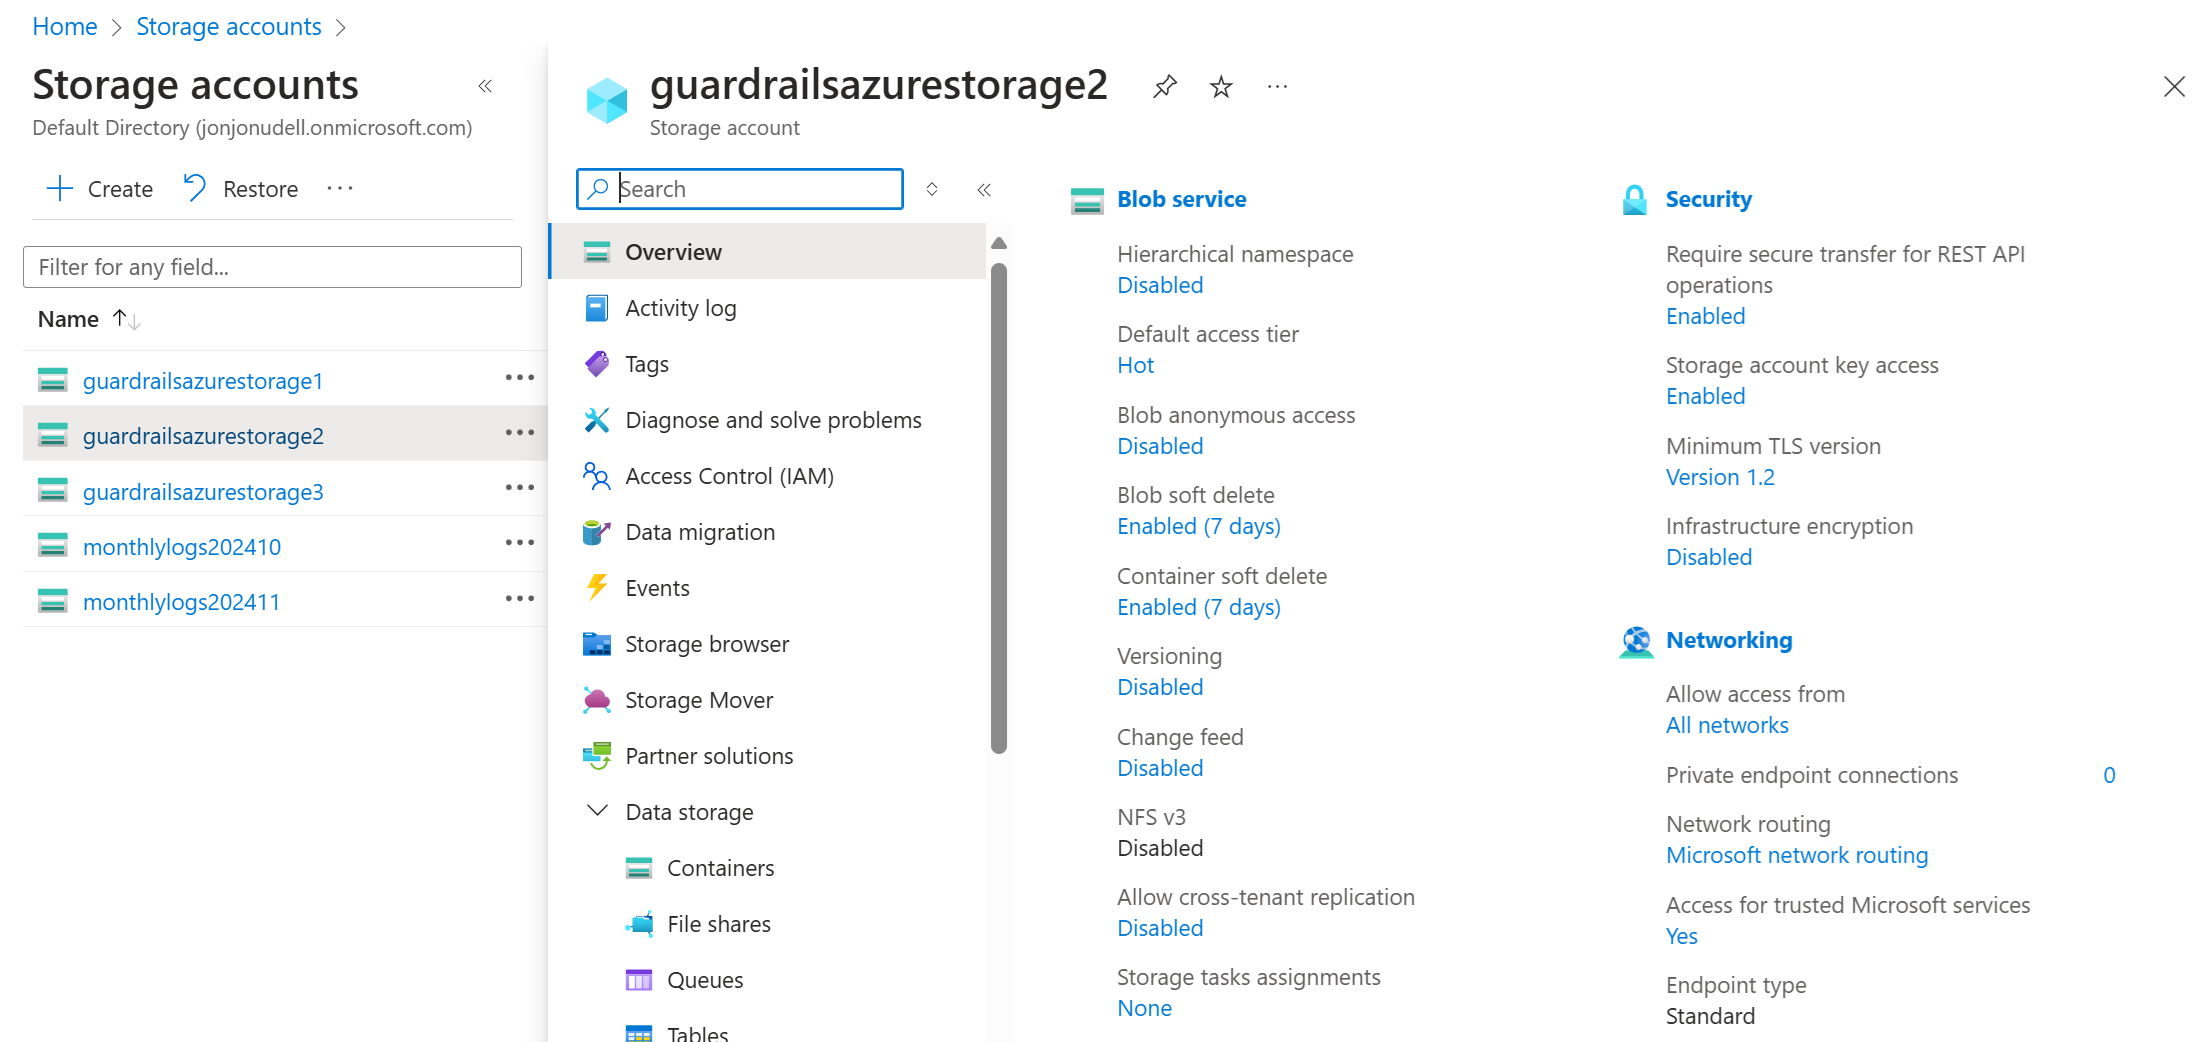
Open a tab to the Azure portal and navigate to the storage account. Confirm the Guardrails Quick Action has correctly set the minimum TLS version.
Step 14: Review
In this guide you enabled Guardrails Quick Actions and used a Quick Action to change a storage account's policy for minimum TLS version.
Next Steps
In the next guide we’ll set Guardrails to automatically enforce these actions continuously.
Progress tracker
- Prepare an Azure Subscription for Import to Guardrails
- Connect an Azure Subscription to Guardrails
- Observe Azure Resource Activity
- Enable Your First Guardrails Policy Pack
- Review Subscription-Wide Governance
- Create a Static Exception to a Guardrails Azure Policy
- Create a Calculated Exception to a Guardrails Azure Policy
- Send an Alert to Email
- Apply a Quick Action
- Enable Automatic Enforcement