Workspaces
Workspaces
The Workspace is where work gets done! A Workspace provides a secure, independent set of Pipes resources. Workspaces allow you to separate your Steampipe instances for security, operational, or organizational purposes. Your workspace includes:
- A dedicated Steampipe database instance hosted in Turbot Pipes and available via a public Postgres endpoint. You can query the workspace database from the Turbot Pipes web console, run queries or controls from a remote Powerpipe or Steampipe CLI instance, or connect to your workspace from many third-party tools.
- Your own hosted Powerpipe server, providing secure access to your benchmarks and dashboards from any mod hosted in a public or private GitHub repository.
- Your own hosted Flowpipe server allowing you to run pipelines and set up always-on triggers to run your pipelines automatically on a schedule or in response to events.
Creating Workspaces
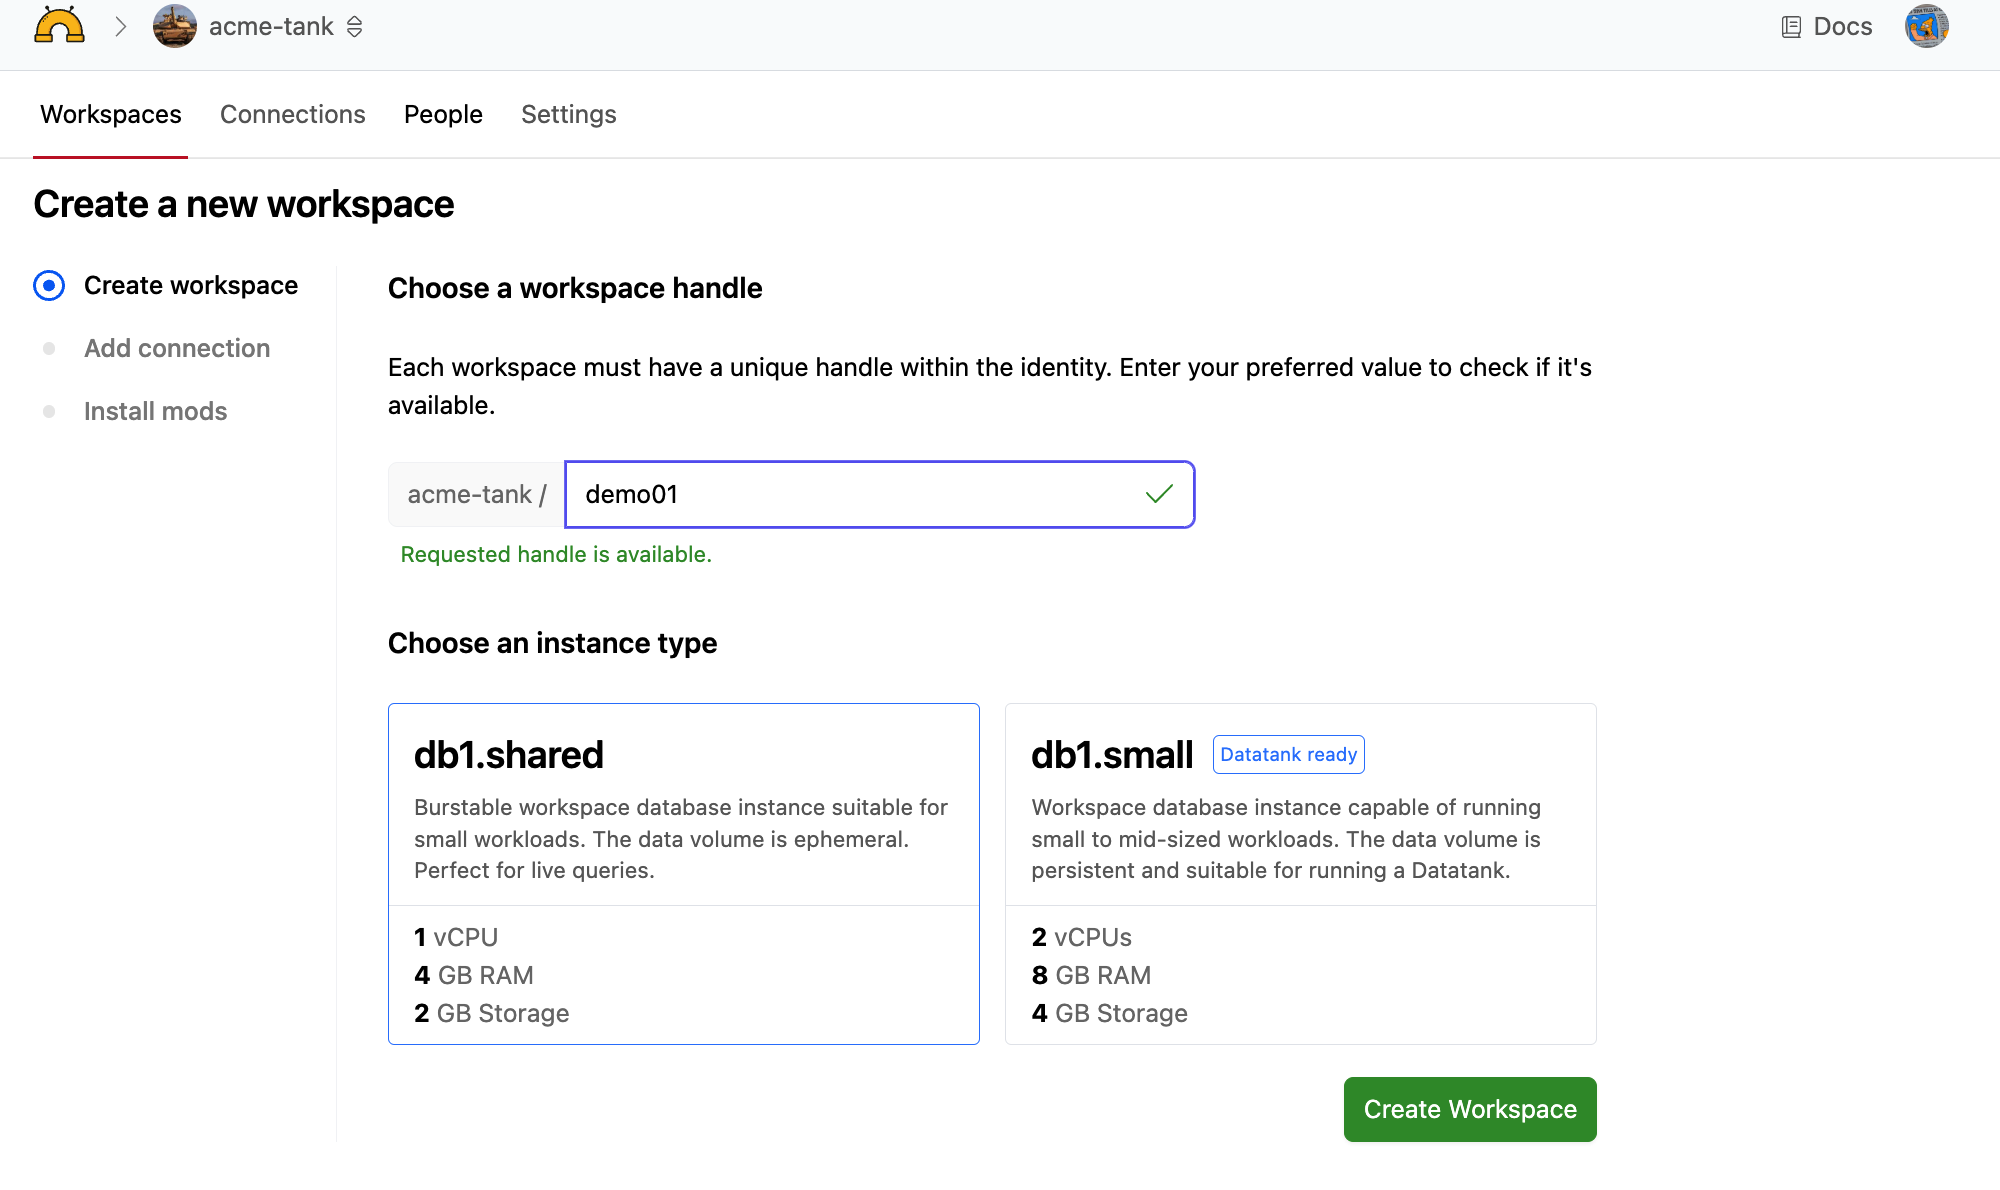
You can create workspaces from the Workspaces tab for your developer account or organization. From the Workspaces tab, click New Workspace. Note that if the New Workspace button is disabled, you have likely reached a limit for your plan.

If you are on a paid plan, you may select the instance type for your workspace. Select the instance type that meets your capacity, performance, capability, and cost requirements.
Each workspace must have a handle. The workspace handle is a friendly identifier for your workspace and must be unique across your workspaces. You can change the handle later, but note that the DNS name for your workspace includes the handle. If you change the handle, your workspace's DNS name will also change. Enter a handle for your workspace and click Create Workspace.
If you have no connections defined, you will be prompted to create one. In order to query data, you'll need at least one connection. Click one of the plugins from the list. Enter the required settings for the plugin. You can verify your credentials using the Test Connection button and then click Create.
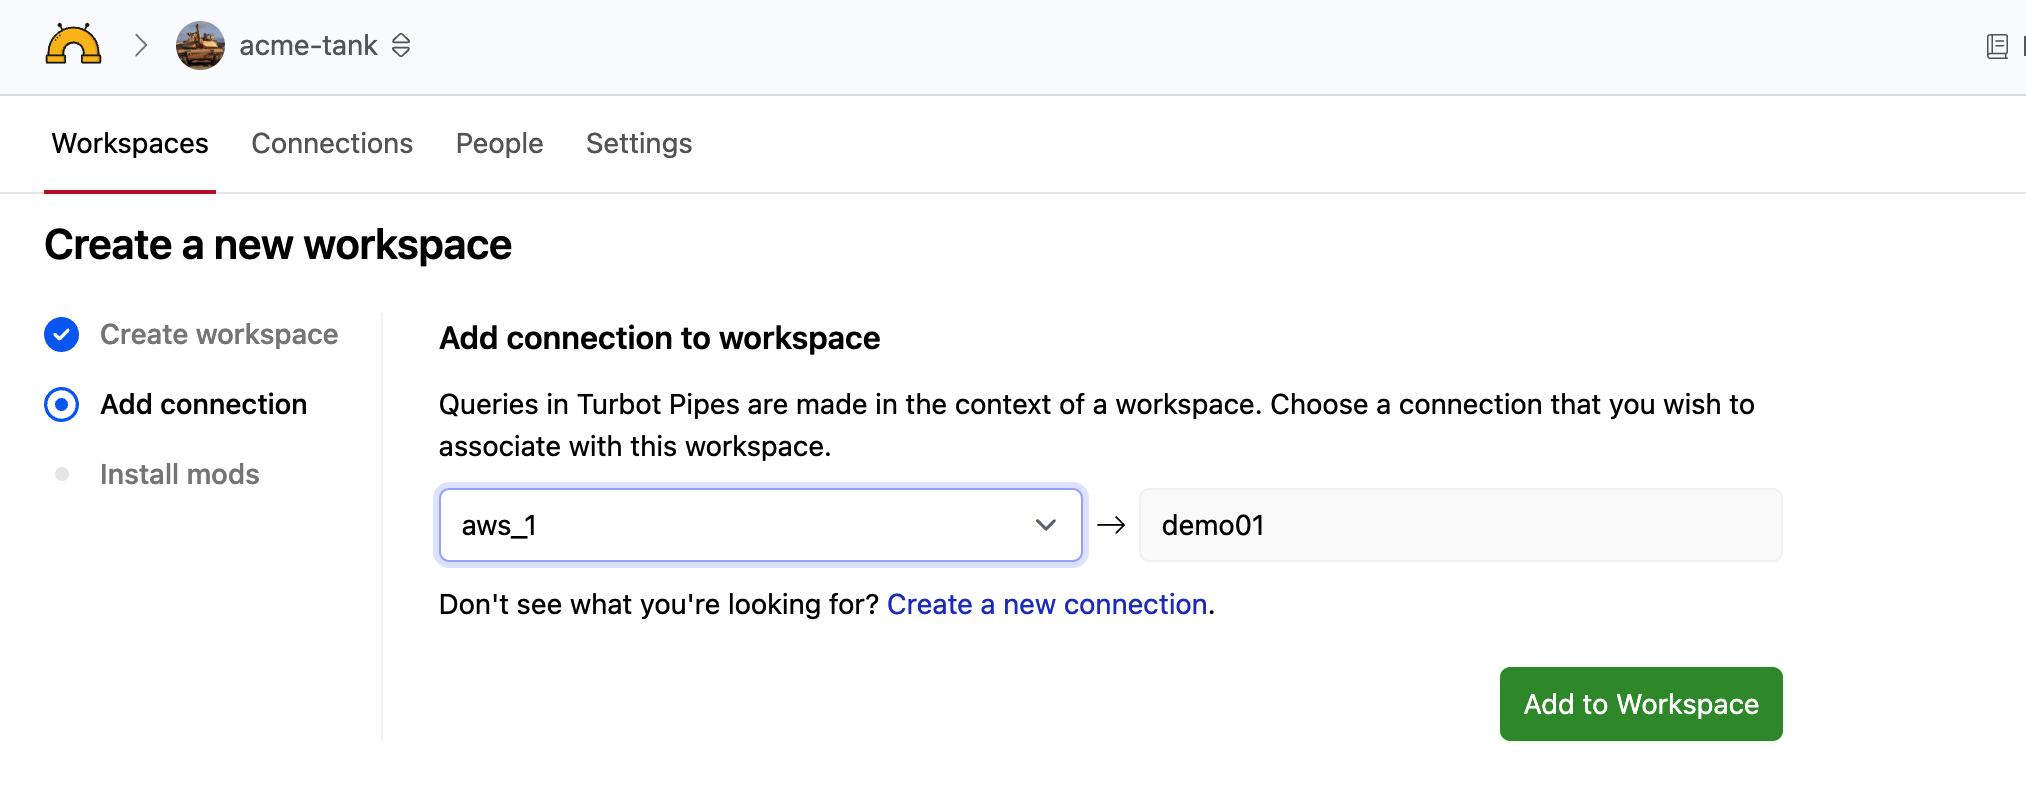
You will be prompted to add a connection to the workspace that you just created. Select the connection that you wish to add and click Add to Workspace if you would like to add a connection to your workspace at this time.

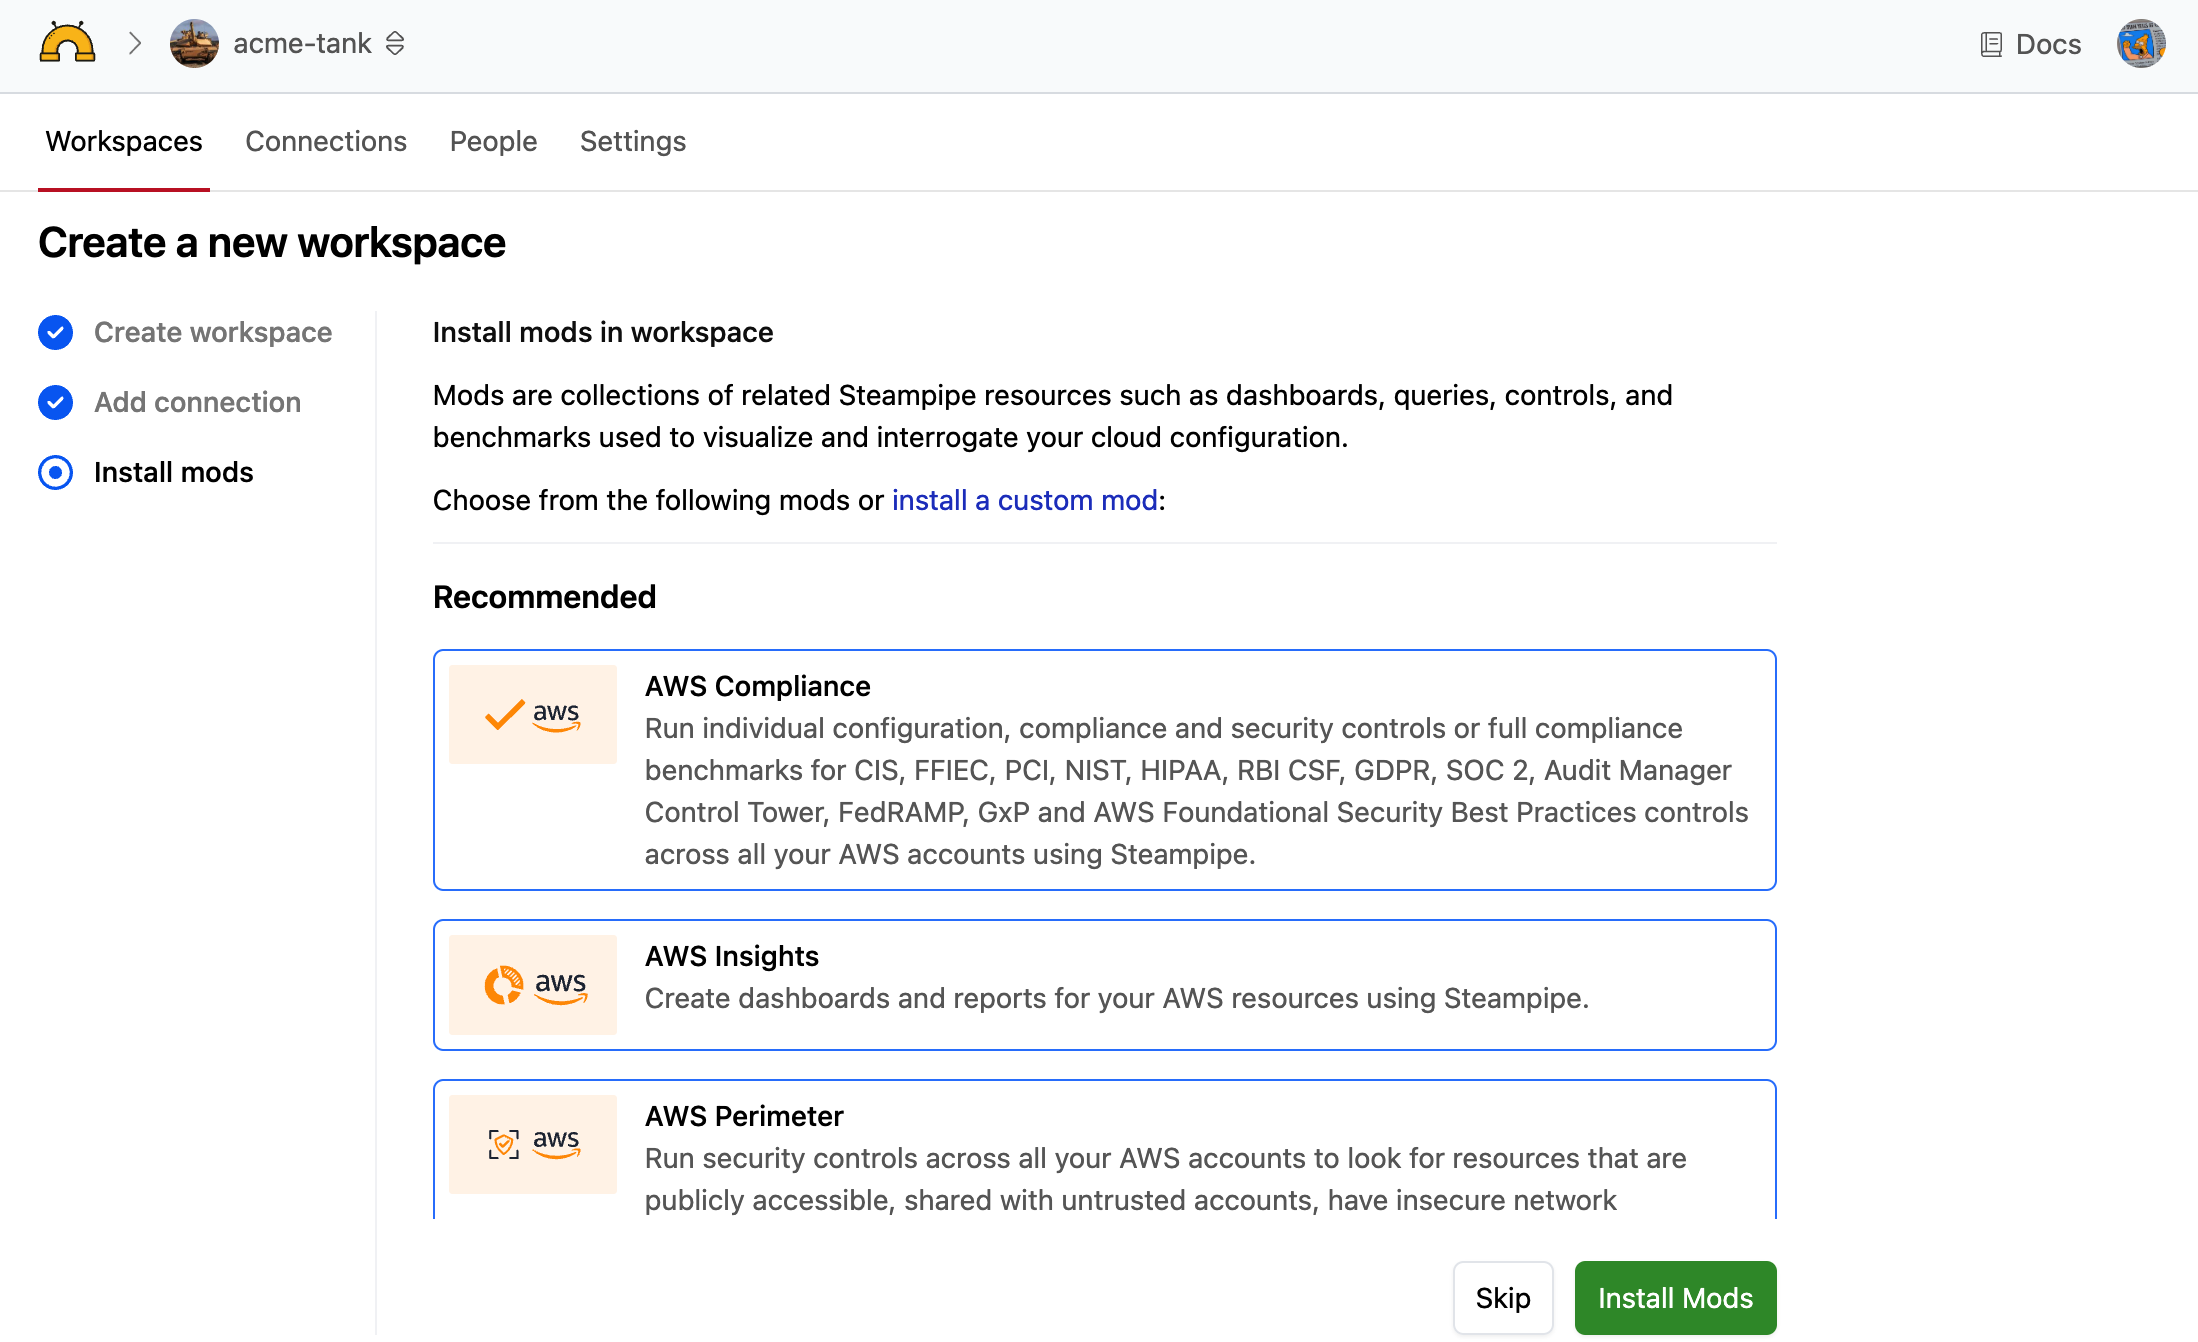
If the connection you added has mods associated with it, you will be prompted to add mods to the workspace that you just created. Select the mods you wish to install and click Install Mods if you would like to add mods to your workspace at this time.

Sleeping, Waking, and Rebooting Workspace
After a workspace has been created, it is in the enabled state - the workspace's Steampipe database is running and available, and any scheduled snapshots will run. If no one accesses the database for 4 days, it will be put to sleep, and the status will be changed to disabled. You can wake up (enable) the workspace from the console. Simply click Wake Up in the banner that appears at the top of your sleeping workspace.

You can also wake up, sleep, or reboot your workspace from the Steampipe Advanced page for your workspace.
Managing Instance Type Configuration
Navigate to the Advanced tab for your workspace and click on the Workspace menu on the left. You can see the current instance type for your workspace selected in the radio button options.

You can change the instance type for your workspace by selecting a different instance type. For instance types that support persistent storage, you also have the option to set the desired storage size. Note that you are currently only able to upgrade the storage size, so make sure to select a size that meets your needs. Click Update to save your changes.

Deleting Workspaces
You can delete a workspace from its Advanced tab. From the Workspaces tab for your developer account or organization, click on the workspace you wish to delete. On the workspace page, go to the Advanced tab, select Workspace from the menu on the left, and click Delete workspace. You will be prompted to confirm deletion; enter the workspace name and click Delete.