GCP Integration
GCP Integration
The GCP Integration allows you to automatically import a connection folder hierarchy that mirrors your GCP Organization folder structure, with a connection folder for each GCP folder and a connection for each project in your GCP organization.
The GCP integration will automatically keep the configuration up to date as your organization changes, adding, removing, and modifying connections and folders as projects and folders are created, deleted, or changed in your GCP Organization.
Creating the GCP Integration
You can create an integration for a tenant or an organization, and where you create the integration affects the scope of the resources it creates; the resulting connections and folders can only be shared within the entity in which it was created.
| Level | Plan | Description |
|---|---|---|
| Tenant | Enterprise | Selectively share GCP connections and folders with any (or all) organization or workspace in the tenant. |
| Org | Team or Enterprise | Selectively share GCP connections and folders with any (or all) workspace in the organization. |
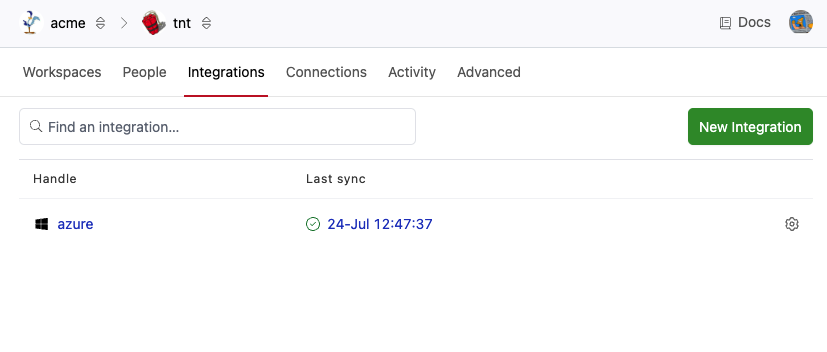
First, navigate to the Integrations page for the appropriate resource:
- To configure a GCP integration for your Tenant, click the double arrow button from the tenant switcher at the top of the Pipes console, select your tenant, and then select Tenant Settings. This option will only be visible in a custom tenant for which you are a tenant owner. Once you've selected your tenant, go to the Integrations tab to manage the integrations for the tenant.
- To configure a GCP integration for your Organization, click the double arrow button from the organization switcher at the top of the page and select the organization from the dropdown. Once you've selected your organization, go to the Integrations tab to manage the integrations for the organization.
Next, click the New Integration button. You will be asked to select an integration to create.
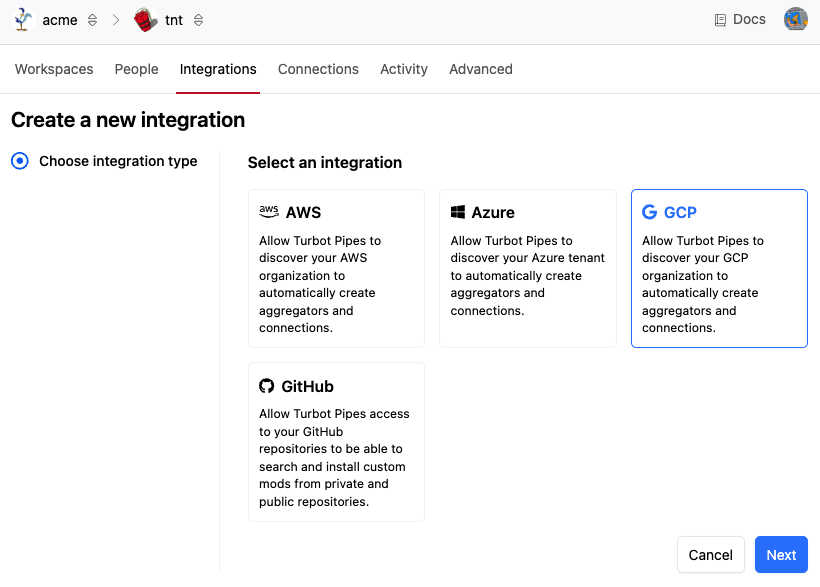
Select GCP and click Next.
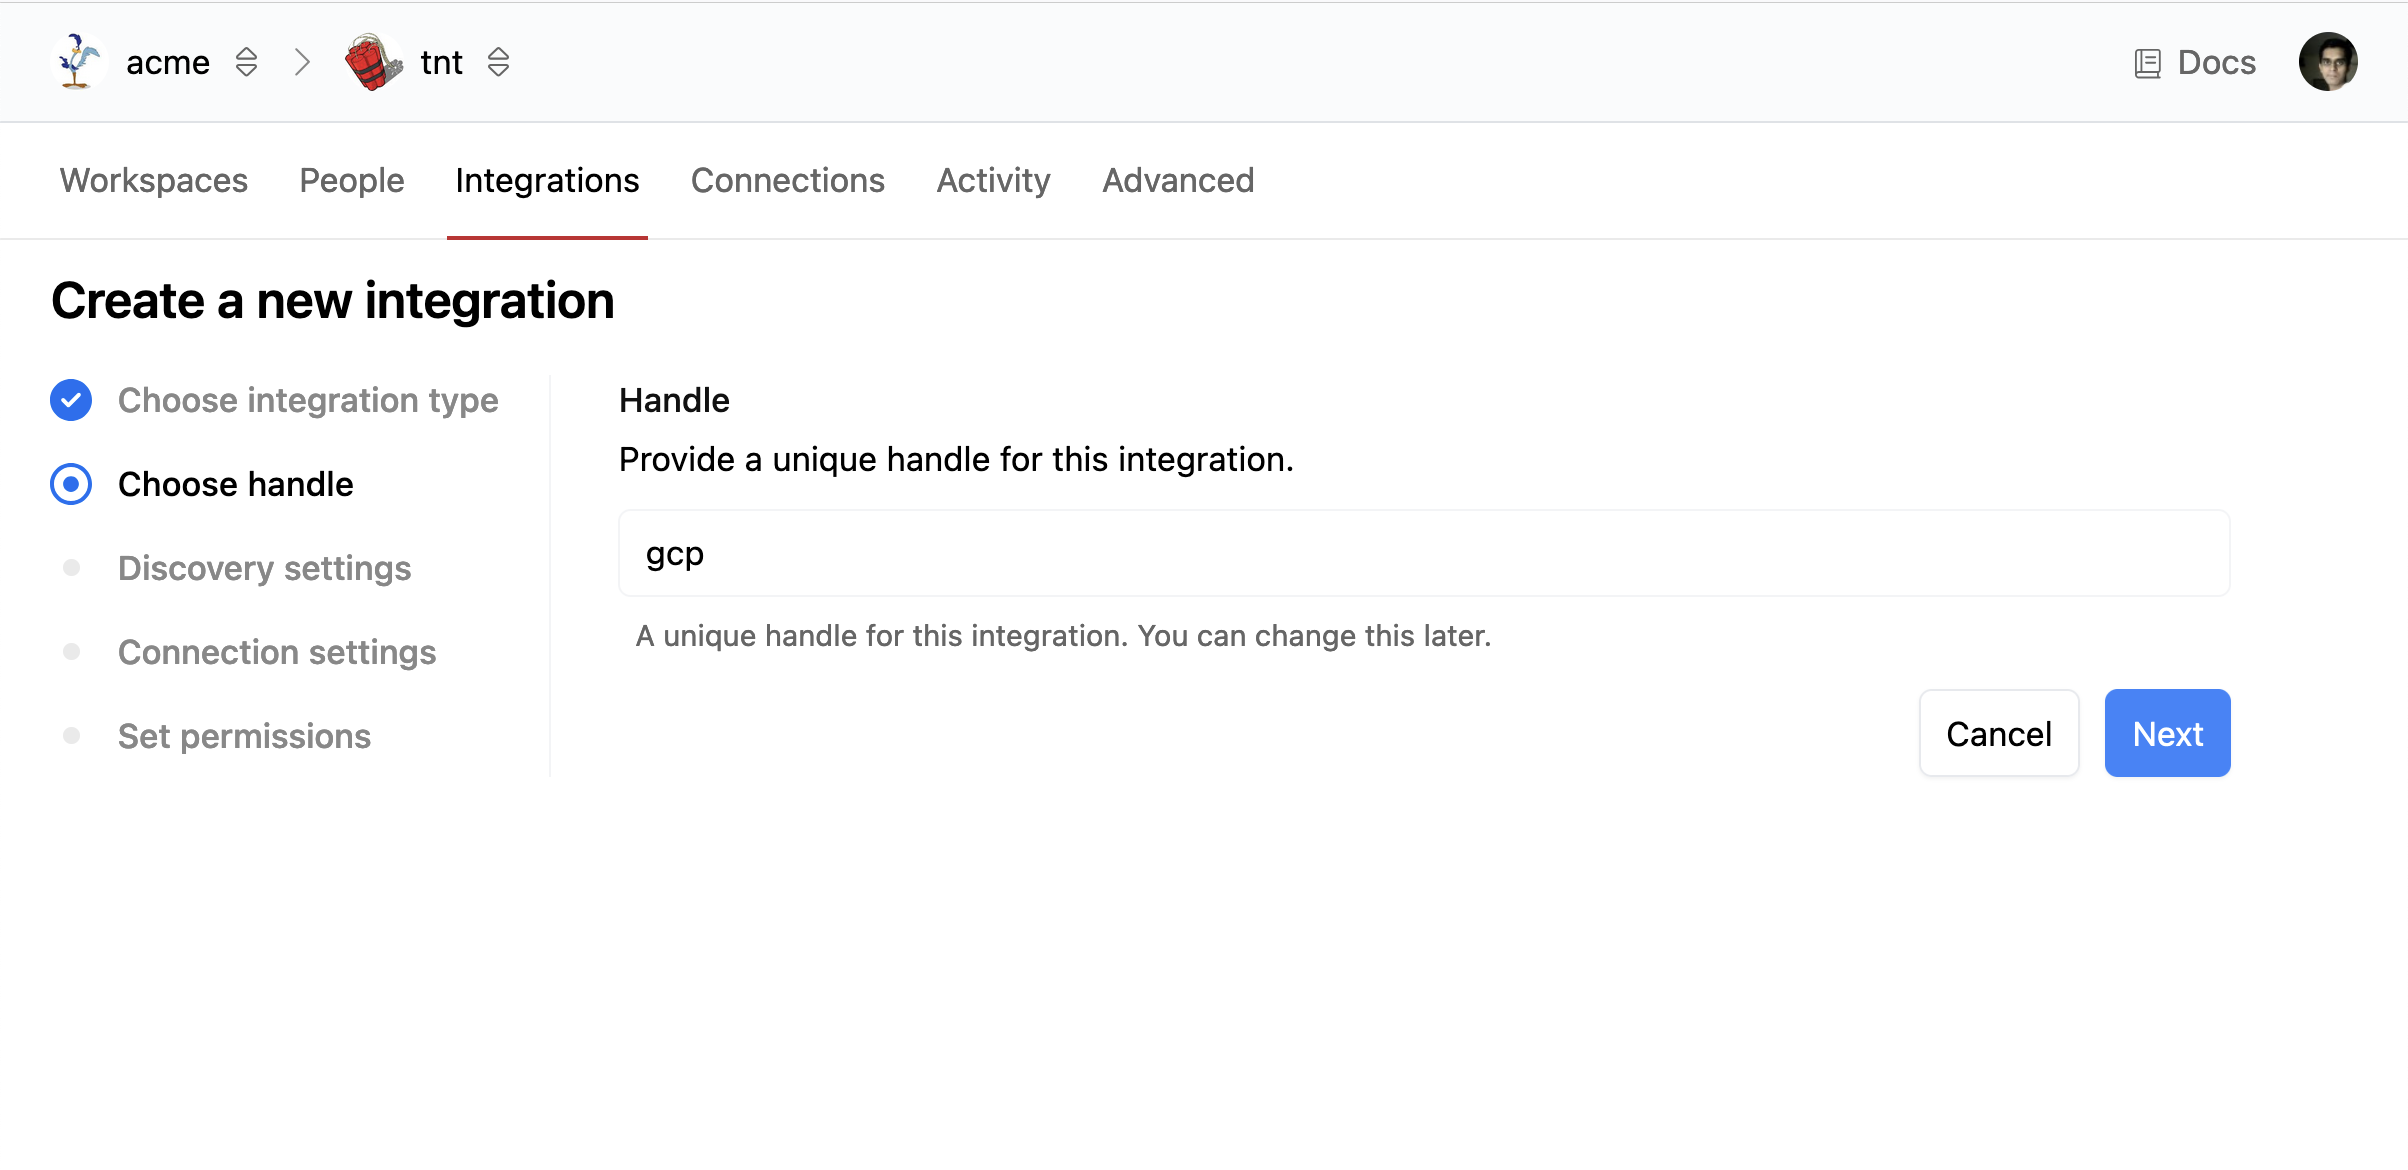
Provide a Handle for the integration. This handle should be meaningful and must be unique for all integrations in the tenant (including any org-level integrations).
Configure the Discovery Settings, including the credentials that Pipes should use to discover the organization's resources.
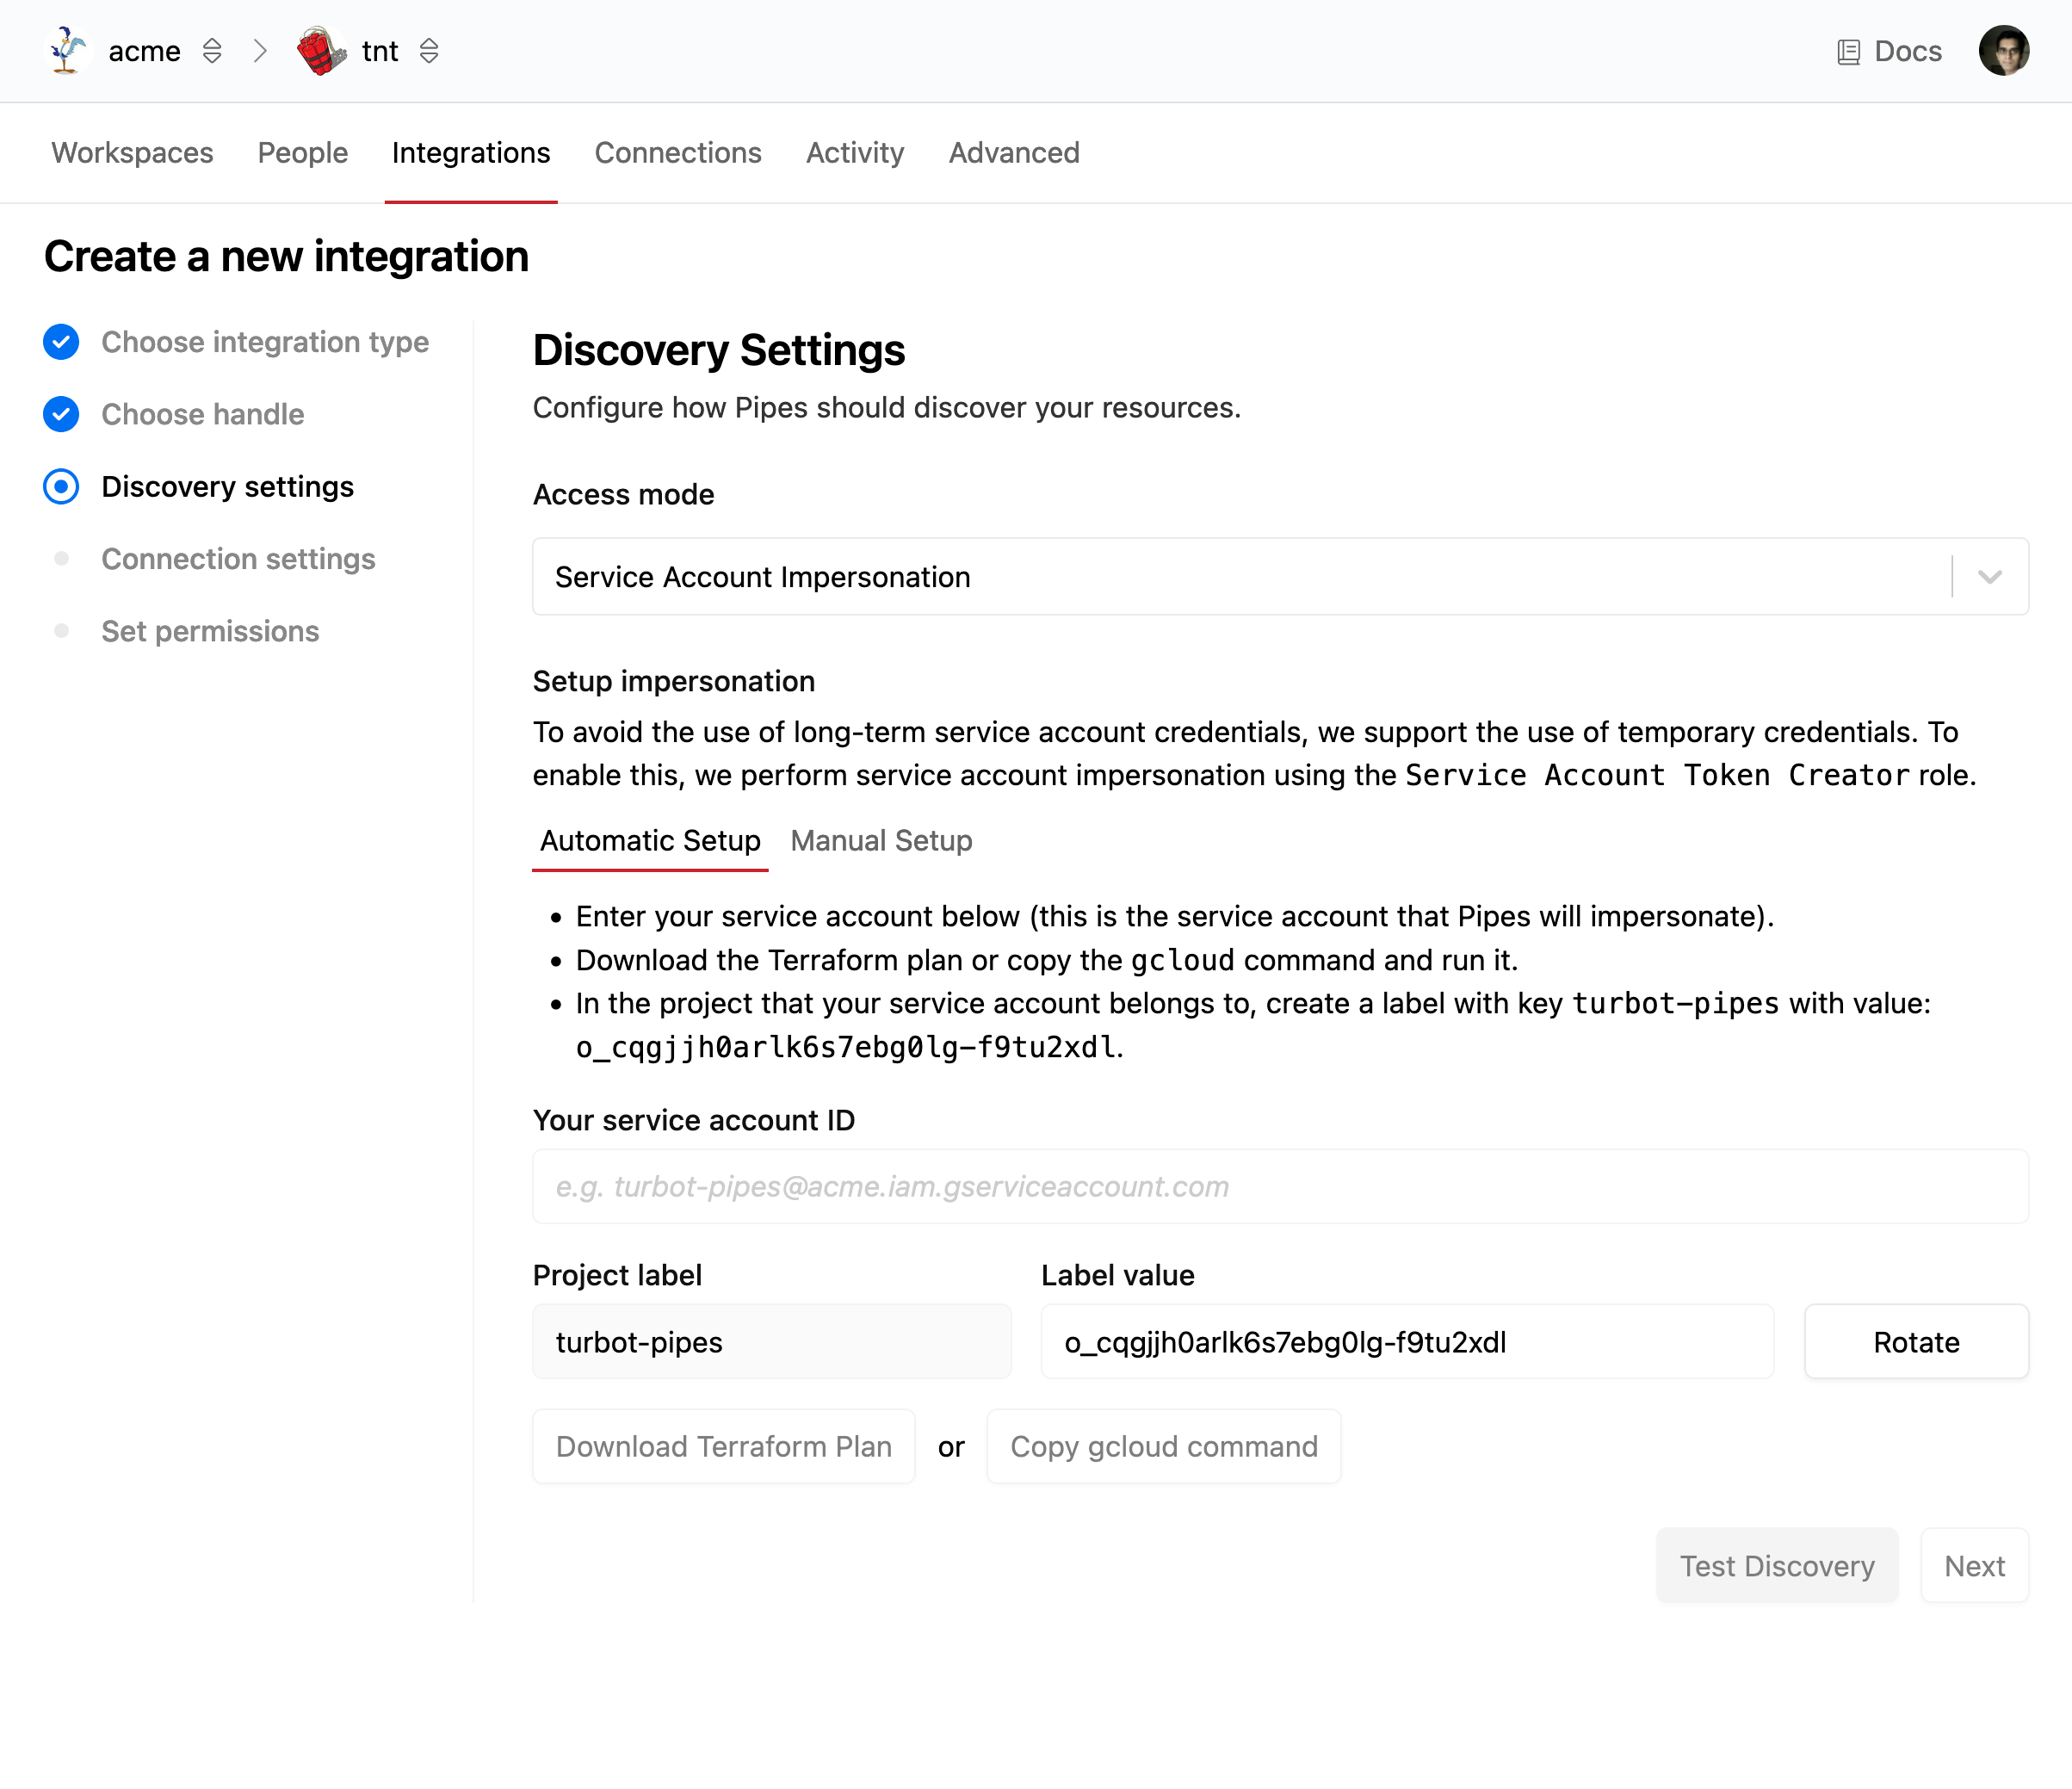
These credentials need permission to read the project data in the GCP Organizations project. You may either authenticate using service-account impersonation (recommended) or a service key file.
-
To use service-account impersonation, select Service Account Impersonation from the Access Mode dropdown. You will need to grant the Service Account Token Creator role to the Pipes service and add a label named turbot-pipes to your project, with the value shown in the form. You can automate the granting of the role to Pipes service using the Terraform plan or the copy-able
gcloudcommand. Click the Test Discovery button to verify that the credentials are configured correctly. -
To use a service key file, select Credentials from the Access Mode dropdown and upload the key file in the form of a JSON key pair for an existing GCP service account. As a minimum, grant your service account the Viewer role in the projects and folders that you wish to manage.
Click Next.
Configure the Connection settings.
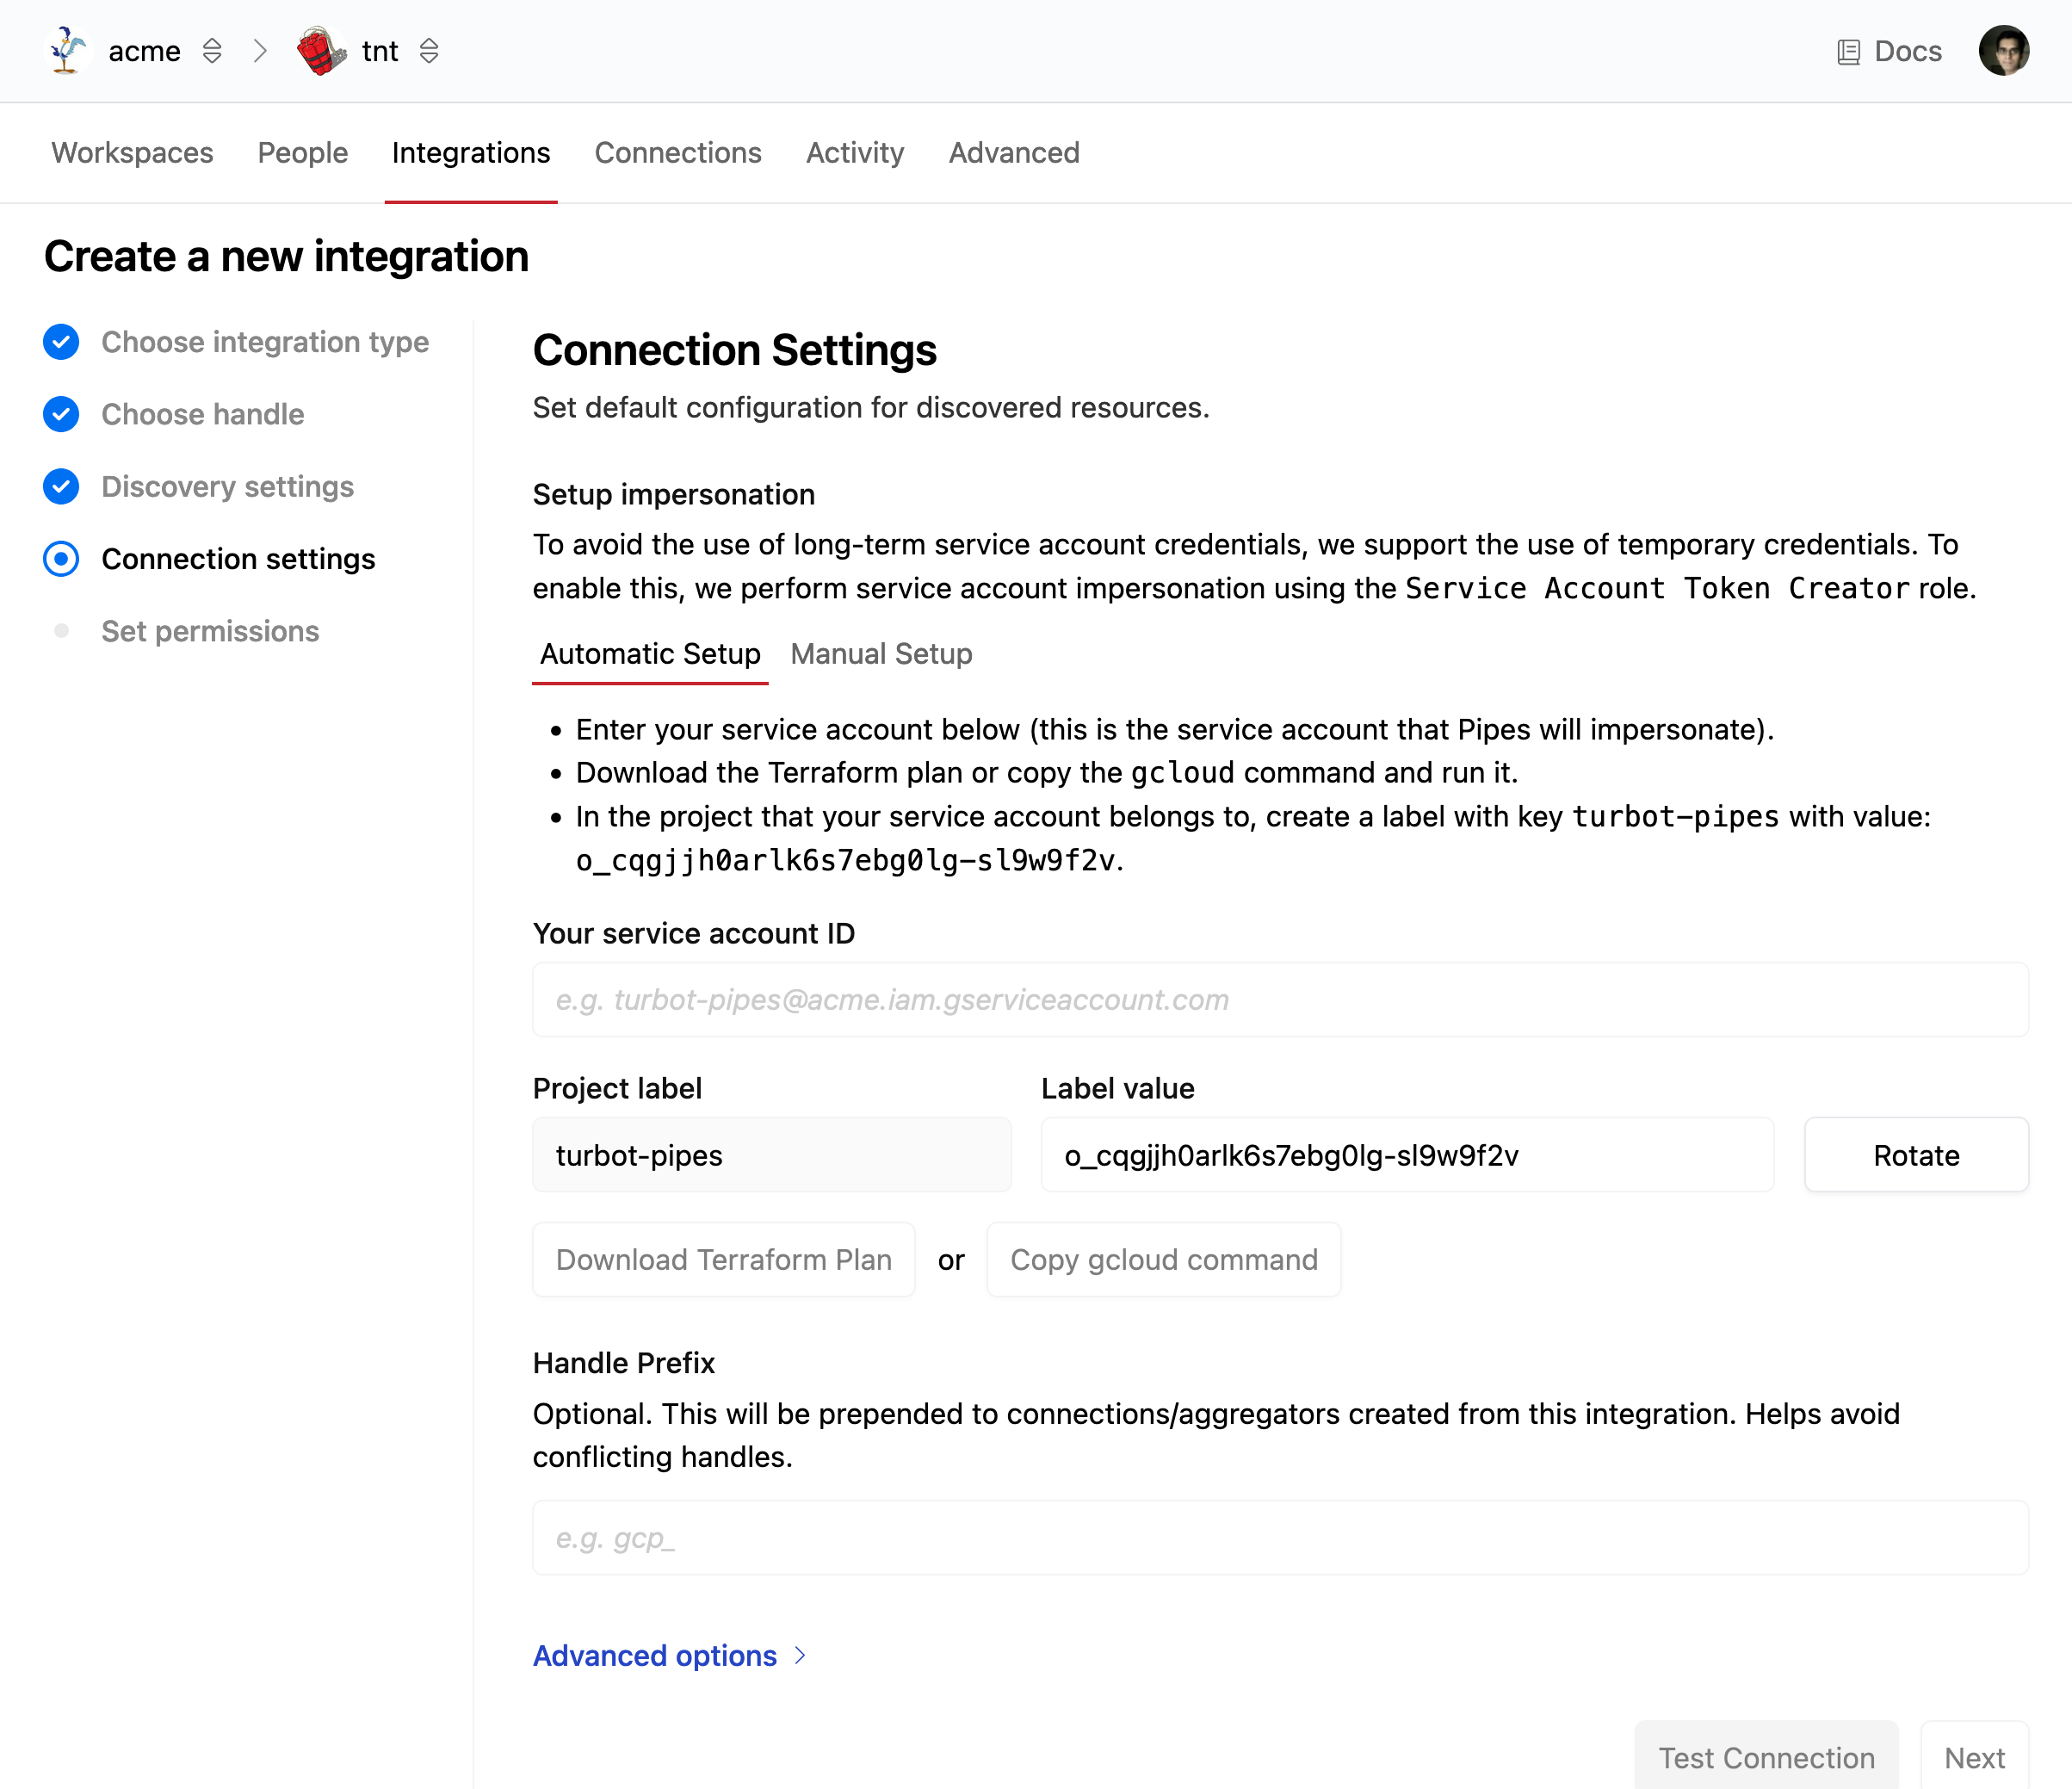
Optionally, provide a Handle Prefix to be pre-pended to the names of connections created from this integration. This is optional but may be useful for organizational purposes or to ensure the uniqueness of the generated connection handles.
If desired, you can click Advanced Options to set default settings for the imported connections. All connections created by the integration will inherit these settings, though you can override them later for each connection if you want.

Click the Test Connection button to verify that the credentials are configured correctly, then click Next.
Finally, select the Permissions.
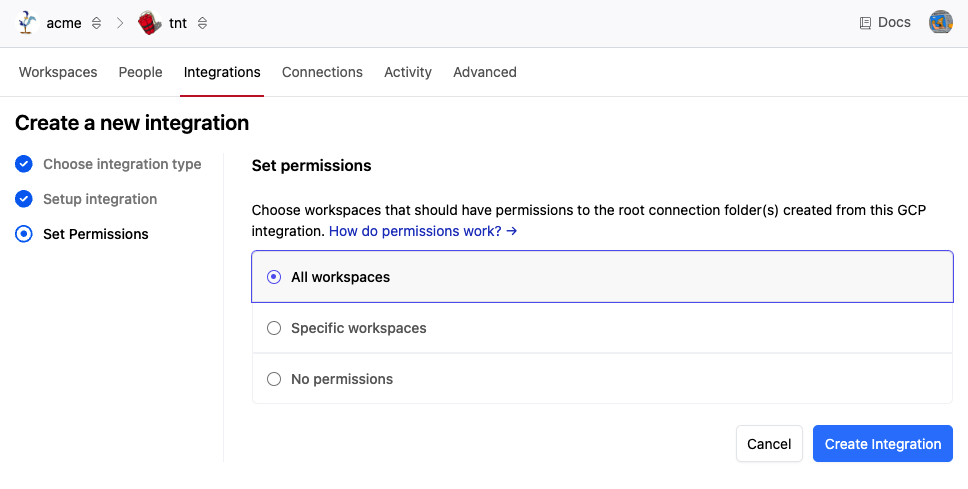
The permissions on this screen apply to the top-level folders and, therefore, to all connections and folders discovered by this integration. If you want to assign permissions more granularly, on a per-subfolder or per-connection basis, select No Permissions at this time, and then manage the permissions on the connections and folders once they have been discovered.
Note also that All Workspaces will not only add permissions for the existing organization workspaces but will also allow access for any new workspaces that are created.
After you have made your selections, click Create Integration. Pipes will begin discovering your subscriptions and management groups and creating folders and connections.
Modifying the GCP Integration
After you have created an integration, you can change its Handle, Handle Prefix, or Service Account Credentials. You can also change the Permissions and Handle individually for each child folder or connection.
Modifying the integration after it has been created will potentially impact any workspaces that use its connections!
- Changing the Handle Prefix will change the handles of all of its connections. This means that the schema names will change in any workspace to which they are attached. The schema names, in turn, impact the search path and aggregators that use wildcards.
- Discovery of projects and folders occurs using the supplied Service Account information or Credentials. If changing these affects access to these projects and folders, that will be reflected in the folders and connections. For example, if the new credentials do not have access to some folders or projects that were visible to the previous credentials, then the corresponding folders and connections will be deleted and removed from any workspaces where they are attached.
To modify the integration, navigate to the Integrations page for the appropriate resource:
- To configure an AWS integration for your Tenant, click the double arrow button from the tenant switcher at the top of the Pipes console, select your tenant, and then select Tenant Settings. This option will only be visible in a custom tenant for which you are a tenant owner. Once you've selected your tenant, go to the Integrations tab to manage the integrations for the tenant.
- To configure an AWS integration for your Organization, click the double arrow button from the organization switcher at the top of the page and select the organization from the dropdown. Once you've selected your organization, go to the Integrations tab to manage the integrations for the organization.
In the list of integrations, click the gear icon next to the integration that you want to modify.
You can change the Credentials, Handle Prefix, or Advanced Settings from the Config tab.
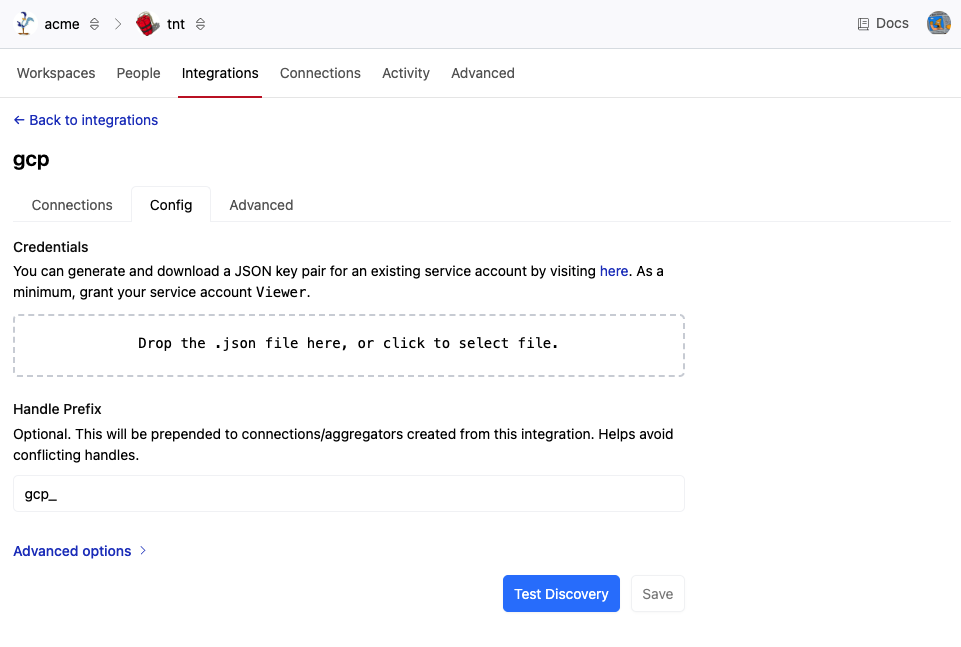
Make the desired changes and click Save.
You can modify the Handle from the Advanced tab.
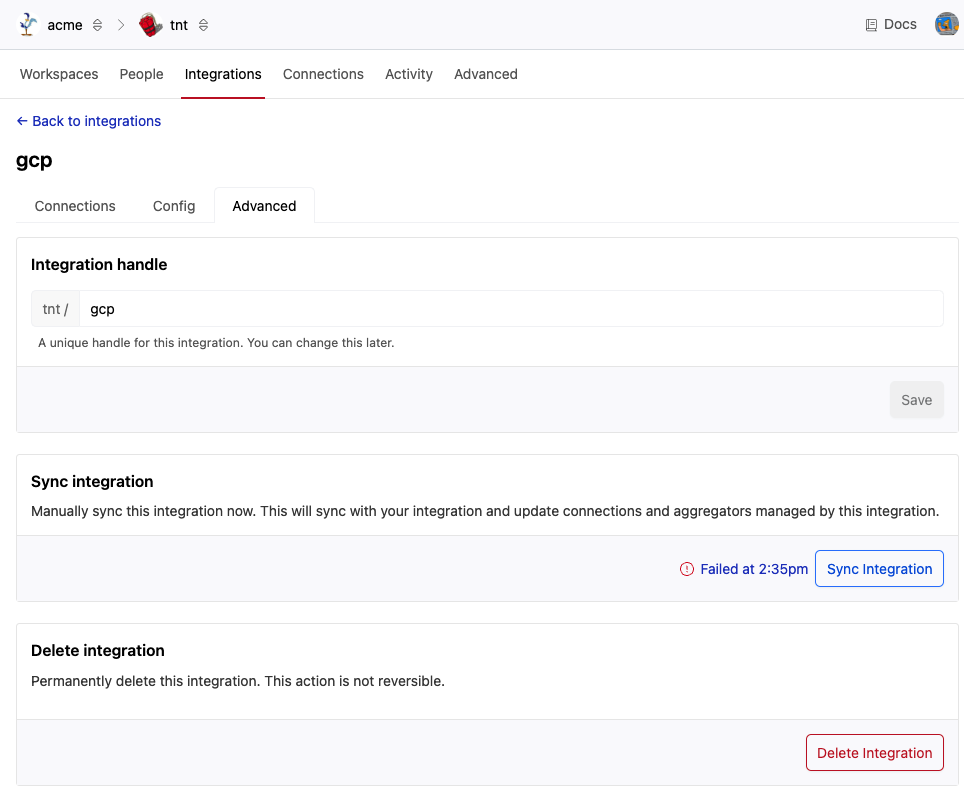
Enter the new handle and click Save.
You can view the connection tree from the Connections tab. Click on a connection or folder to view or change its properties. You can change the Permissions and Handle from its Settings tab.
Deleting the GCP Integration
You can delete an integration from its Advanced page.
If you delete an integration, all of its associated folders and connections will be deleted and removed from all workspaces. This action is not reversible!
Navigate to the Integrations page for the appropriate resource:
- To delete an AWS integration for your Tenant, click the double arrow button from the tenant switcher at the top of the Pipes console, select your tenant, and then select Tenant Settings. This option will only be visible in a custom tenant for which you are a tenant owner. Once you've selected your tenant, go to the Integrations tab to manage the integrations for the tenant.
- To delete an AWS integration for your Organization, click the double arrow button from the organization switcher at the top of the page and select the organization from the dropdown. Once you've selected your organization, go to the Integrations tab to manage the integrations for the organization.
Go to the Advanced page and click the Delete Integration button.
You will be asked to enter the handle to confirm deletion.
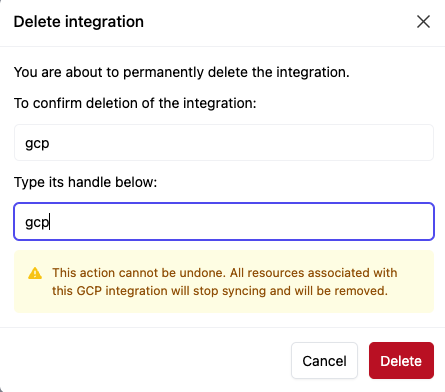
If you wish to permanently delete the integration and all of its resources, click Delete.