
Managing Policies
Overview
Polices allow you to define configuration settings in Guardrails and apply them across your environment. Guardrails' hierarchical structure providers a powerful but simple mechanism for centralizing policy administration, along with managing exceptions.
Best Practices
Minimize administration by leveraging the Policy Hierarchy.
- Create policy settings as high as possible in the hierarchy and manage exceptions below.
- Use Smart Folders to apply a group of policies to a resource.
Review and set ALL sub-policies before enabling a control. Many controls such as
Active,Approved, andTagsuse multiple policies to determine their behavior. To avoid unwanted changes, make sure all of these dependent sub-policies are configured before enabling the control.Before settingAWS > EC2 > Instance > Approvedto "Enforce: Delete unapproved if new", review and set (if necessary) all of the sub-policies:AWS > EC2 > Instance > Approved > Instance TypesAWS > EC2 > Instance > Approved > Public IPAWS > EC2 > Instance > Approved > RegionsAWS > EC2 > Instance > Approved > Usage
Preview changes by setting a policy to
Checkbefore setting toEnforce. Creating a Guardrails Policy Setting is a powerful action - a single setting may affect thousands of resources. Setting the policy toCheckcan help determine the impact of the change before enforcement is enabled.After settingAWS > EC2 > Instance > Approved > *sub-policies, setAWS > EC2 > Instance > Approvedto "Check: Approved" and allow the controls to run. Review theAWS > EC2 > Instance > Approvedcontrol alarms to determine which instances will be deleted if you change the setting to "Enforce: Delete unapproved".
Creating Simple Policy Settings
Policy Settings in the Guardrails Console
You can create a policy setting in the Guardrails Console from the Policies tab.
Log into Guardrails with
Turbot/Adminpermissions, then click the Policies tab.Click the New Policy Setting button.
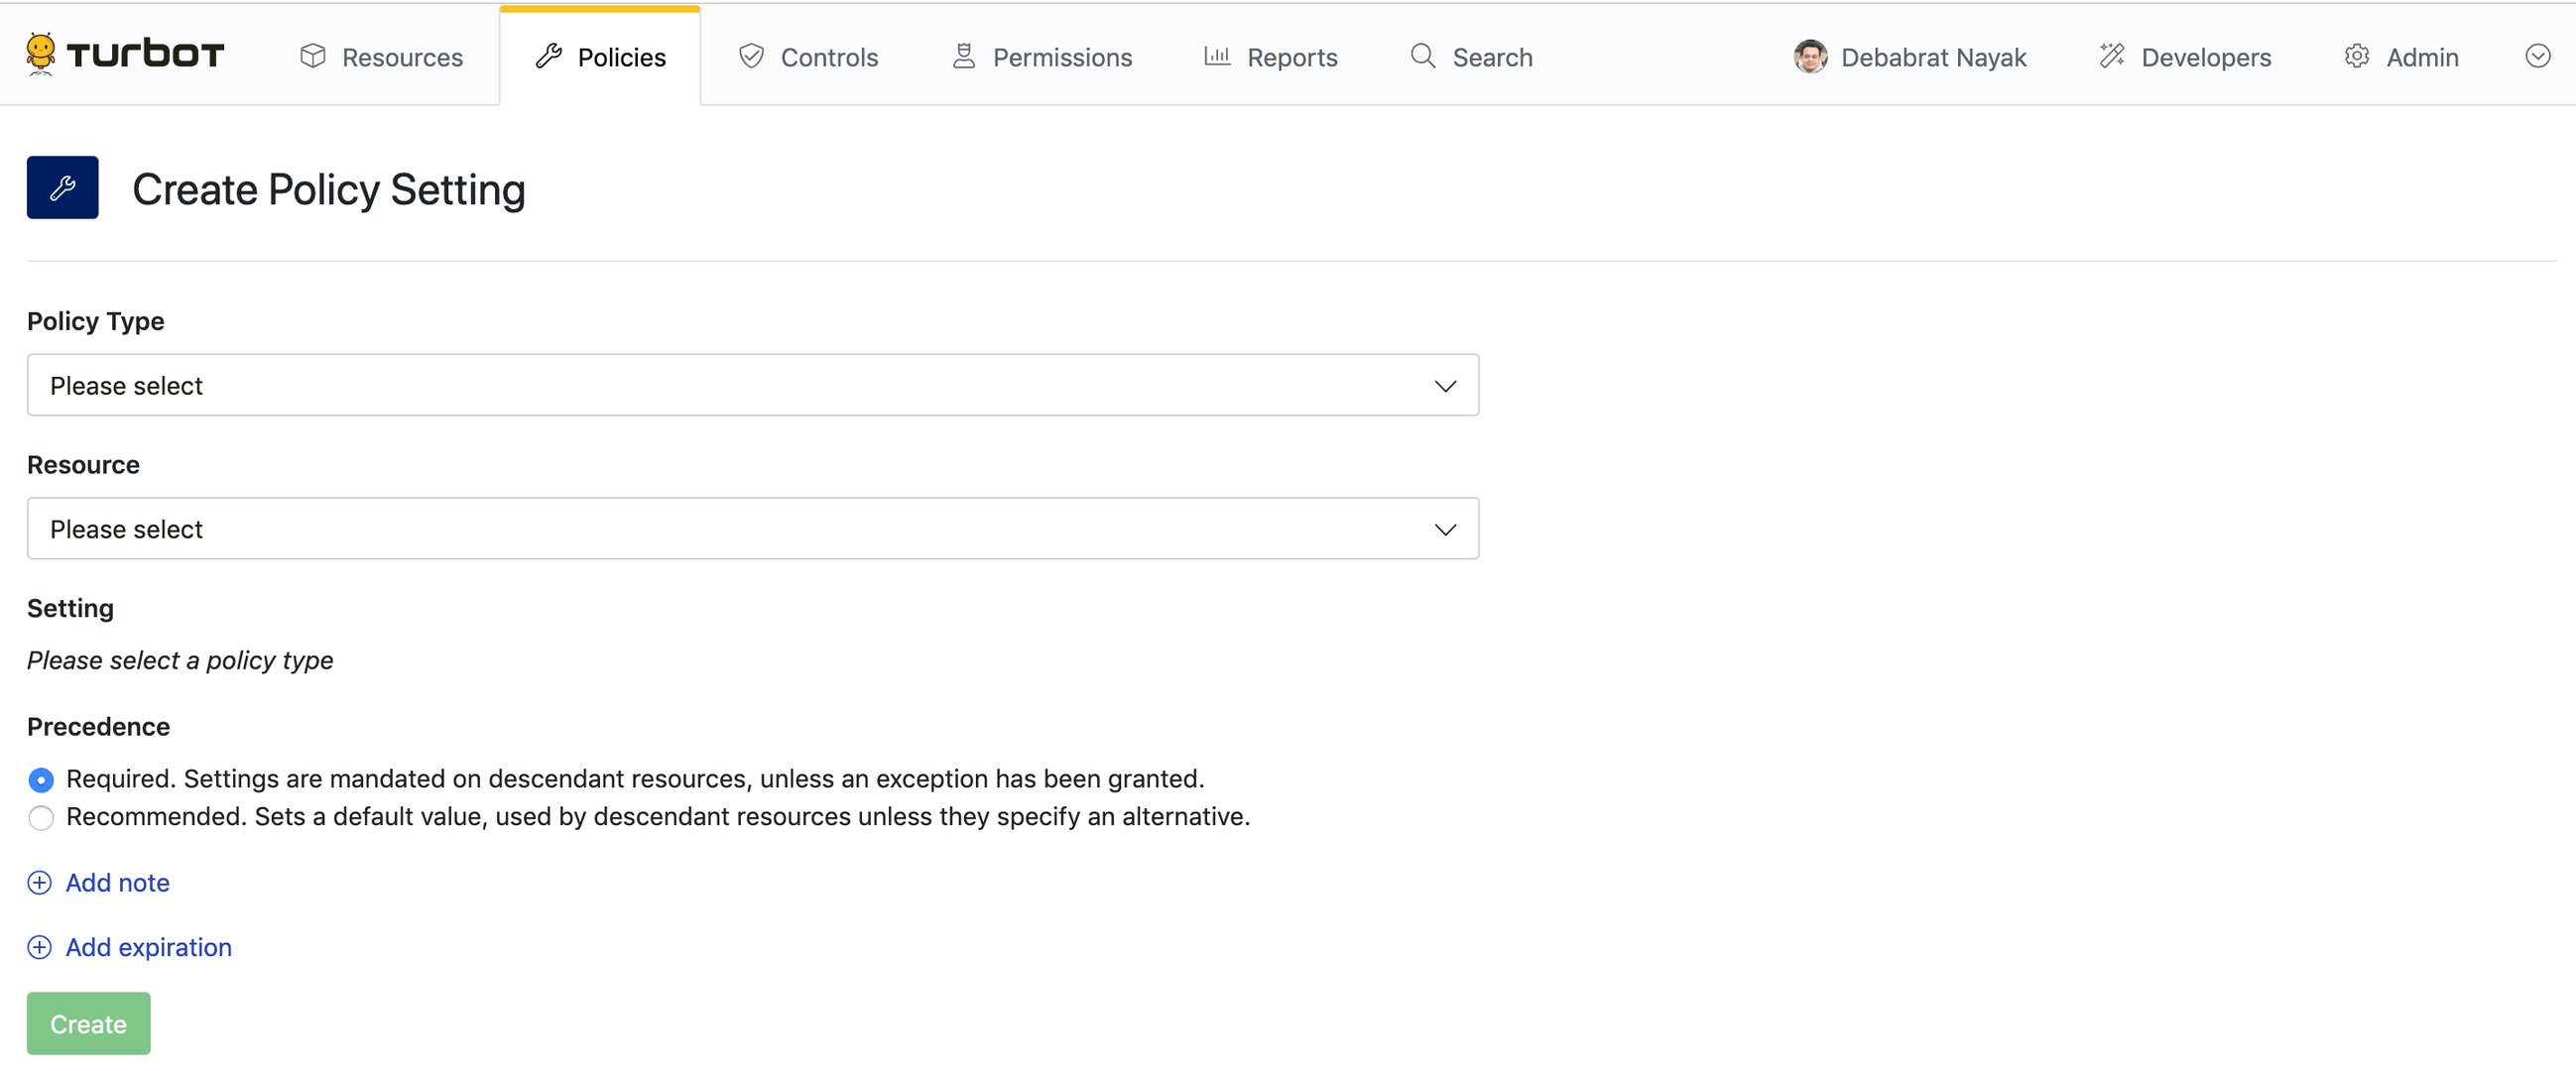
Select the Policy Type. For example,
AWS > EC2 > Instance > Approved.Select the Resource where the policy setting will live. The setting will affect all resources at the specified level and below in the policy hierarchy.
Select the appropriate setting. Some policies have predefined settings, but others accept arrays with strings. The format and acceptable values depend on the policy type. The right side of the window contains the policy overview, recommendations, as well as the allowed values.
Select the Precedence for this setting. Default setting is
Required.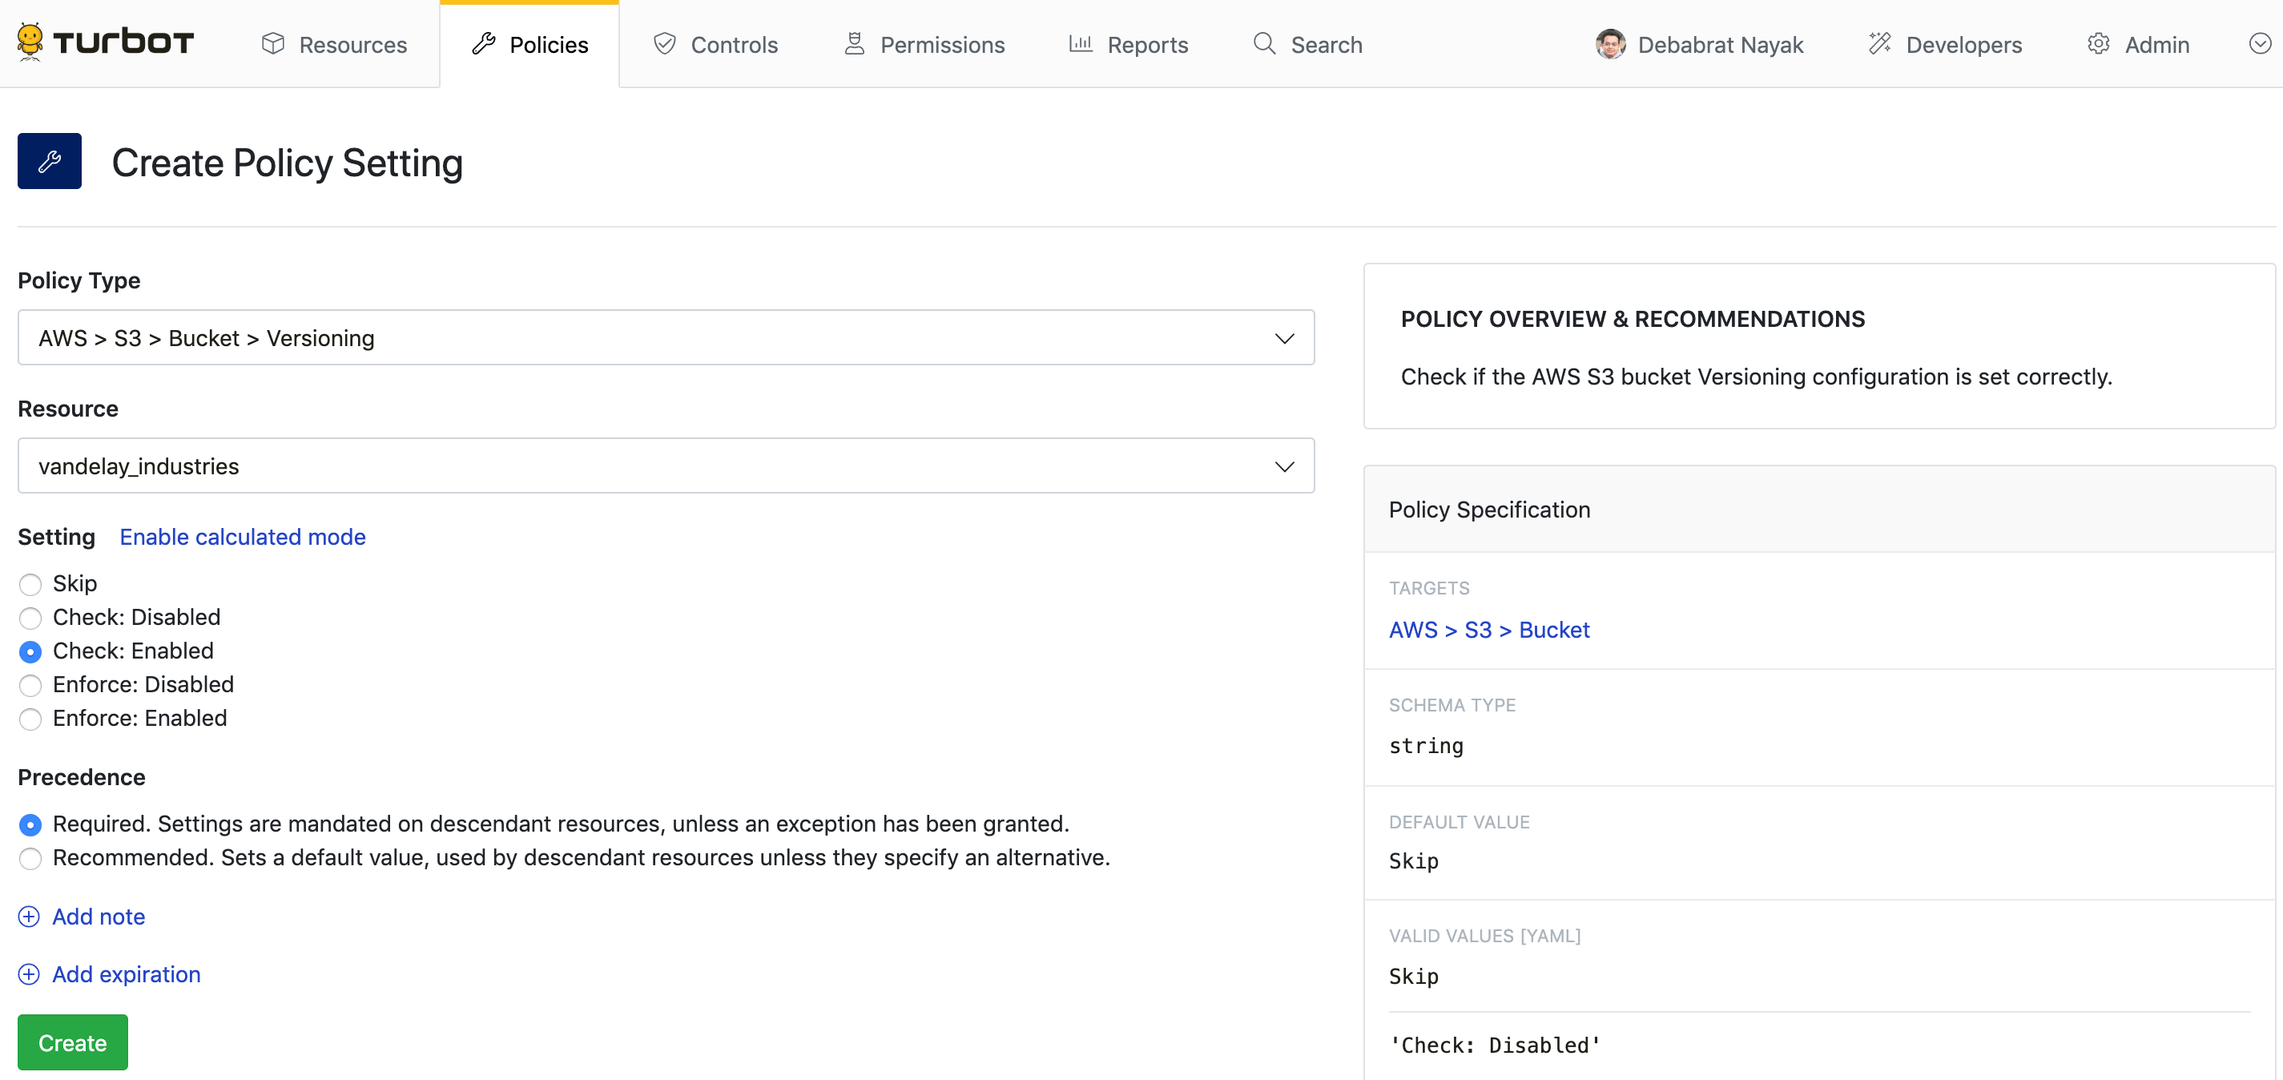
If desired, click Add note. Often this is used to designate change control identifiers such as change order ticket numbers.
If desired, click Add expiration to set an expiration date. The policy will expire after the defined time elapses.
Click Create to create your new setting. The policy will immediately go into effect. Be careful when applying policies that are capable of changing or removing cloud resources!

Policy Settings with Terraform
You can manage policy settings with Terraform using the turbot_policy_setting resource.
# Setting value to "Enforce: Enabled" to enable versioning for buckets# AWS > S3 > Bucket > Versioningresource "turbot_policy_setting" "s3_bucket_versioning" { resource = turbot_folder.id type = "tmod:@turbot/aws-s3#/policy/types/bucketVersioning" value = "Enforce: Enabled"}Using Calculated Polices
While most policy settings can be set with a simple static value, there may be instances where more flexibility is needed in determining the correct option. Calculated policies allow you to dynamically compute the policy value using information available in the Guardrails CMDB.
Any policy in Guardrails can use a calculated policy instead of a static value!
Calculated Policy Taxonomy
What defines a calculated policy?
- A GraphQL query. This query automatically pivots to the
current resource, simplifying the query syntax. For example, if you query
resource, Guardrails knows you mean this (the current) resource, and queryingregionmeans the region for this (the current) resource:
{ resource { tags } region { Name }}- A Nunjucks template to define logic, parse the query response, and eventually output a value. For example:
{% if $.resource.tags['data-classification'] == "temp" %}"Enforce: Disabled"{% else %}"Enforce: Enabled"{% endif %}Create a Calculated Policy Setting [Guardrails Console]
You can create a policy setting in the Guardrails Console in the same way that you can create a simple policy setting, however instead of entering a value for the Setting, click Enable calculated mode and click Launch calculated policy builder.
To create a calculated policy, navigate to the Create Policy Setting page. Select Enable calculated mode then Launch calculated policy builder.
Select a Test Resource that is used to verify the query.
Enter a valid GraphQL Input Query. The query Output box will update in real time.
Enter a valid Nunjucks Template. Once again, this is logic that can be used to parse the query and then output a value based on template logic.
Verify that the final computed policy value in the Result box is correct and has passed validation.
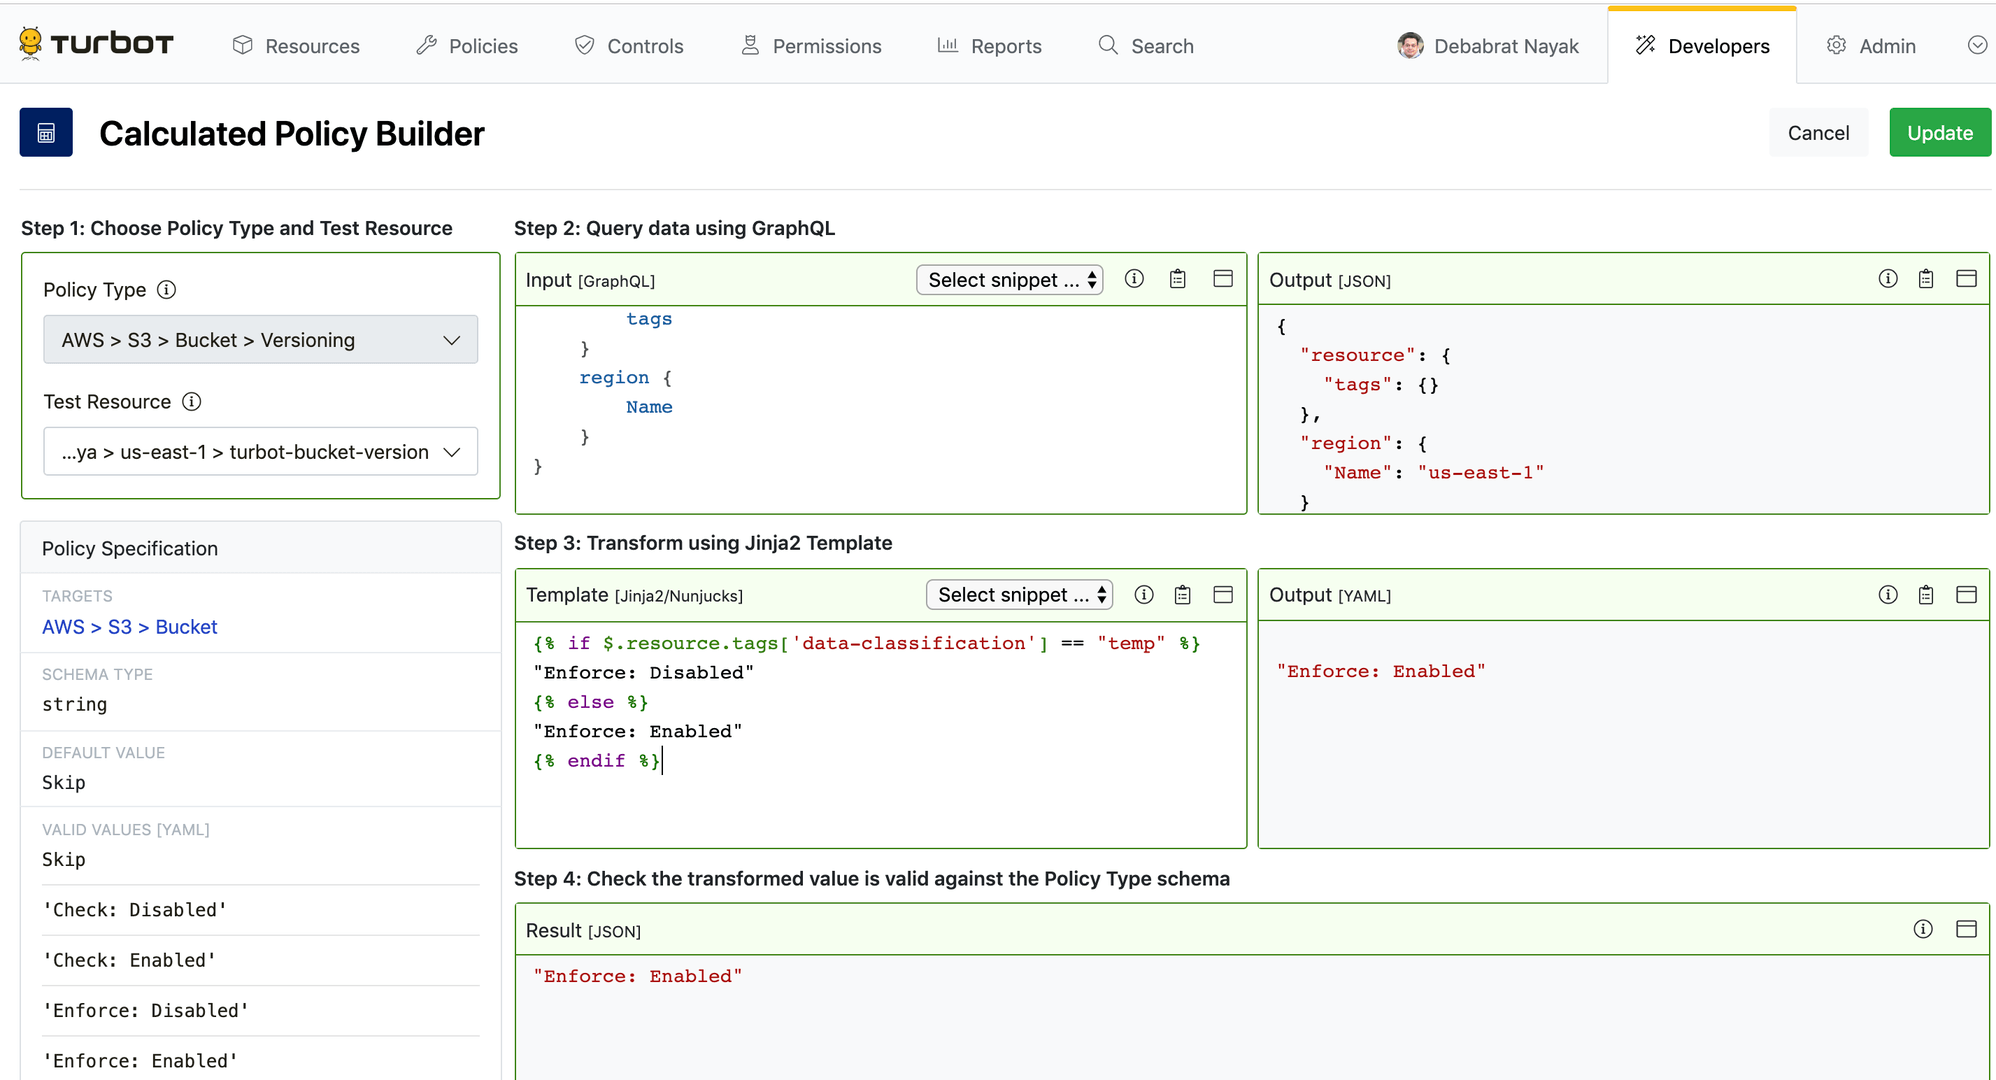
If desired, change the Test Resource to verify against other resources.
Click Update to set the calculated policy.
Click Create to create your new policy setting.
Creating a Policy Setting [Terraform]
You can manage policy settings with Terraform using the
turbot_policy_setting
resource by specifying a template and template_input. Syntax here is VERY
important. Note the EOT encapsulating both the template and template_input!
# AWS > S3 > Bucket > Versioningresource "turbot_policy_setting" "s3_bucket_versioning" {  resource   = turbot_smart_folder.baseline.id  type       = "tmod:@turbot/aws-s3#/policy/types/bucketVersioning"  template_input = <<EOT    {        resource {            tags        }    }  EOT
  template      = <<EOT    {% if $.resource.tags['data-classification'] == "temp" %}    "Enforce: Disabled"    {% else %}    "Enforce: Enabled"    {% endif %}  EOT}
Modifying/Deleting a Policy Setting
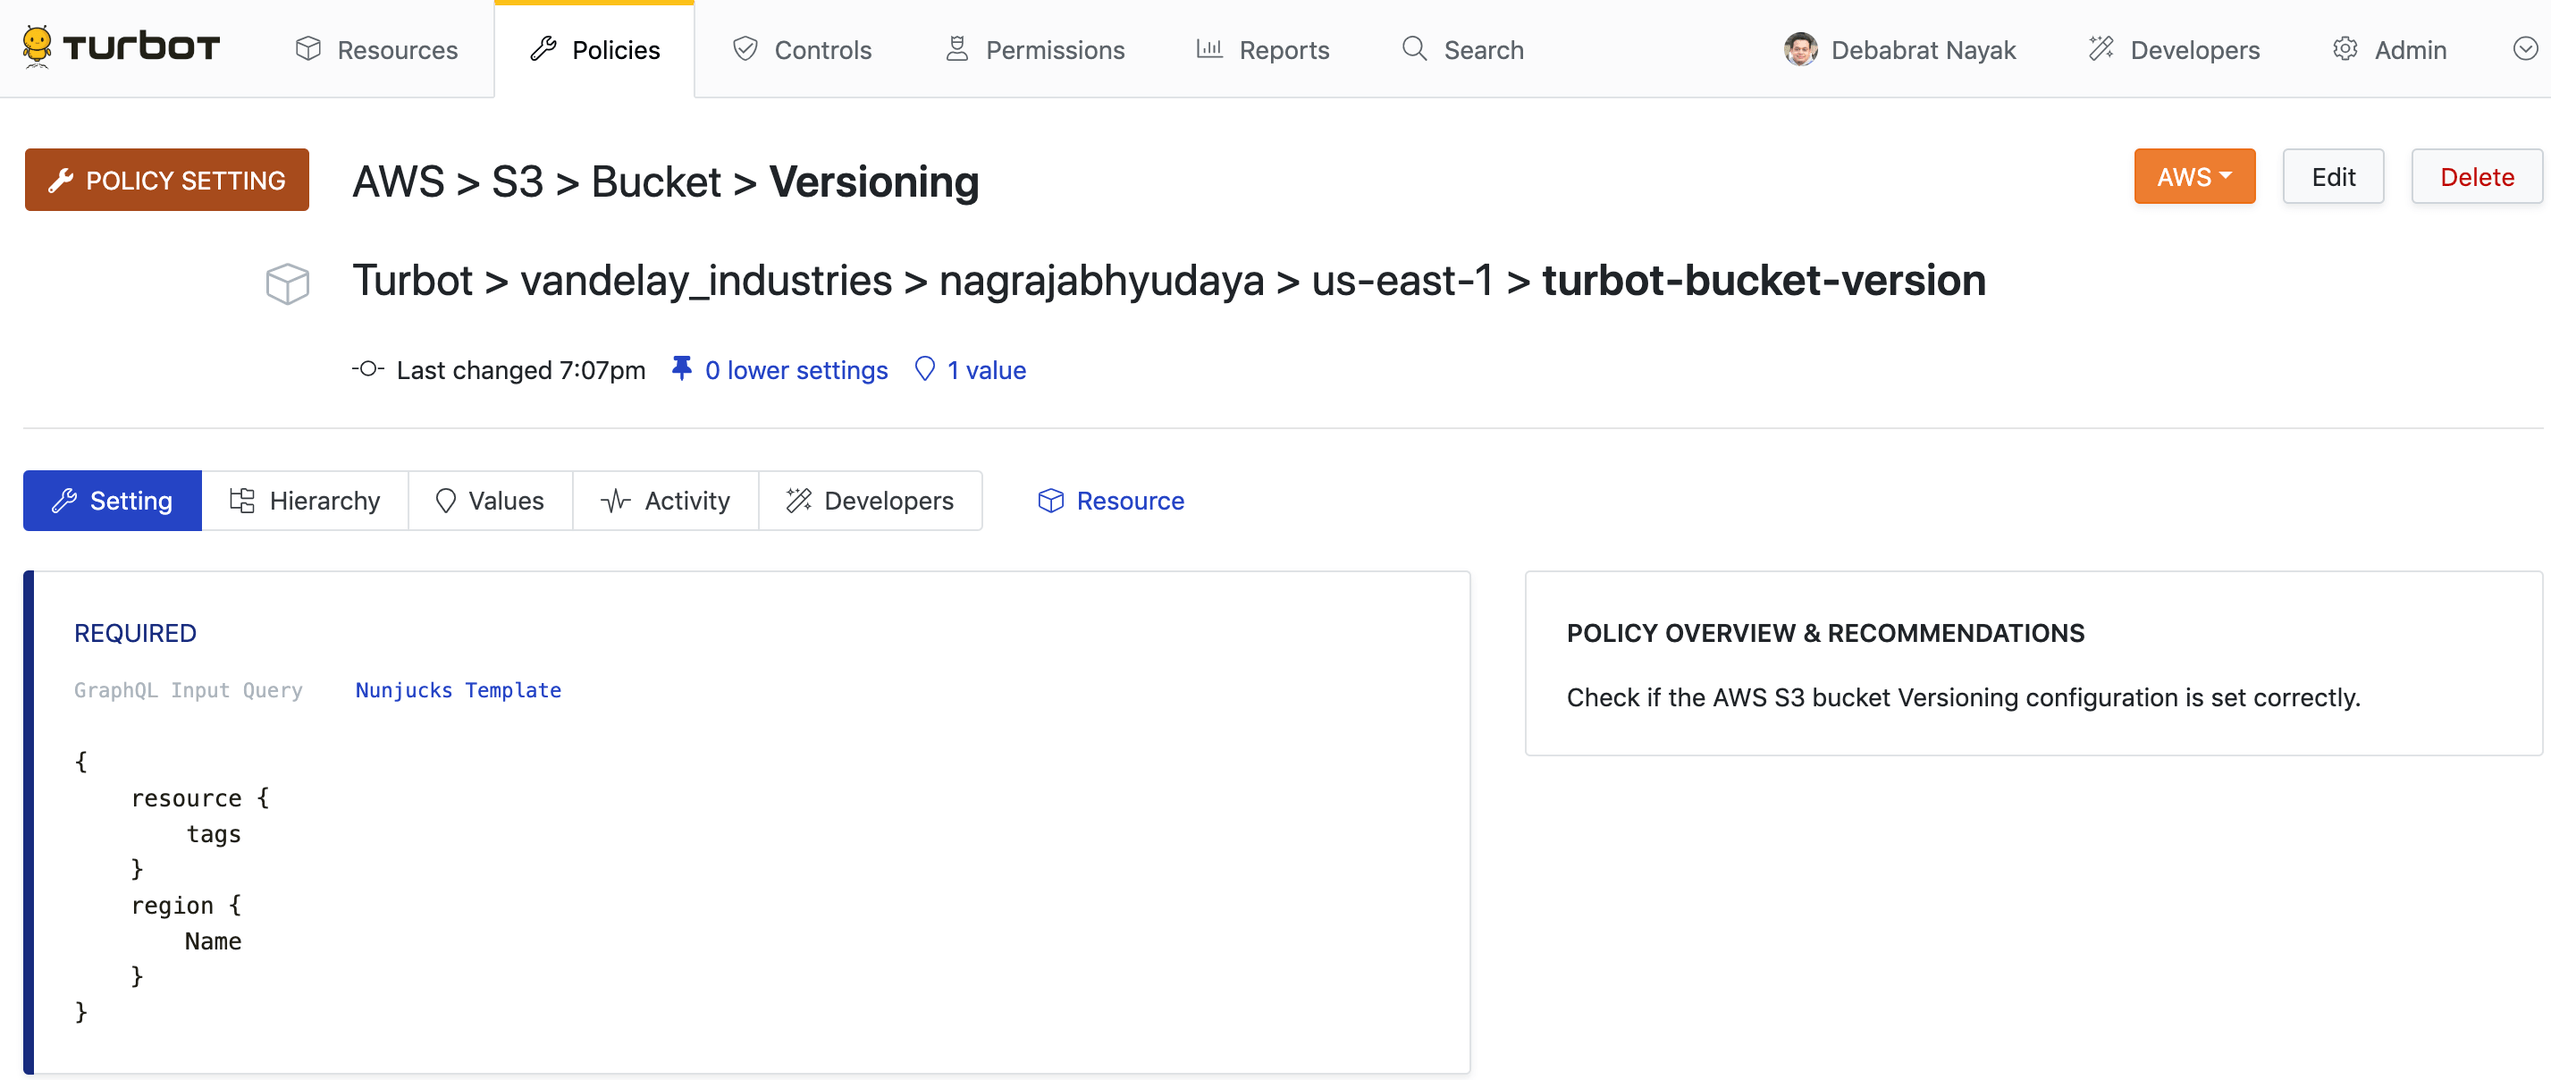
You can delete or modify a policy setting on the Policy Setting page.
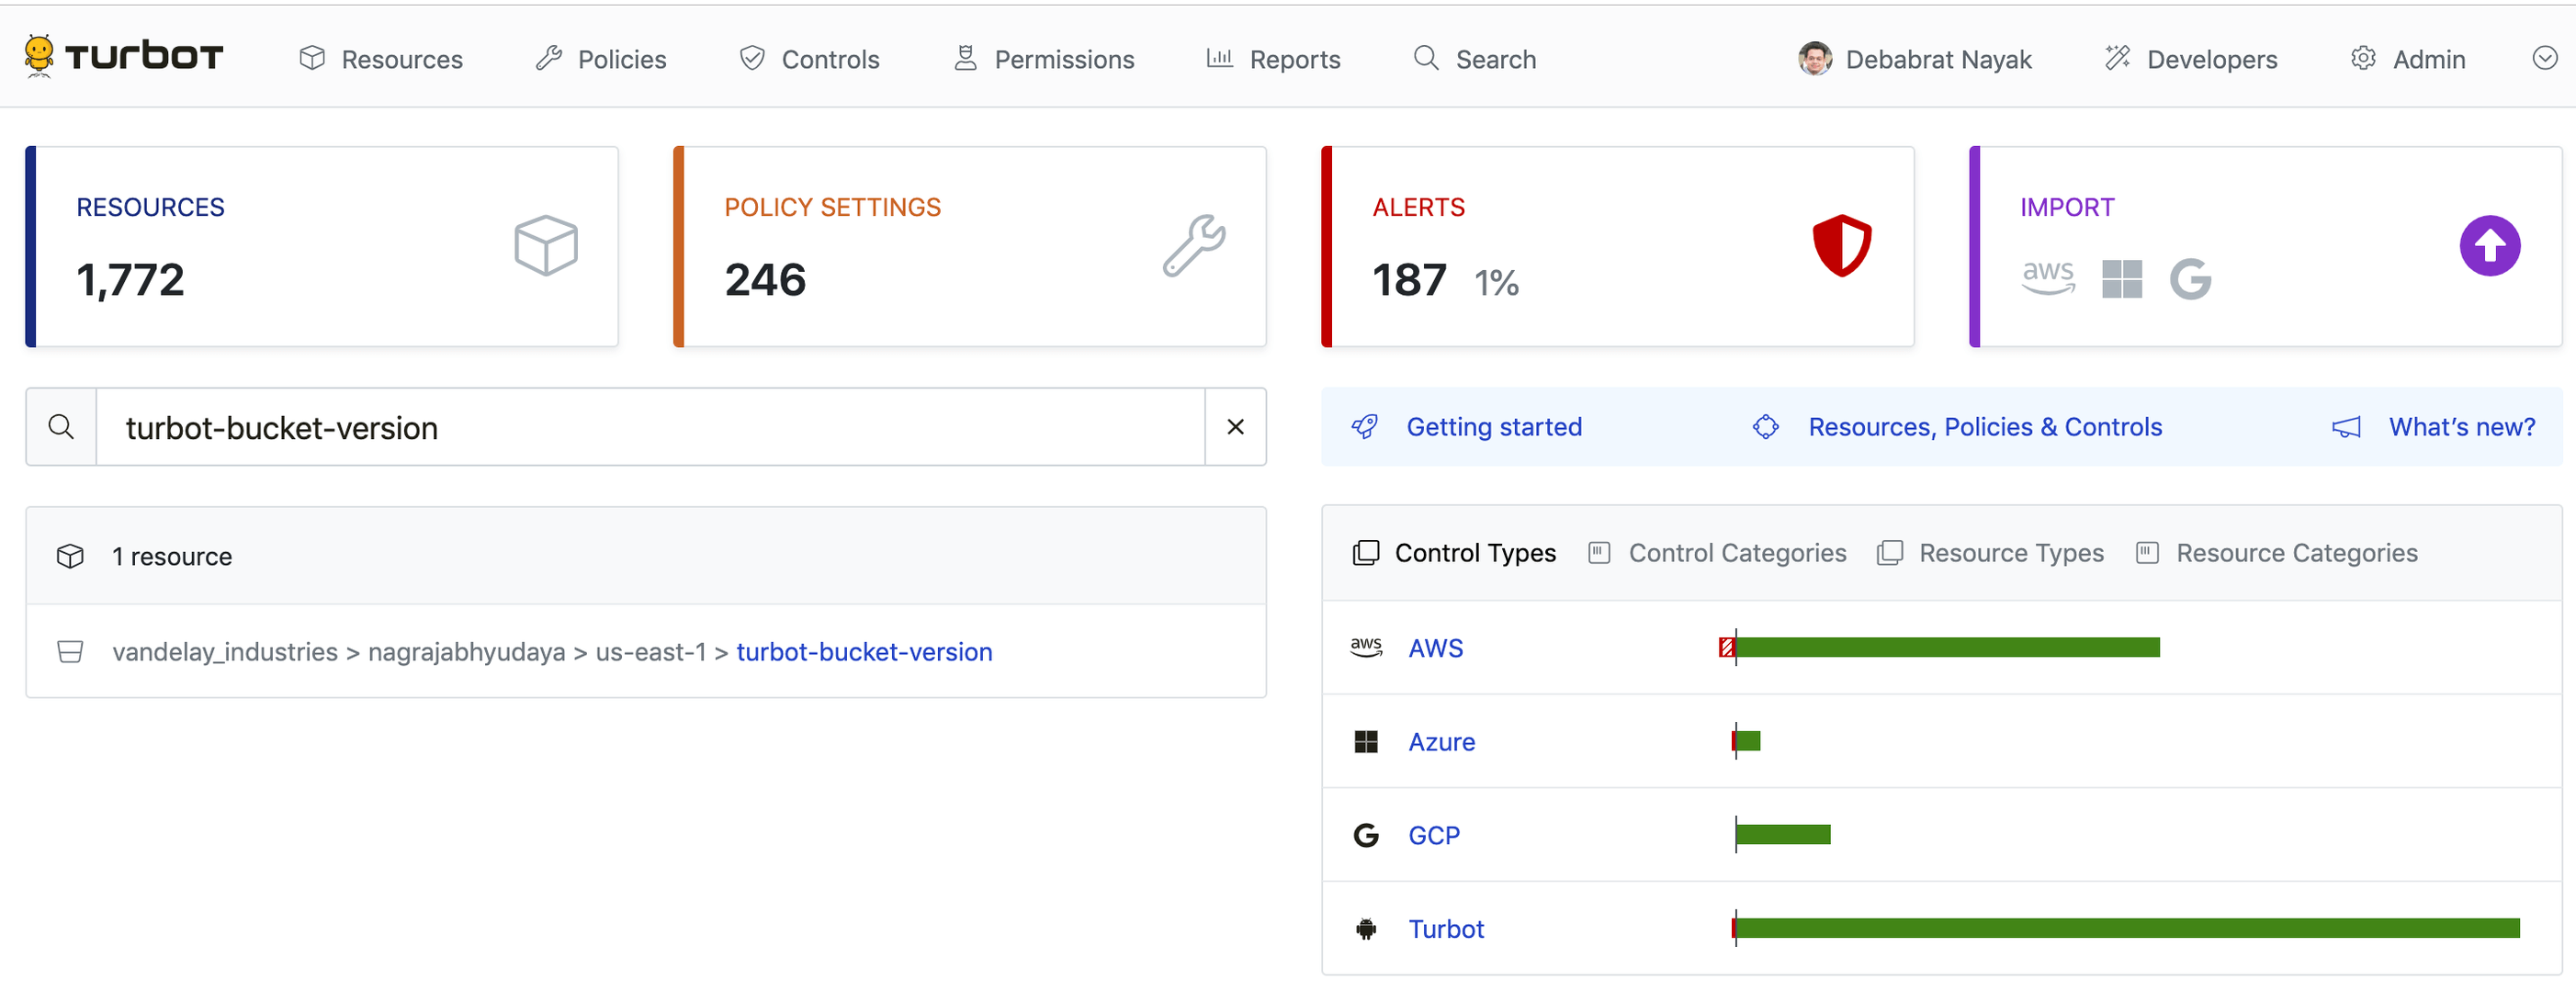
- On the Policies tab, click POLICY SETTINGS card towards top right
corner. Search for the policy setting, for example: AWS > S3 > Bucket >
Versioning.

- Click on the policy setting.
- To modify the setting, click Edit towards top right corner of the page.
This will launch the Update Policy Setting page. Make any desired changes
and click the Update button.
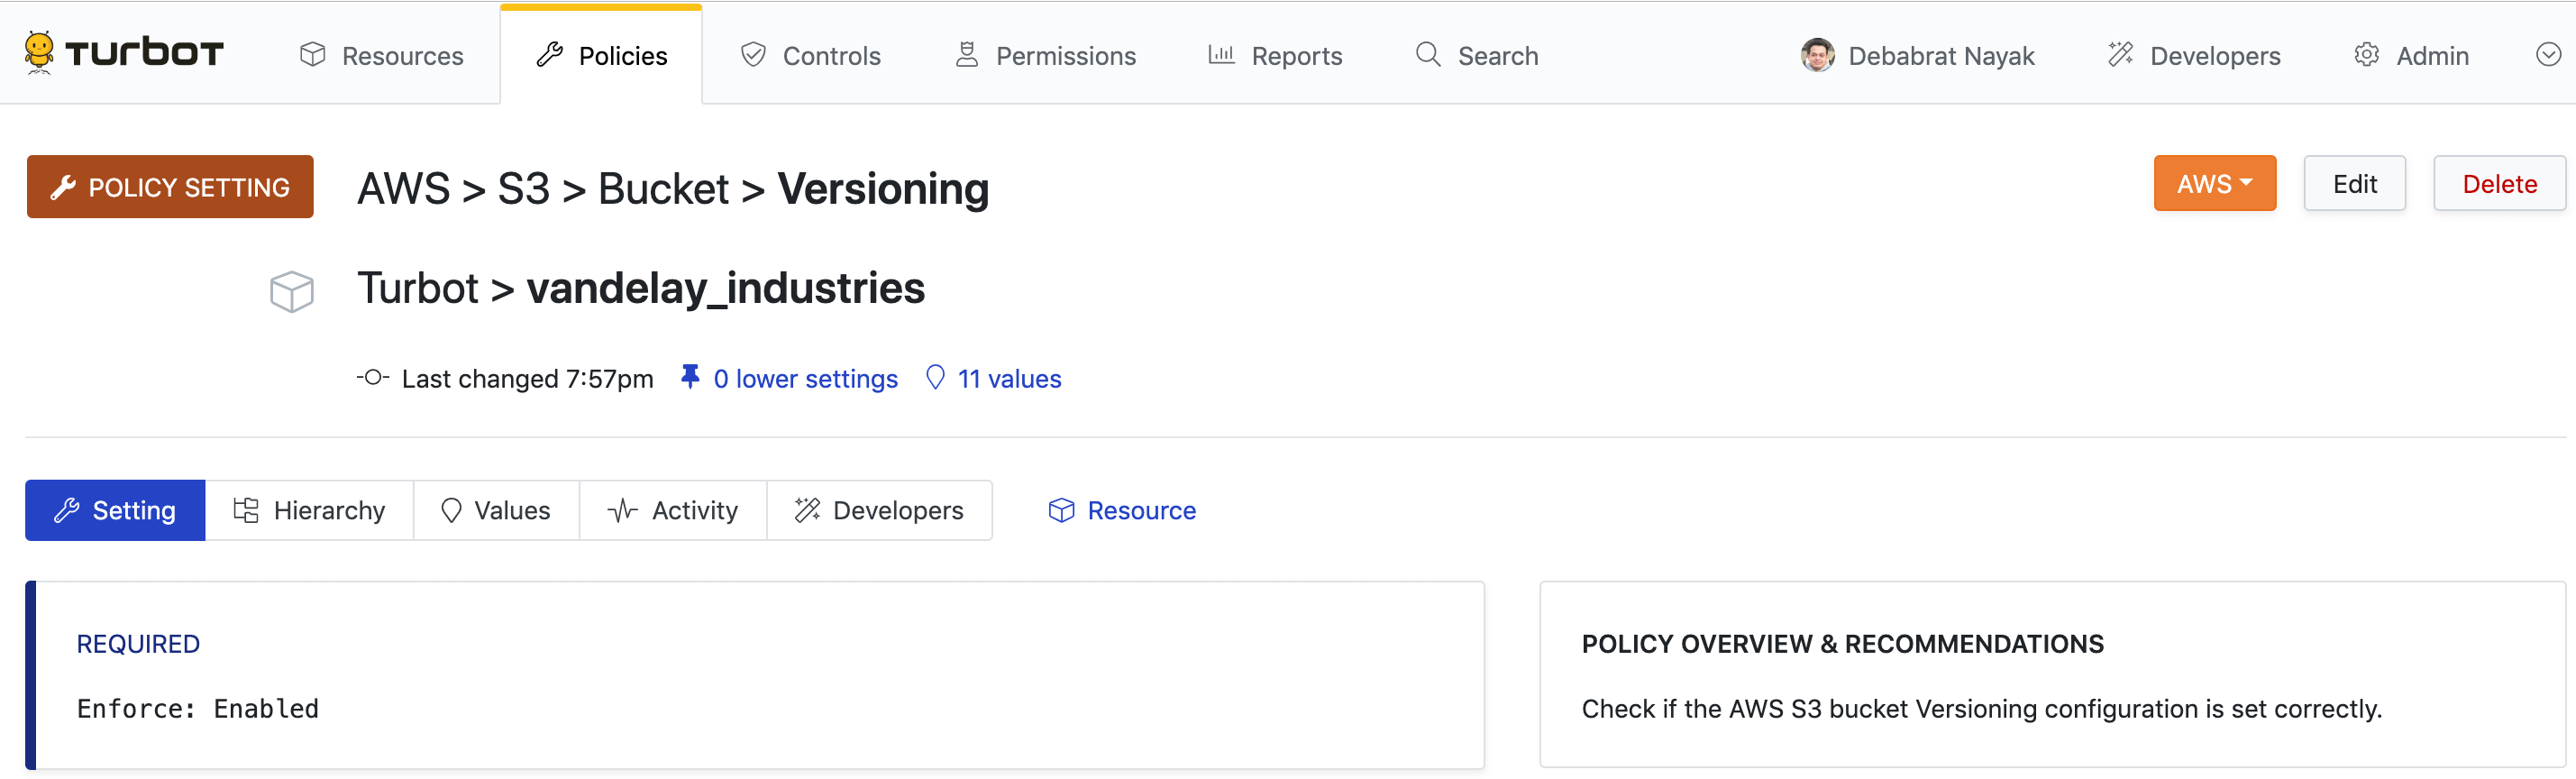
- To delete the setting, click Delete next to the policy setting that you wish to delete.
Creating an Exception
The Guardrails Resource Hierarchy allows you to define a policy setting in a single place and have it enforced on all descendant resources. However, there are occasions when the policy setting should not (or cannot) be enforced on specific resources. Exceptions allow you to override a required setting on a resource lower in the policy hierarchy.
Exceptions can be created in the Guardrails Console from the Policy Setting Hierarchy page:
From the home page, search the resource for which you wish to create an exception. Click on the Resource. Resource details page displayed.
Click Policies tab for the resource (under the resource name, not at the top of the window). Note that this page is filtered to show only the policies at the resource level.
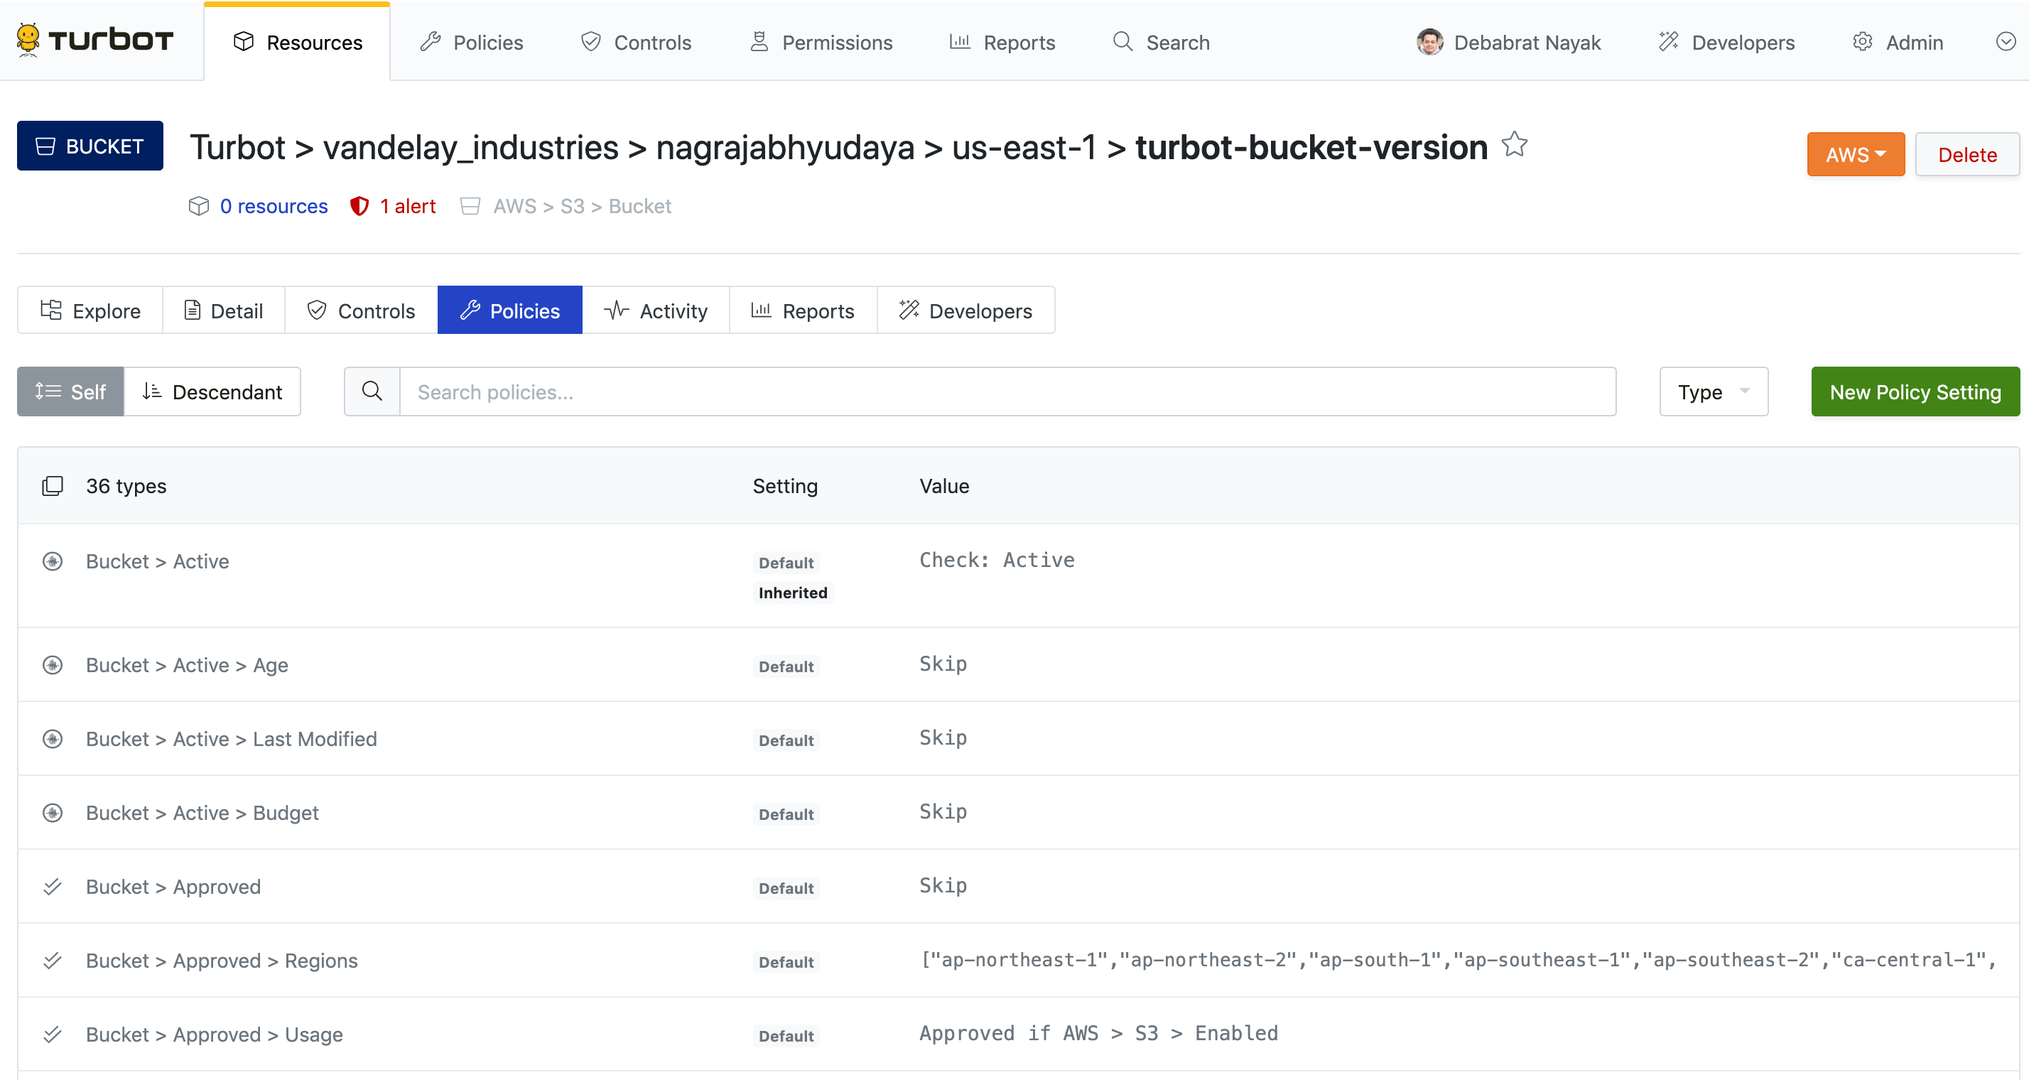
Search and click on the policy setting to open the Policy Value page.
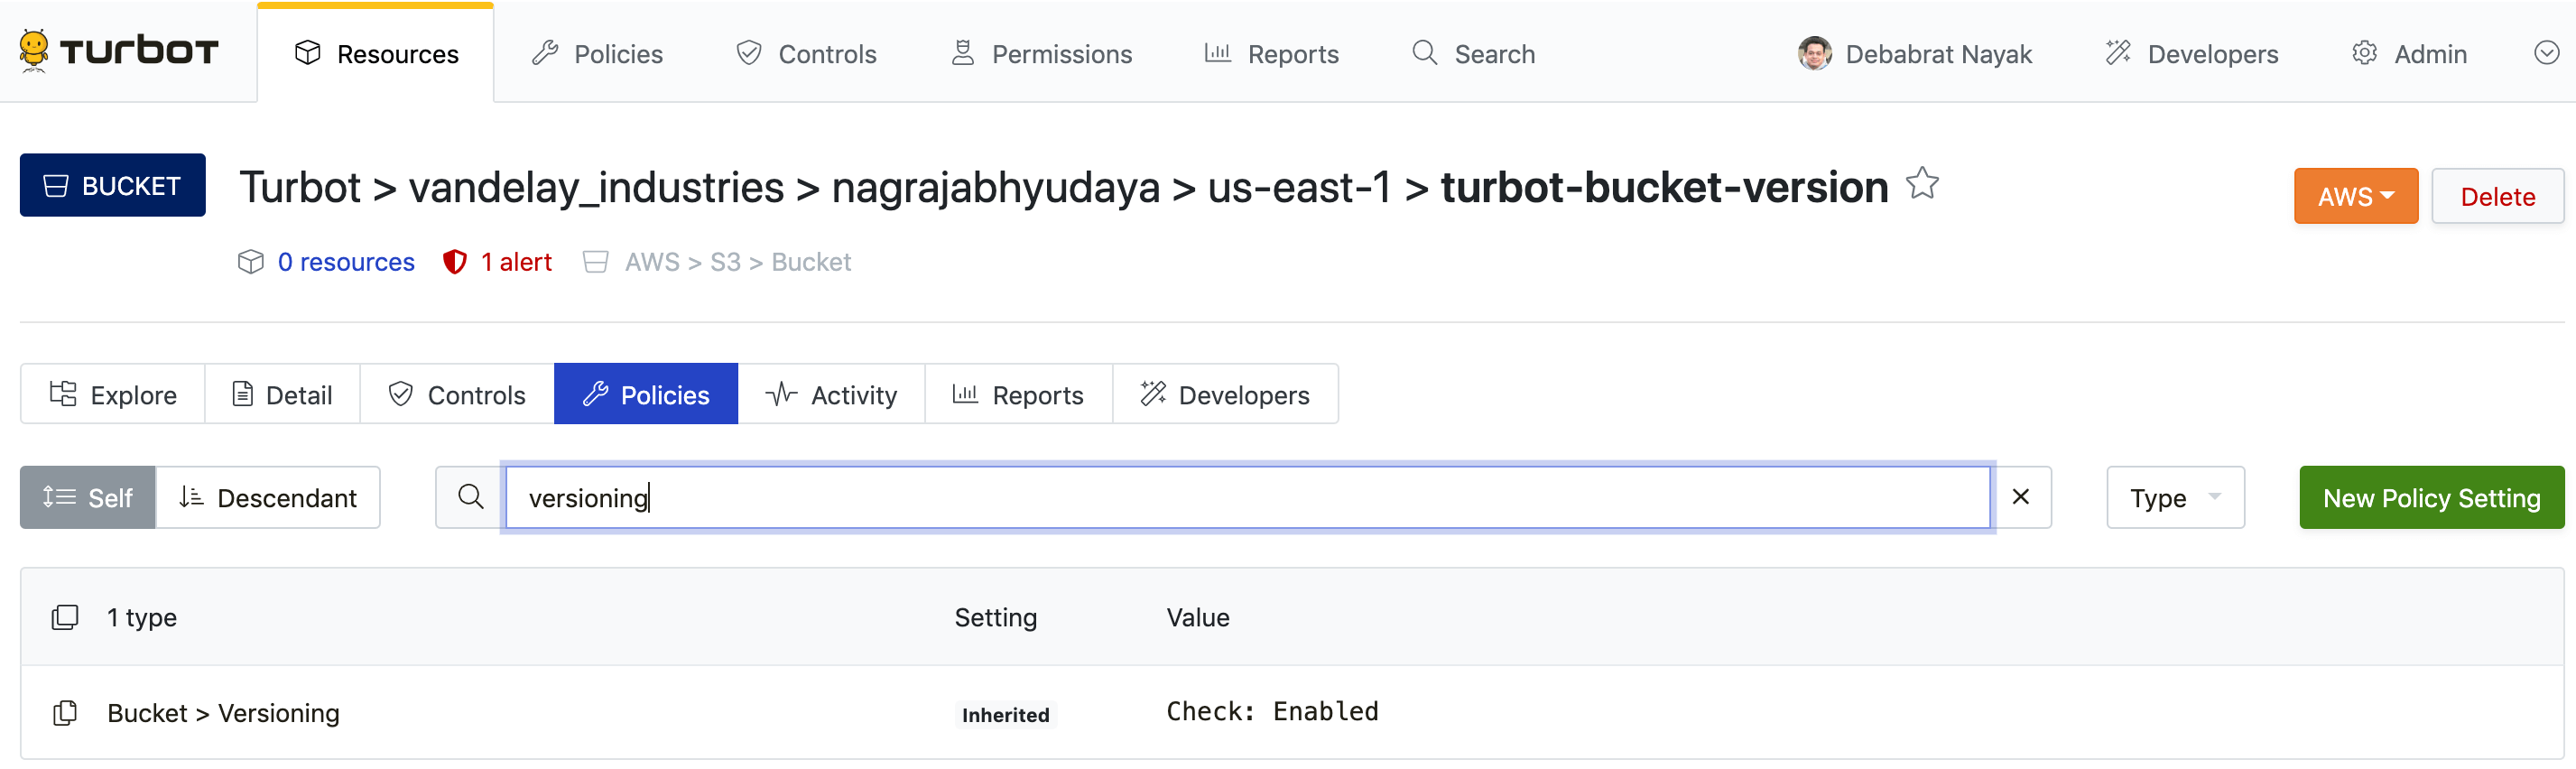
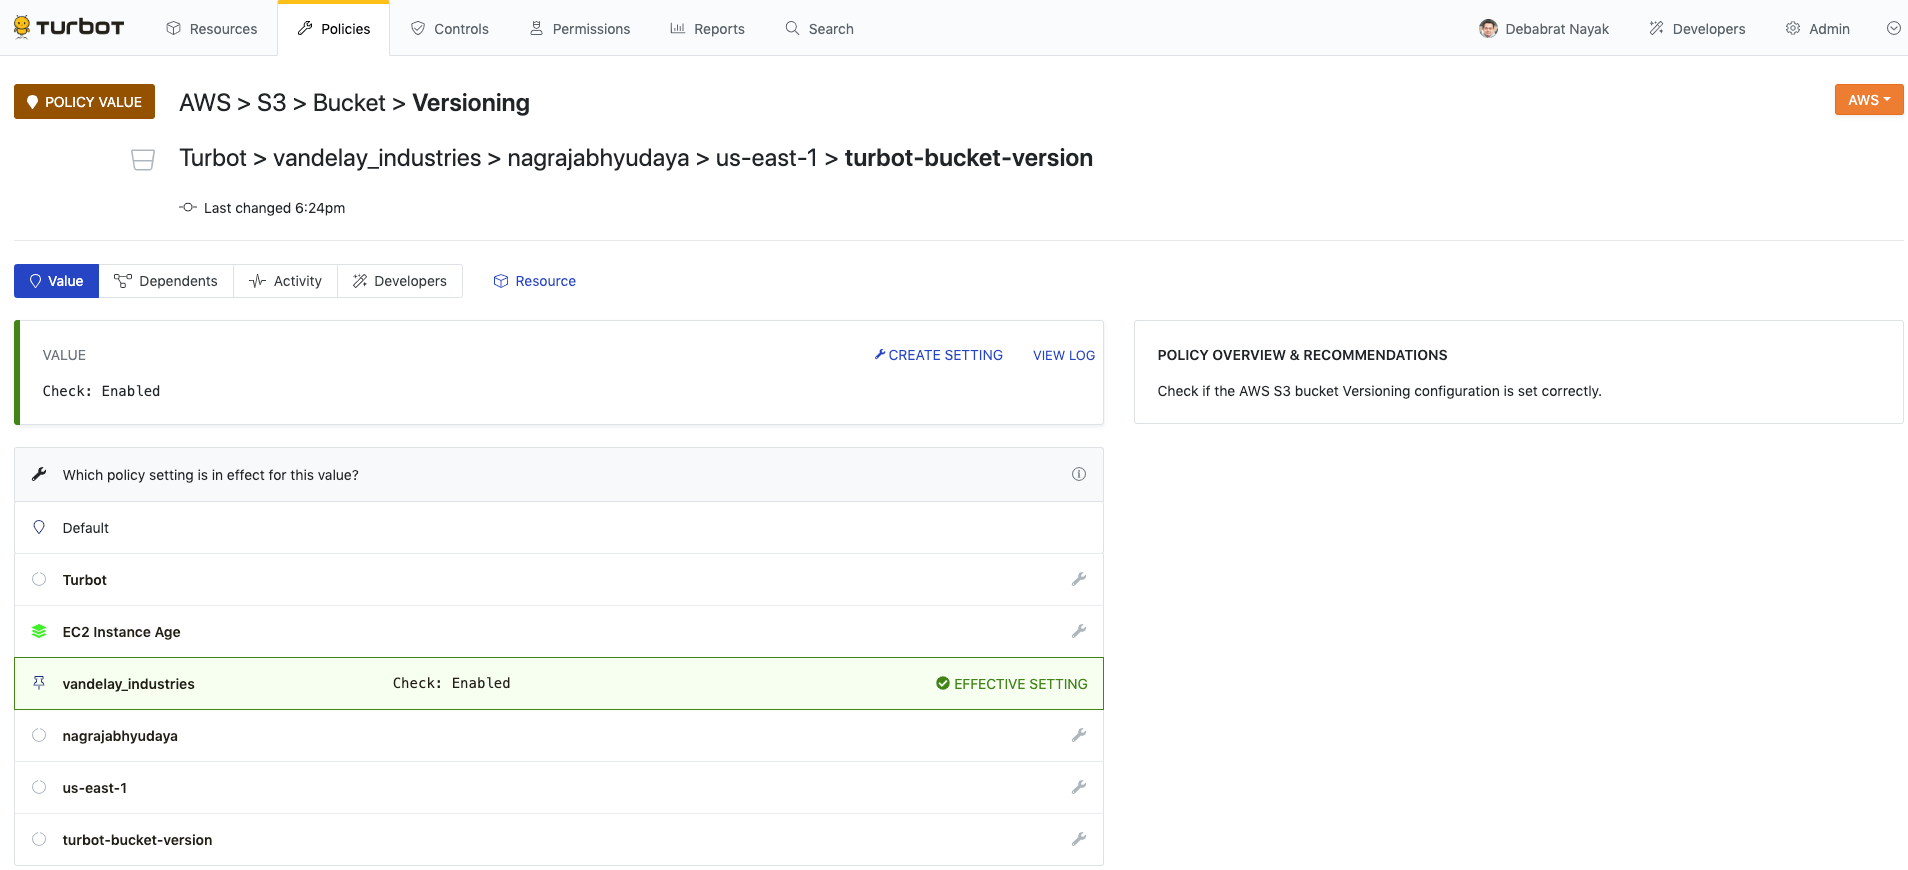 Notice that the detail page for a policy value shows the current value as well as where the value is inherited from (if it is inherited).
From the policy value page, click the Create Setting link.
Enter the information in the Create Policy Setting page, and click Create. This creates the policy setting on the resource.
The policy type will automatically fill, but be sure to verify that it is as expected and that the resource in the resource field is correct.
Once verified, select the correct setting (or input the value if required) and click Create! Once created, you will see a page showing both the
Requiredsetting as well as the newException.